Manage the sales figures for all of your contract jobs
You can record sales figures in Firefish when making a contract placement or even prior to the placement being made (in the case of retained or campaign-based project work).
This guide explains how to record these sales figures in Firefish. Click to jump to guidance on a specific section or scroll to view all options:
Add Pay & Additional Contract Rates
When you create a job, the Pay section in the job summary will display pay details for the job.
Firefish will automatically calculate the Pay Rate as the minimum rate value entered in the Potential Match section of the Job Details.
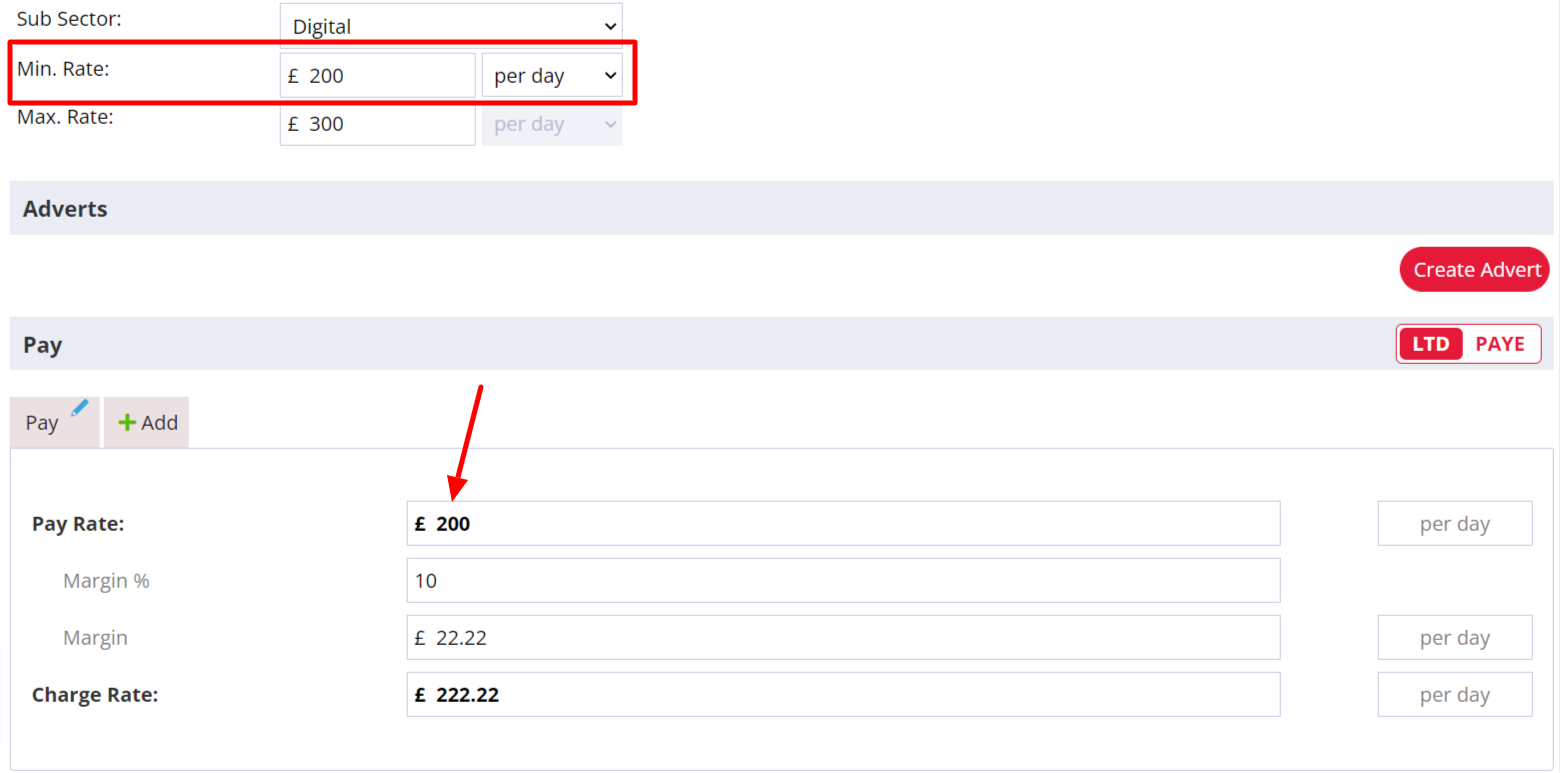
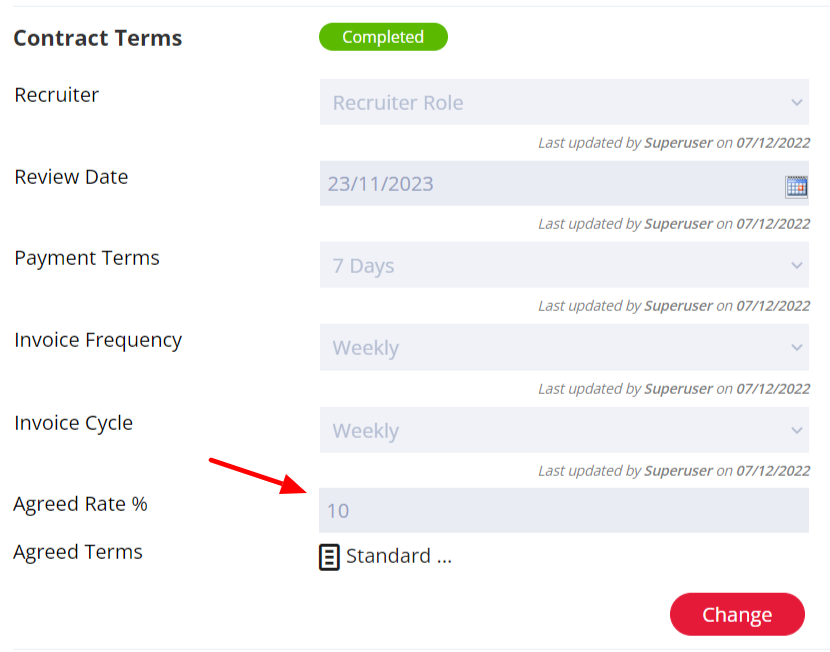
If an Agreed Rate % is populated on the Compliance tab of the company record, this will automatically pull through to the Markup % field on the job.

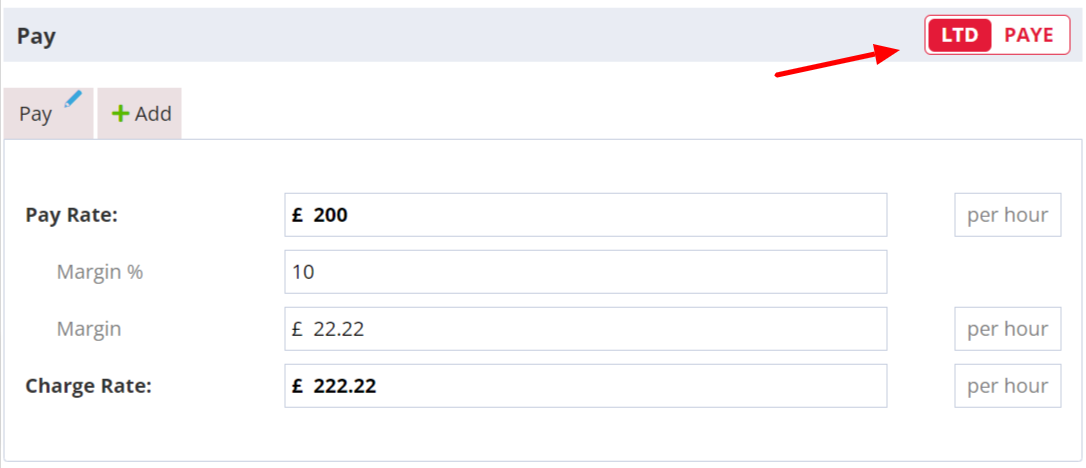
For contract jobs, pay details may vary depending on whether the contractor is registered as PAYE or as a LTD Company.
Select PAYE or LTD at the top right of the Pay section (the option you're currently working on will display as a red tab).
For LTD you can make changes to the Pay Rate and adjust your Markup % or Markup amount as required. Firefish then calculates the Charge Rate for you.
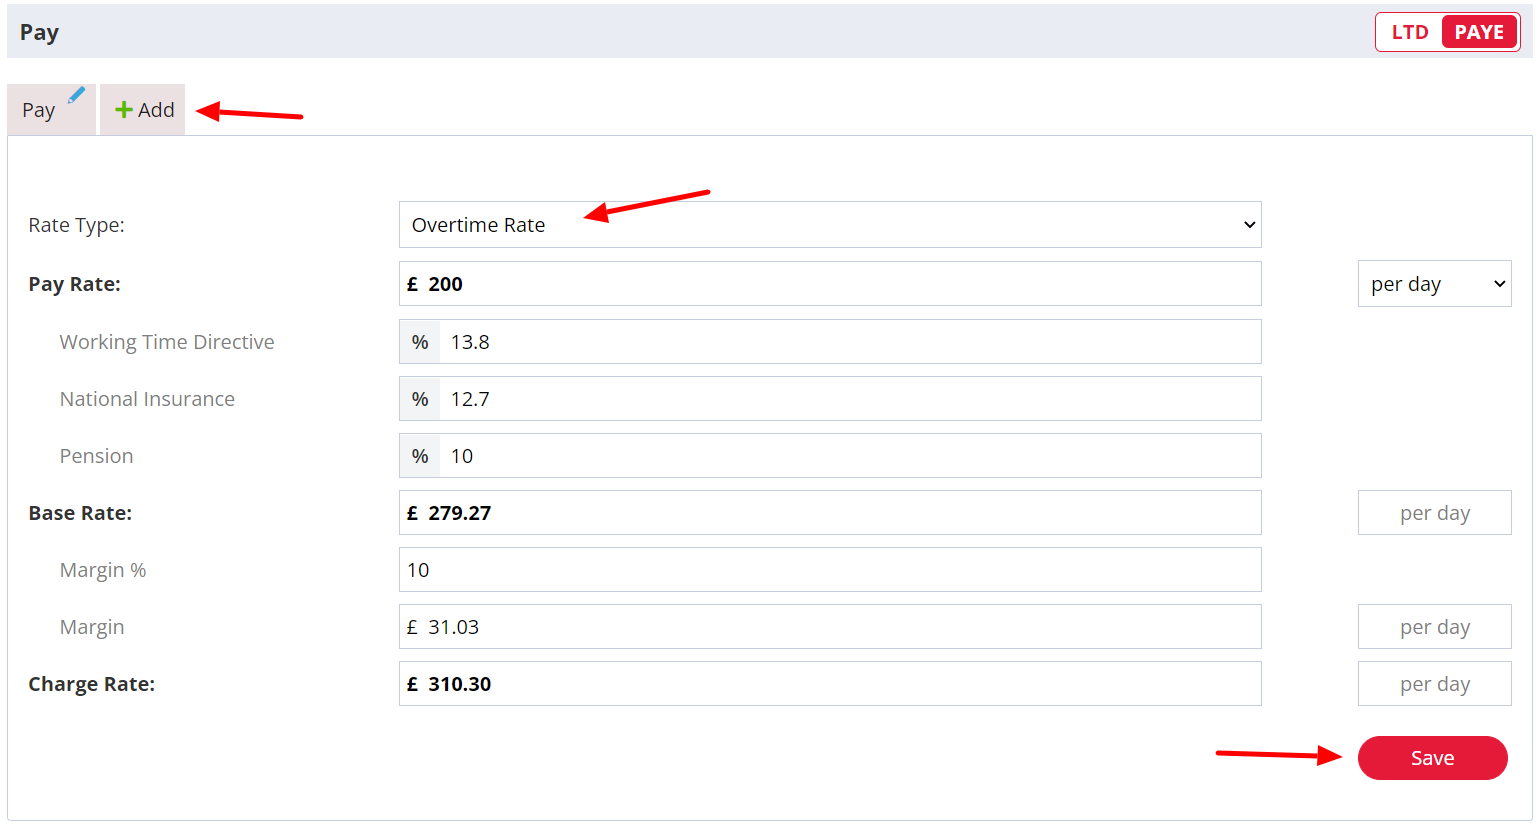
For PAYE, you can make changes to the Pay Rate, Working Time Directive (%), NI (%) and Pension (%) if required.
Note: Apprenticeship Levy and Payroll Cost fields are currently available as part of a Beta feature
Firefish will then calculate the Base Rate for you and once you add in either your Margin % or Markup amount, the Charge Rate will also be calculated for you.
These will be shown as 'per hour' or 'per day' depending on the Unit Type you have entered on the job.
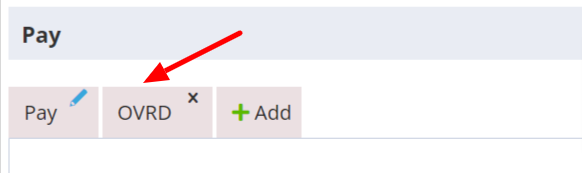
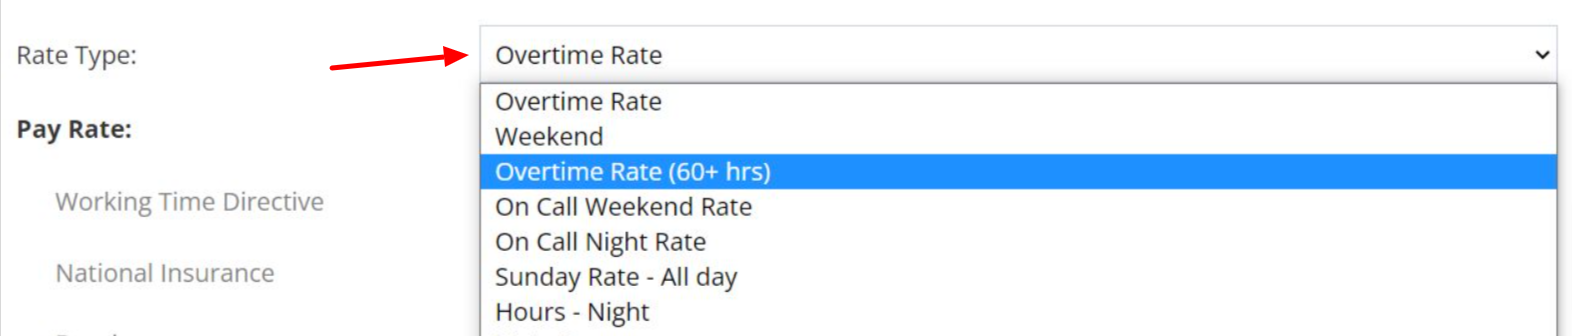
You can also add any Additional Rates and make changes to any of the values which may differ to the standard pay rates (e.g. overtime) by using the +Add tab.
Just select the Rate Type from the drop down and enter the values in the same way as the standard pay rates:
All of the settings controlling default % rates as well as configuring new additional rates can be managed by a super user on the contract workflow settings.
When you click Save, you'll see a new tab has been created for your additional rate:
You can add up to 15 different additional rates on any one job.
Data entered in the pay fields automatically pulls through when you make an offer on this job workflow.
Using the dropdown on the right-hand side, an additional rate can be toggled between 'Per Day' or 'Per Hour', regardless of what the standard pay rate of the Job has been set to. This is called changing the Unit Type.
This can be done at the Summary, Offer and Placement stages of the Contract Job workflow, independently of one another.

The Rate Type of an additional rate can be changed at any time, even after a placement has been made.
This can also be done at the Summary, Offer and Placement stages of the Contract Job workflow, independently of one another.
Add any additional sales
Additional sales are sales that you're expecting in addition to your placement fees (e.g. retainer fees and commencement fees).
These can vary depending on the type of clients you work with so you can customise them in Firefish to suit your business needs.
To add extra fees to your jobs, click the Additional Sales button via the Sales section in the Summary of a job:

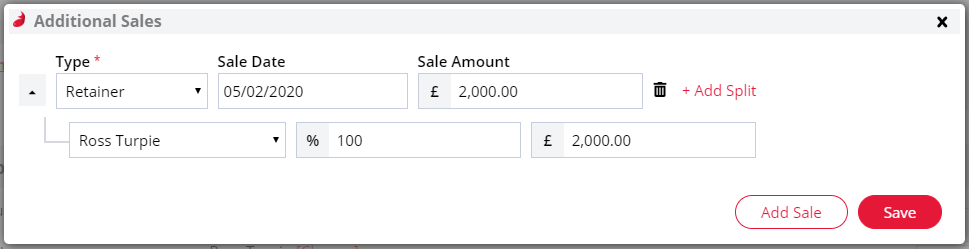
Click Add Sale and select the Type of sale you're adding from the drop down:
Sales Type values can be customised for contract jobs by a super user via the Dropdown Settings.
You can amend the Sales Date and enter the Sales Amount before selecting a user to assign the sales to. If there's only one user, enter 100% and Firefish will automatically calculate the sales amount.
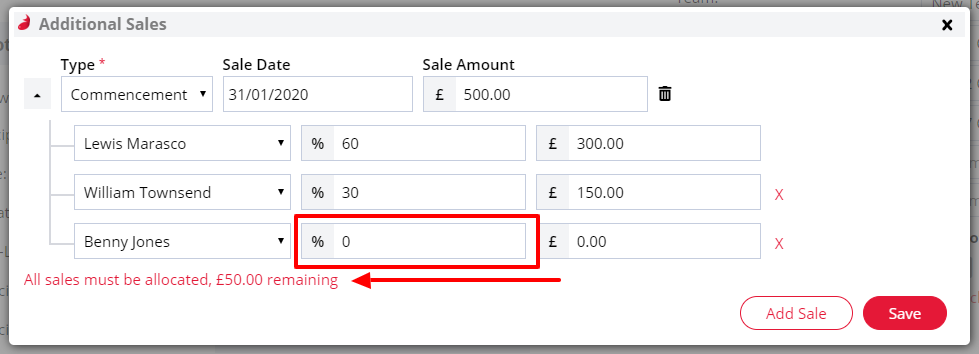
If there's more than one user splitting the additional sales item then you can click + Add Split.
You can add splits for up to 3 users for each sales entry. Remember all splits combined should total 100%. Firefish will remind you of any sales amounts yet to be allocated (if you find it easier you can add the sales values and Firefish will auto-calculate the % for you instead).
Remember to click Save to save your changes before closing the Additional Sales window.
Add placement/extension sales figures
When creating a placement, rolling on a contract or creating an extension, the Pay details will automatically be populated with the rates you've entered on the Summary of the job.
During the process of making or editing a placement, you'll see the placement will appear in orange when in edit mode:
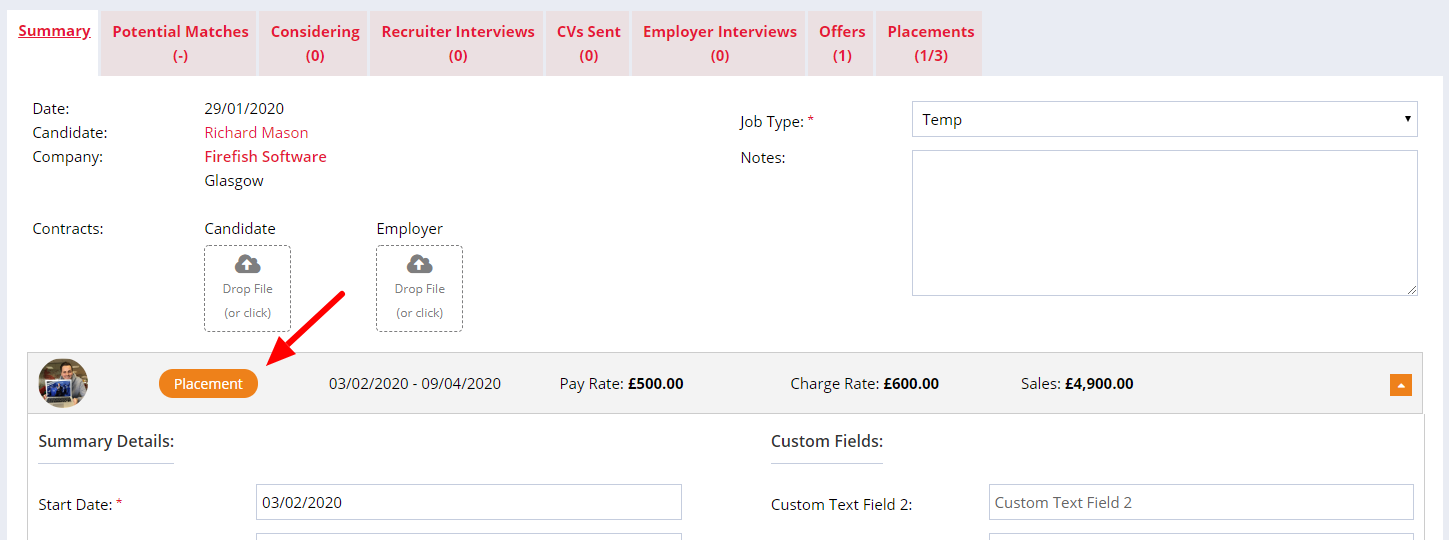
You can make changes to pay details on any individual placement or extension - even when it's for the same job.
Under the Pay Details section, all fields will be auto-populated with figures you've added to the job summary at offer stage. You can make changes to these if they're specific to the individual placement you're making and you need candidates to have different pay values, placed in the same job.
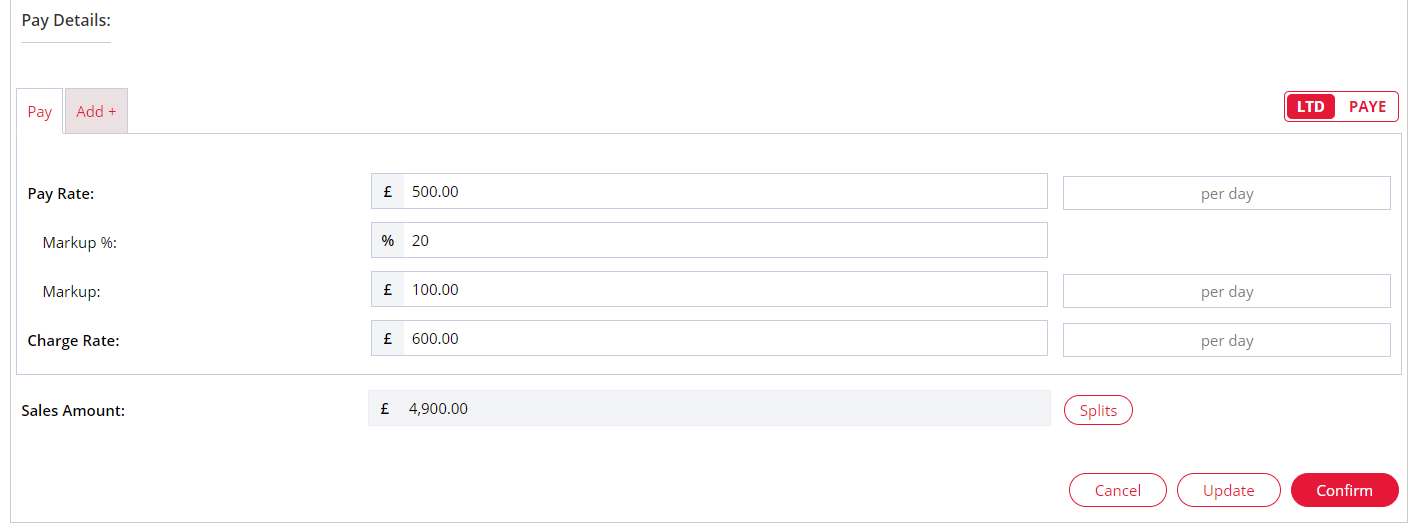
From this page you can add/edit any splits on the placement fee by clicking on the Splits Button:
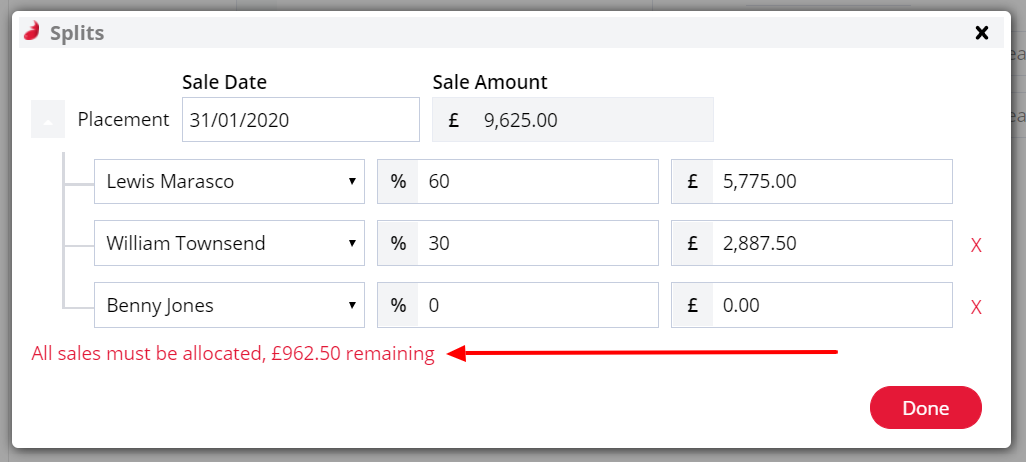
You can add splits for up to 3 Users by clicking + Add Split and selecting the user from the dropdown.
You can then add in either the split %, or the split £ amount and the remaining field will auto-calculate. Firefish will also remind of any sales that have not been allocated, then once you are satisfied click Done to save and close the pop-out.
Once all of your changes have been made, click Confirm and your placement emails will be generated. You'll notice that the Placement is now in read-only mode and the Placement label has changed to green:

For contract sales, your Sales Plan will be updated on the contract placement start date.
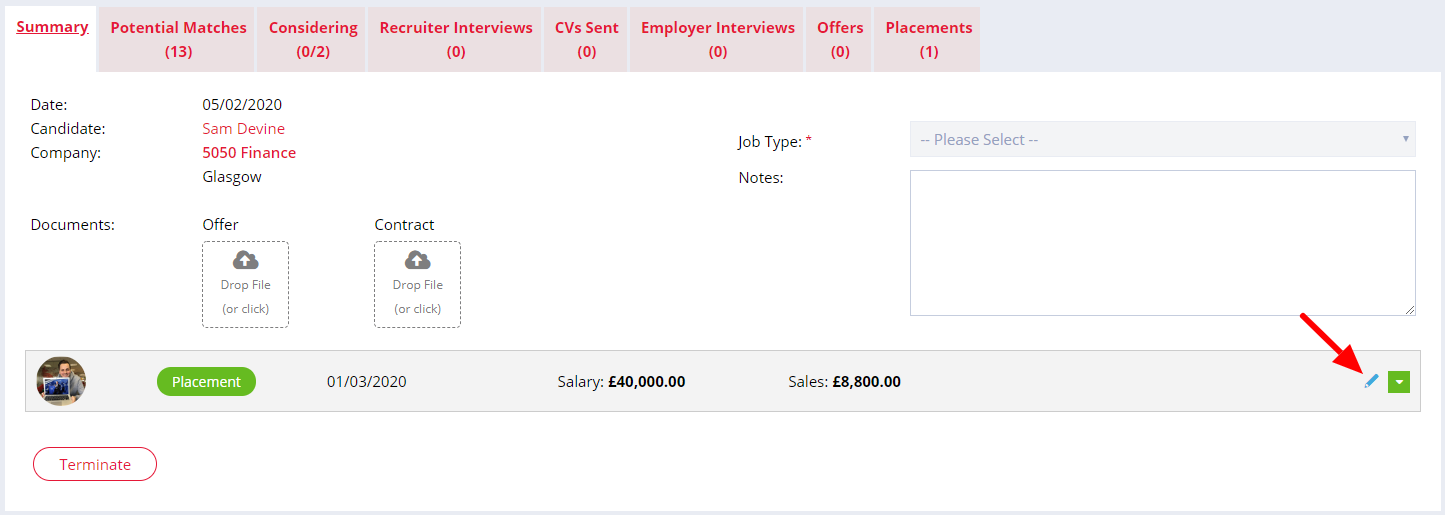
After making a placement or extension, you can edit the sales figures at any time by clicking the blue pencil icon on the placement/extension:
Managing sales figures for terminations
When terminating a contract placement, Firefish will make a deduction to your figures based on the difference between the original End Date and the new End Date (when the contract will be terminated). Changes will be automatically applied to your week, month and year-to-date sales plan.
Clicking the Terminate button will open the Termination Summary screen for editing. The Termination label will display in orange.
Here you can make the relevant changes to the Rebate amount or Rebate % based on the Pay Rate value. You can also click the Splits button to make any required changes to User splits.
Once your changes have been made, you can click Confirm to generate your Termination Emails. Select Update if you would like to save without generating the emails or Cancel to cancel any of the changes you have made in the Termination Summary.
You will now see the Termination label change to red indicating read-only mode:
