How to access and implement featured content for web templates.
Firefish allows you to manage your website and content through different plugins. You can also utilize featured content throughout your website.
What is featured content?
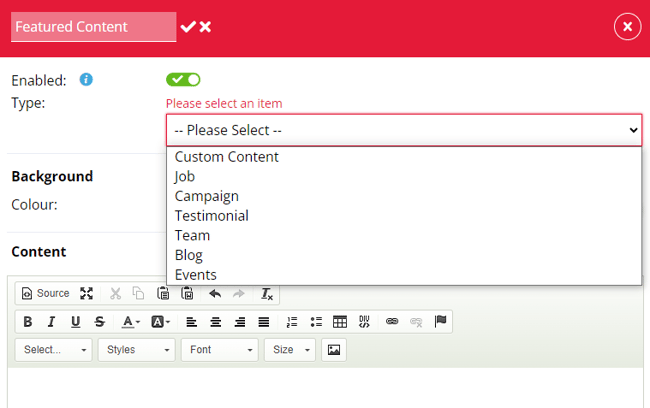
Featured Content is a plugin feature that can be added to any page within your website. This will allow you to layer your content and pull in featured elements from areas of the system.
Here is a list of featured content that is available:
-
Custom Content - This allows you to add a content area to your website page. This can include text, images, videos, links and custom HTML.
-
Jobs - This allows you to add a section to display featured jobs on your website page.
-
Campaign - This allows you to add a section to display featured campaigns on your website page.
-
Testimonial - This allows you to add a section to display featured testimonials on your website page.
-
Team - This allows you to add a section to display featured teams members on your website page.
-
Blog - This allows you to add a section to display featured blogs on your website page.
How to add featured content?
The below will detail how to add featured content to your website pages.
-
Login to your CMS and then navigate to Website > Web Content and view the featured content tab on your desired page.
-
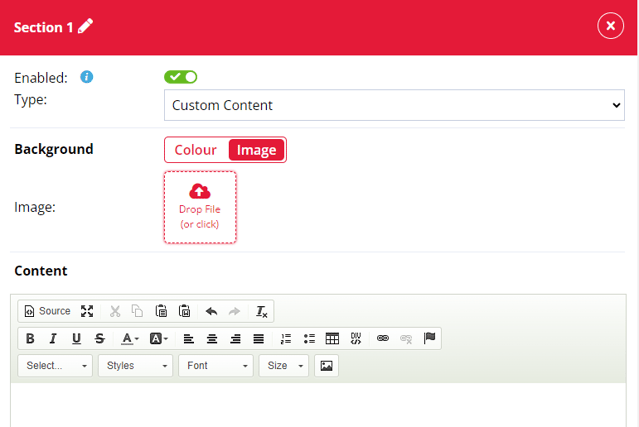
From here you can click Add button on the right-hand side. This will display a pop-up side panel called Section X ( The X will be a number depending on how many records you already have e.g. Section 1).
-
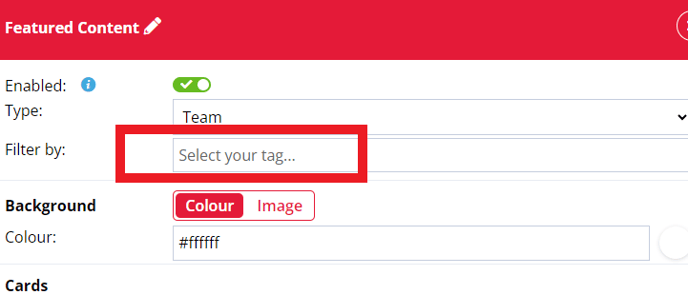
Select the Type of featured content you wish to add to this page.
-
If you select one of the following plugin options, you will be presented with a further field called Filter By.
-
Campaign
-
Testimonial
-
Team
-
Blog
-
-
From here you can also select to brand your featured content by populating the following fields:
-
Background Image
-
Background (Colour)
-
Card Background
-
Title
-
Text
-
Hyperlink
-
-
You can also choose to add a content area for this featured content by populating the Content area.
How to Update a Section Name?
You can edit the name of each plugin section by opening up your record and clicking the pencil icon next to the title at the top.

This will then appear in your featured content list view.
You will also find details of your plugin type and any filters that have been applied to this record.
Enable and disable toggle
There is an enable and disable toggle that can be used to hide featured content within a content area; you'll see an info bubble explaining this feature:
What is the Filter By field?
The filter by fields allows you to apply a specific filter to your featured content. This will enable you to display specific records that are assigned to specific records on pages throughout your website. This is driven by the tags that applied to your records for the following plugin types:
-
Campaign
-
Testimonial
-
Team
-
Blog
-
Jobs - For your Jobs featured content, you can choose filters relating to the workflows (Permanent and Contract), Disciplines, Roles, Locations and Sub-Locations.
The filter by field will not appear and can not be used for the following plugin types:
-
Custom Content
How to apply a filter to your featured content?
After creating your featured content section from your selected page and selecting the Filter By field. You can start to type text and this will refine your available tags that are currently assigned to a record.
Note - In order to add a tag to an featured content, it must first be assigned to a record in your relevant Plugin within the Web Settings tab.