Email Settings Troubleshooting & FAQs
Whether you're having trouble logging into the right account or missing content in an email, this guide will help you to find the resolution.
- My Personal/System Emails Are Sending From the Wrong Email Address
- The Images in My Email Signature Aren't Showing Once Sent
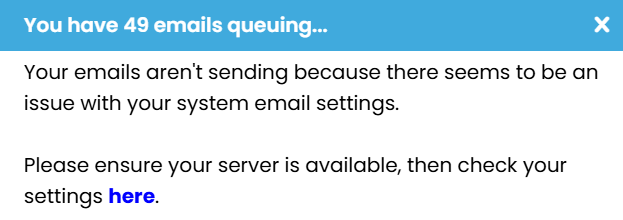
If you login and see a notification about your personal emails aren't set up, it means that emails you have attempted to send from the system are stuck in the email queue.

This usually happens when you have changed your email password on Outlook but haven't updated it on the settings pages of Firefish, although there can be a variety of other reasons too.
Firefish needs to have your current email login details so that it can send emails on your behalf and log them on Firefish records as actions. However, Firefish does not have permission to change your email password for you and will not be able to detect when it has been changed - just when it's wrong!
Here's how to check your email settings for Microsoft Office 365:
- Go to your name at the top right of the screen and select My Integrations.
- Select Logout on the right hand side of the Email Settings page (if it already says Login, skip to the next step).
- Press the three dots in the top right hand corner of your browser and choose New Incognito Window/New InPrivate Window.
- Navigate back to Firefish and repeat step one.
- You can now select Login on the right hand side.
- You will now be redirected to Microsoft's email login page. When prompted, you should enter the email address you would like to connect and the password associated with that email address.
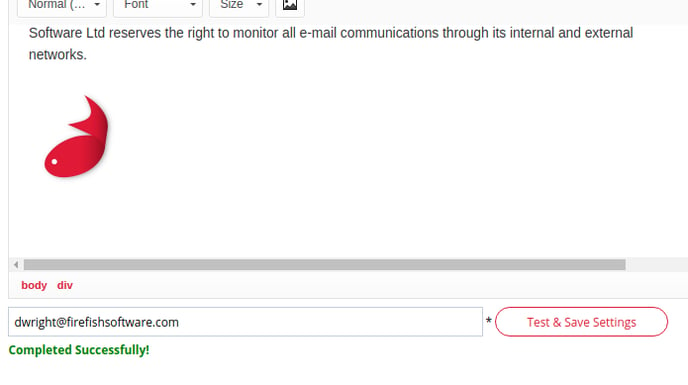
- Once complete you will be redirected back to Firefish. You can scroll to the bottom of the page and enter your email address in the highlighted box then select Test & Save.
- You should then get a Completed Successfully message. If you do not, please reach out to support@firefishsoftware.com for further assistance.
![]()
Here's how to check your email settings for Gmail:
-
Go to your name at the top right of the screen and select My Integrations .
- Select Logout on the right hand side of the Email Settings page (if it already says Login, skip to the next step).
-
Select Sign in With Google.
-
Select the email address you would like to connect and enter the corresponding password.
-
Once complete you will be redirected back to Firefish. You can scroll to the bottom of the page and enter your email address in the highlighted box then select Test & Save.
-
You should then get a Completed Successfully message. If you do not, please reach out to support@firefishsoftware.com for further assistance.
![]()
Once you have updated your password on Firefish, the queued emails will be sent. Please note, the queue doesn't always clear immediately.
If you log into Firefish and are greeted with a notification letting you know that your system emails aren't sending, then a Super User will need to connect an email address to Firefish on behalf of the whole company.

System emails are automatically generated emails which send from the system such as job alerts, password resets and application acknowledgements. Most sites choose to connect a general email address such as hello@ or info@ rather than one connected to a specific person - although you're welcome to if that is your preference.
To update the email address linked to your system email account, follow the below steps:
- Go to Settings > Integrations > System Email.
- Select Logout on the right hand side of the Email Settings page (if it already says Login, skip to the next step).
- Press the three dots in the top right hand corner of your browser and choose New Incognito Window/New InPrivate Window.
- Navigate back to Firefish and repeat step one.
- You can now select Login on the right hand side.
- You will now be redirected to Microsoft's email login page. When prompted, you should enter the email address you would like to connect and the password associated with that email address.
- Once complete you will be redirected back to Firefish. You can scroll to the bottom of the page and enter your email address in the highlighted box then select Test & Save.
- You should then get a Completed Successfully message. If you do not, please reach out to support@firefishsoftware.com for further assistance.
![]()
If you have emails in your queue that have been sent from a now deactivated user, the emails sitting in the queue will automatically be deleted 14 days after your user has been deactivated.
My Personal/System Emails Are Sending From the Wrong Email Address
If your personal emails are going from the wrong email address, it means you have logged into the wrong account. The is most common in Microsoft users as they can be automatically logged into another email account in use on their device.
- To to Settings then Integrations
- Press Logout on the right
- The button will have updated to Login - press this now
- You will now be redirected to your email host to login with the credentials for the email account you would like to connect. You may be automatically logged in.
- When you are routed back to Firefish, scroll to the bottom and Test & Save.
- If the test email comes from the correct email address, you are done.
- If you were automatically logged in, and the incorrect email address was added, follow this guidance.
Test & Save Failed
There are a few reason that your Test & Save might fail once you've updated your email address and password.
- Username or Password is Invalid - The most common reason is that you've been automatically logged into your email account when logging in, but the login details last used on your device are now outdated. This can happen if you update your password on Outlook but don't log out of Outlook and back in after. When you're automatically logged in, it appears successful at first, the system still can't log in to your email account. The solution to this can be found here.
- Invalid OAuth Credentials - This is similar to the above, but it occurs when your email address and password is out of date and not having been updated on Firefish. To resolve this, select Logout above the email signature box. The button will then update to Login, and you should select this. You'll then be prompted to login with your new details. If you are automatically logged in, you might face the invalid password error detailed above, in which case you should refer to this article.
- Server Issues - If you get an error message referencing your server, you should reach out to your IT team and let them know. This typically indicates an issue with your email host (Outlook, Gmail, etc).
Calendar or Task List Sync Isn't Working
It is important to note that Calendar Sync only functions for meetings, interviews and CV deadlines. It is also only available to Outlook users.
Task List Sync only functions with call notes left on candidate or contact records with a follow-up date. It does not include email follow-ups, note follow-ups, or any other action - these would only show on your To Do list under the relevant category. This feature is also only available to Outlook users.
First of all you should ensure that the it is showing a Good connection.
- Go to Hello, [name]
- Select My Integrations
- Sync Diary Events with Calendar or Sync Calls with Task List. Ensure that the Service Status shows 'Good' in green. If it does not, you will have a circular arrow symbol available which will refresh the service once clicked.

Typically this will resolve any issues with the integration, but if you experience any further problems, you should reach out on the live chat so that we can investigate.
Both sync options can take up to an hour to update on Outlook, although generally it is much faster than this.
My Emails Are Logged But Aren't In My Sent Folder
If you have sent an email to a candidate or contact, and you can see that it is logged on their record, but you can't see it in your sent folder yet, it is likely that the email is queued to send and will go out shortly.
Firefish doesn't actually send the emails, we simply pass them to your email host to send. We don't do this all in one go, but rather we send them in small batches, as part of our work to help your email address not get marked as spam.
Typically this is at a rate of 60 emails per 2 minutes, but we can adjust this at your request (we'd recommend running this past your IT team in the first instance so they can advise on a more suitable rate).
This rate is applied per site, not per user. So, if your colleague has just sent 2,000 emails, you might find that your email doesn't send right away as the queue is working through all theirs first. The queue is based off who hit send first, so even if your colleague hit send just a minute before you, you'd still need to wait for their emails to send first.
An email host server name is the specific address (like mail.yourdomain.com or smtp.gmail.com) that identifies the server handling your emails, acting as a digital post office for sending (SMTP) and receiving (IMAP/POP3) messages, crucial for setting up email clients like Outlook or Gmail to connect and function correctly.
Email Host Name
To find your Email Host name:
- Open your email provider app (Outlook/Gmail/etc)
- Locate your Account Settings
- Double click into the mailbox
- Copy the Server Name which shows here
- For SMTP (IMAP or POP) addresses, use the Outgoing Server address.
Note you won't be able to right click to copy and paste, so make sure you use the keyboard shortcuts (ctrl+C & crtl+V)
If you're struggling to find these details, or you're using a different email account contact your IT provider or mail provider who'll be able to supply these details.
If you send a email from Firefish and notice that the images in your email signature are the wrong size (either too large or too small), it is likely that you copied your signature onto Firefish from your main email host. When you do this, the formatting is lost and the pictures revert to their original size.
To correct this, you should save the images from your Outlook/Gmail/etc email signature and adjust the size before uploading it to Firefish.
There are a host of different tools available online which you can use for this, or you can use something like Paint to adjust the size. Once you've decided which tool you would like to use, resize the image to the correct visual size. You will first of all need to save the image to your device by right clicking and choosing to save from your email signature. From there you can use whichever image resize software you wish to adjust the size of the image.
For example:
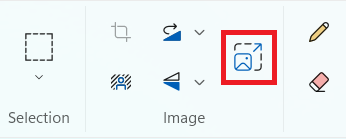
- On Paint, you can click the hill in the box icon:

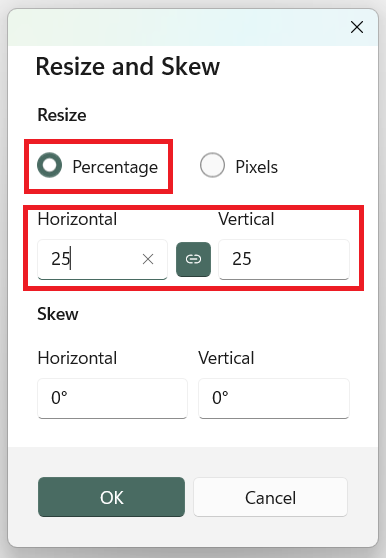
- Then you can adjust by percentage:

- Once the image is the correct size, you can go to settings > Integrations (for system email signatures) or Hello, [name] > My Integrations (for personal email signatures), and select the hill in the box icon:

- You can then choose Browse Server > Choose File > locate and select the image > Upload > OK to upload the image into your email signature.
- Once you're done, make sure to Test & Save down at the bottom!
The Images in My Email Signature Aren't Showing Once Sent
A common reason for this is that when you put your signature on Firefish, you copied and pasted your signature directly onto the signature form.
The way to avoid this is to ensure you upload your logo on Firefish, instead of copying and pasting. When you're pasting the text or body of your signature over, remember to use the Paste From Word tool:
-2.png?width=419&height=186&name=Untitled%20design%20(14)-2.png)
This will remove any formatting that may have been carried over from your signature.
-2.png?width=375&height=334&name=Untitled%20design%20(15)-2.png)
Once you've got your signature text in place, you'll be ready to upload your images! You can do this by clicking the Image icon on the toolbar:
-1.png?width=542&height=147&name=Untitled%20design%20(16)-1.png)
Then click Browse Server and upload your images from your PC.
.png?width=437&height=539&name=Untitled%20design%20(17).png)
Don't forget to click on “Test & Save Settings” when you're done! Once you've completed this action your signature will be ready for use.

Outlook sometimes changes the formatting of HTML emails because all versions released since Outlook 2007 use Microsoft Word to render HTML/CSS. As a result your email may look slightly different on a newer version of Outlook than your initial design and formatting preview within Firefish.
Below you will see how the same email could look on 3 of the most common email providers:
Gmail
.png?width=688&height=356&name=Untitled%20design%20(18).png)
Outlook Desktop
.png?width=688&height=366&name=Untitled%20design%20(19).png)
Outlook on the Web
.png?width=688&height=334&name=Untitled%20design%20(20).png)
-
No support for background images in divs and table cells
-
No support for CSS float or position
-
No support for text shadow
-
Poor support for padding and margin
-
Poor support for CSS width and height
-
Problems with nested elements background colours
Whilst we will always make every effort to ensure our email templates display consistently across providers it should be noted that customisation or changes made to templates/emails may result in some of the listed inconsistencies.