Using Firefish Testimonials, you’ll have the ability to build both hiring managers and candidate testimonials.
Using Firefish Testimonials, you’ll have the ability to build both hiring managers and candidate testimonials.
Perfect for showcasing your company's candidate and hiring managers' experience.
Testimonials include quotes, images, and video links.
Testimonial Plugin - Create & Edit
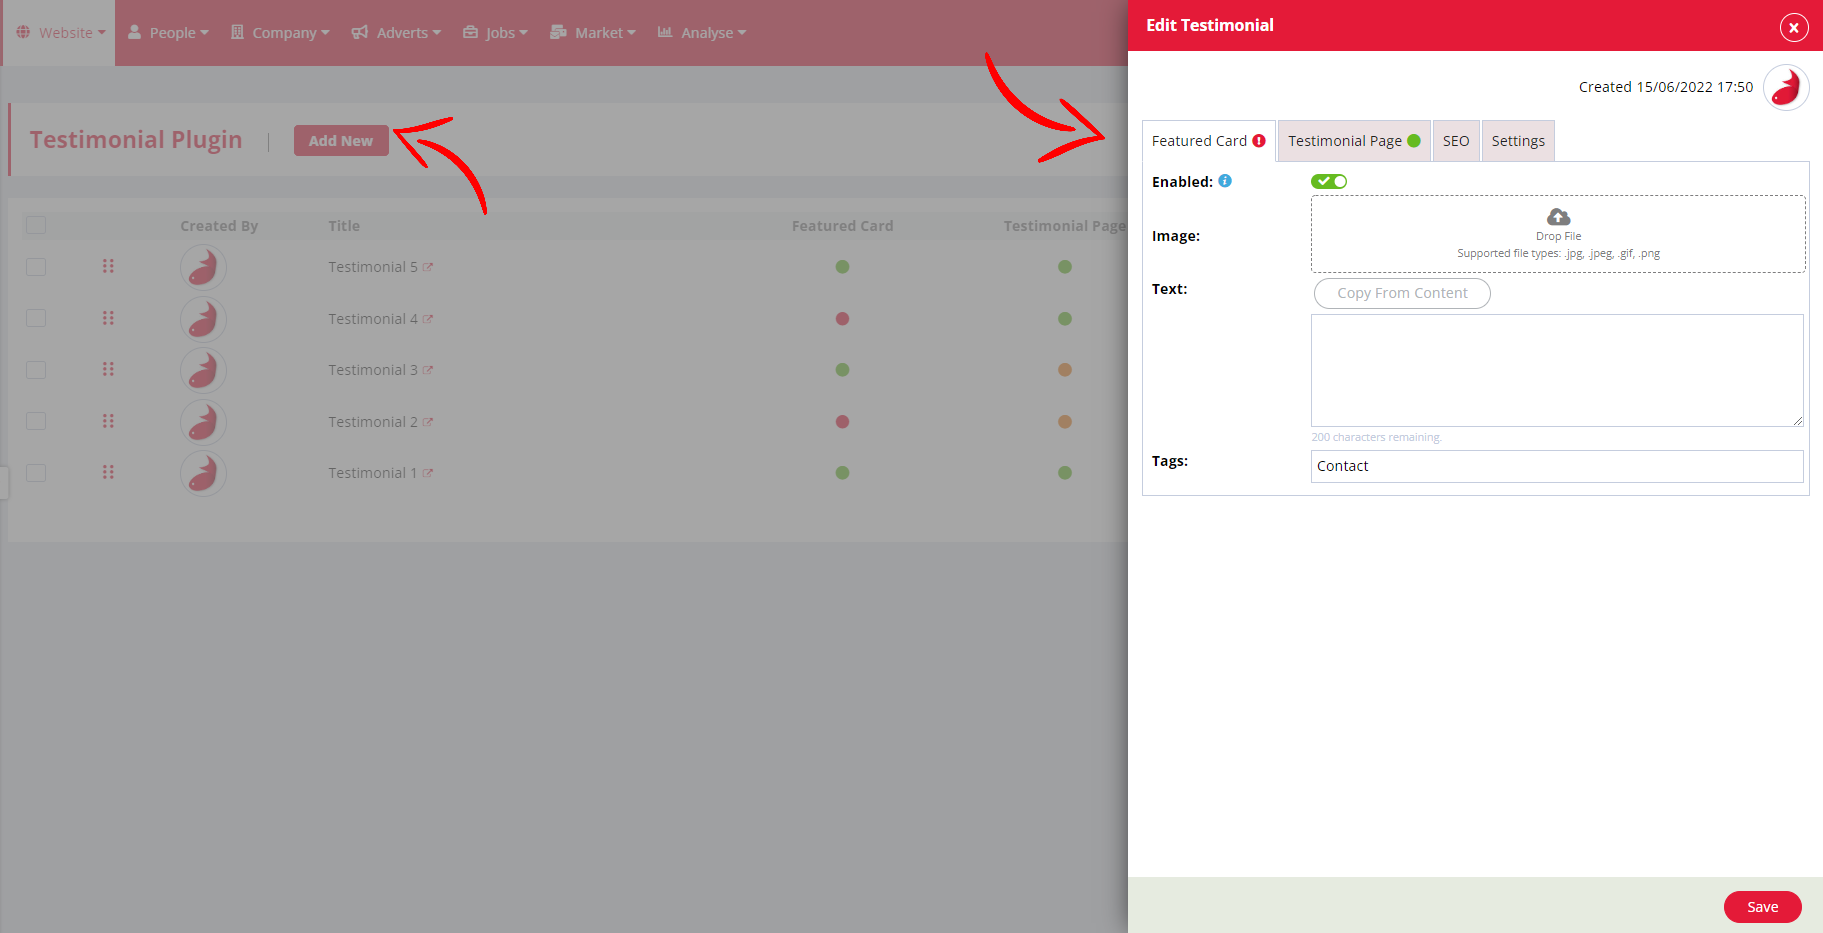
Add a New Record
There will be a button called New at the top of the page. Clicking this button will display the edit Testimonial side panel.
Note - In order to see your Testimonial members on your website, you must also create a content page with the page type - Testimonial Plugin.
Tab Structure
The edit side panel will consist of four different tabs, these are detailed below.
Featured Card
The featured card tab controls the content that is visible for additional plugin records.

Enabled Toggle - This controls the visibility of the featured card. If enabled, this record will be considered to appear within your additional plugin area.
Image - This image slot allows you to upload a separate image for your featured record. You can do this by dragging and dropping or by clicking to browser your device files. The supported file types are ‘.jpg, .jpeg, .gif, .png’.
Text - The featured text field allows you to add a shorter introduction to your Testimonial record that will be visible on your website.
This includes a 'Copy from Content' button that will automatically copy the maximum number of characters from your main Testimonial content.
Tags - Adding tags to your Testimonial post will allow you to refine via the additional plugin filtering options.
Testimonial Page
The Testimonial page tab drives the main content for your Testimonial record. This is also where you set your publish date and time.
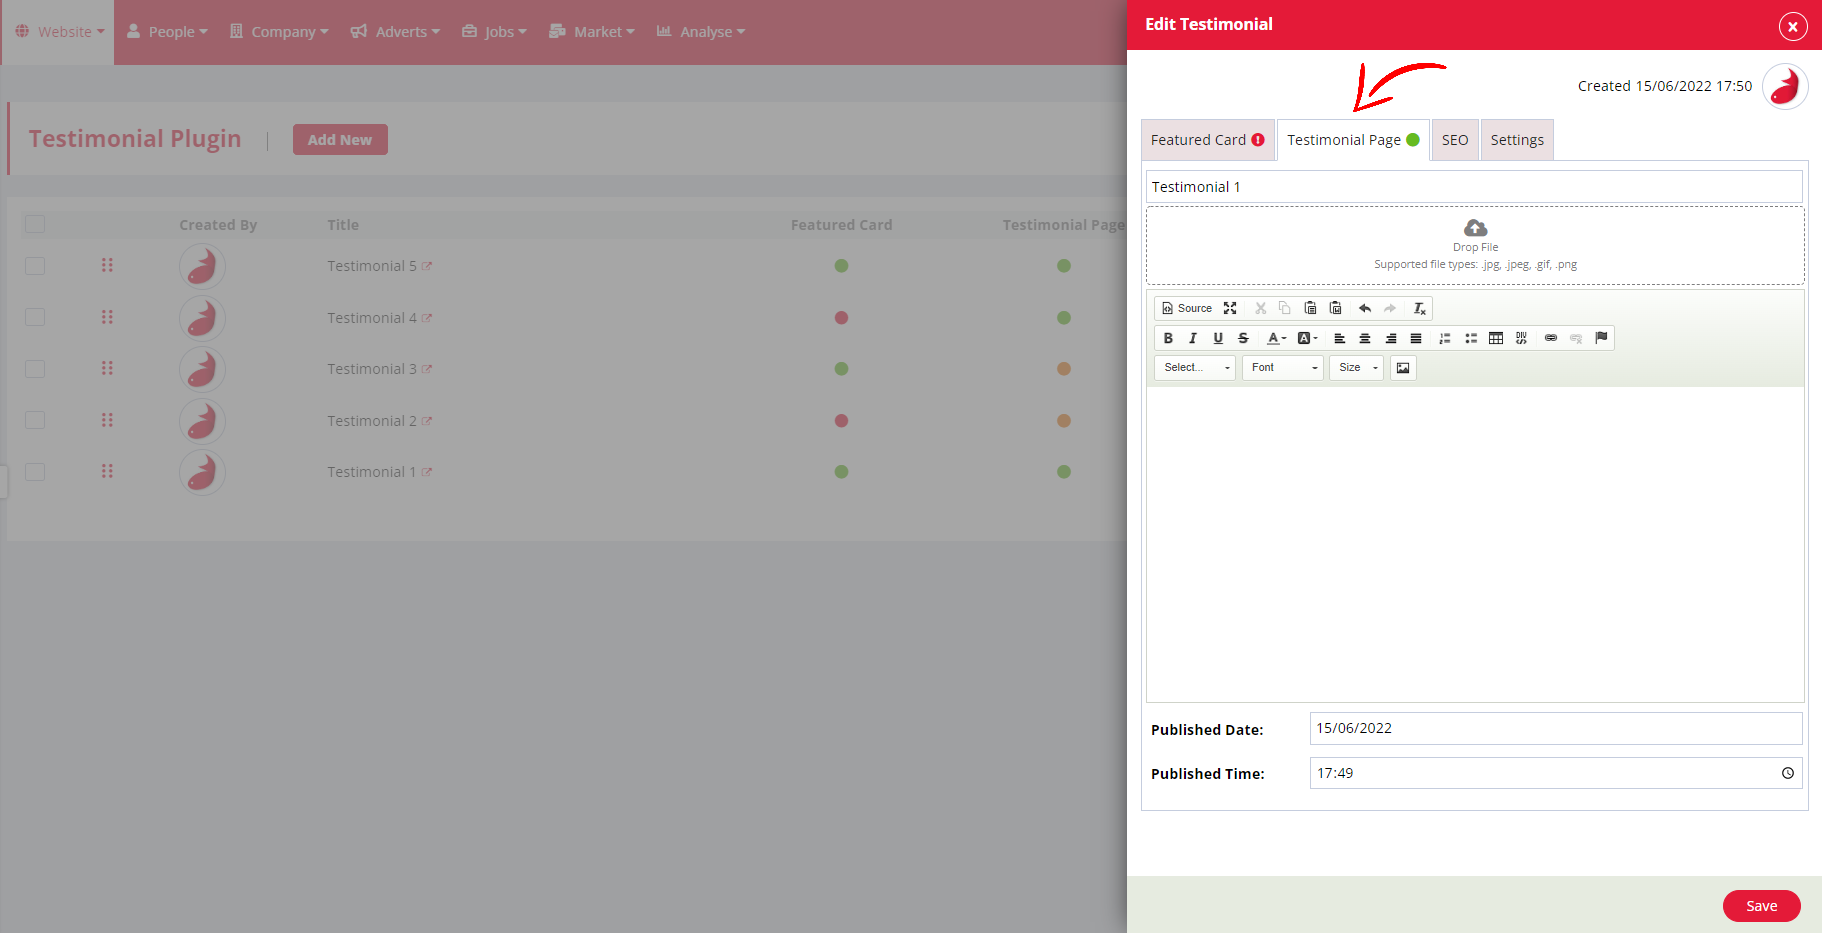
Title - This is the field to populate your Testimonial title. This will appear on the front end of your website.
Image - This image slot allows you to upload an image for your Testimonial member post. You can do this by dragging and dropping or by clicking to browser your device files. The supported file types are ‘.jpg, .jpeg, .gif, .png’.
Content - This area allows you to enter the main content for your Testimonial record. This is a standard content box and custom HTML can be added via the 'Source' button. Images and videos can also be embedded within this content area.
Publish Date / Time - These fields allow you to set a publish date and time for your Testimonial record. You can set this date in the past, present or future. If you add a future date, your Testimonial post will appear as 'Unpublished' until the scheduled date.
SEO
The SEO & Social tab allows you to give your Testimonial record a description and keywords to optimize searching and make it easy for potential candidates and clients to come across your Testimonial page!
SEO will automatically populate based on your Testimonial title and content. You can update and edit your SEO details as you wish.
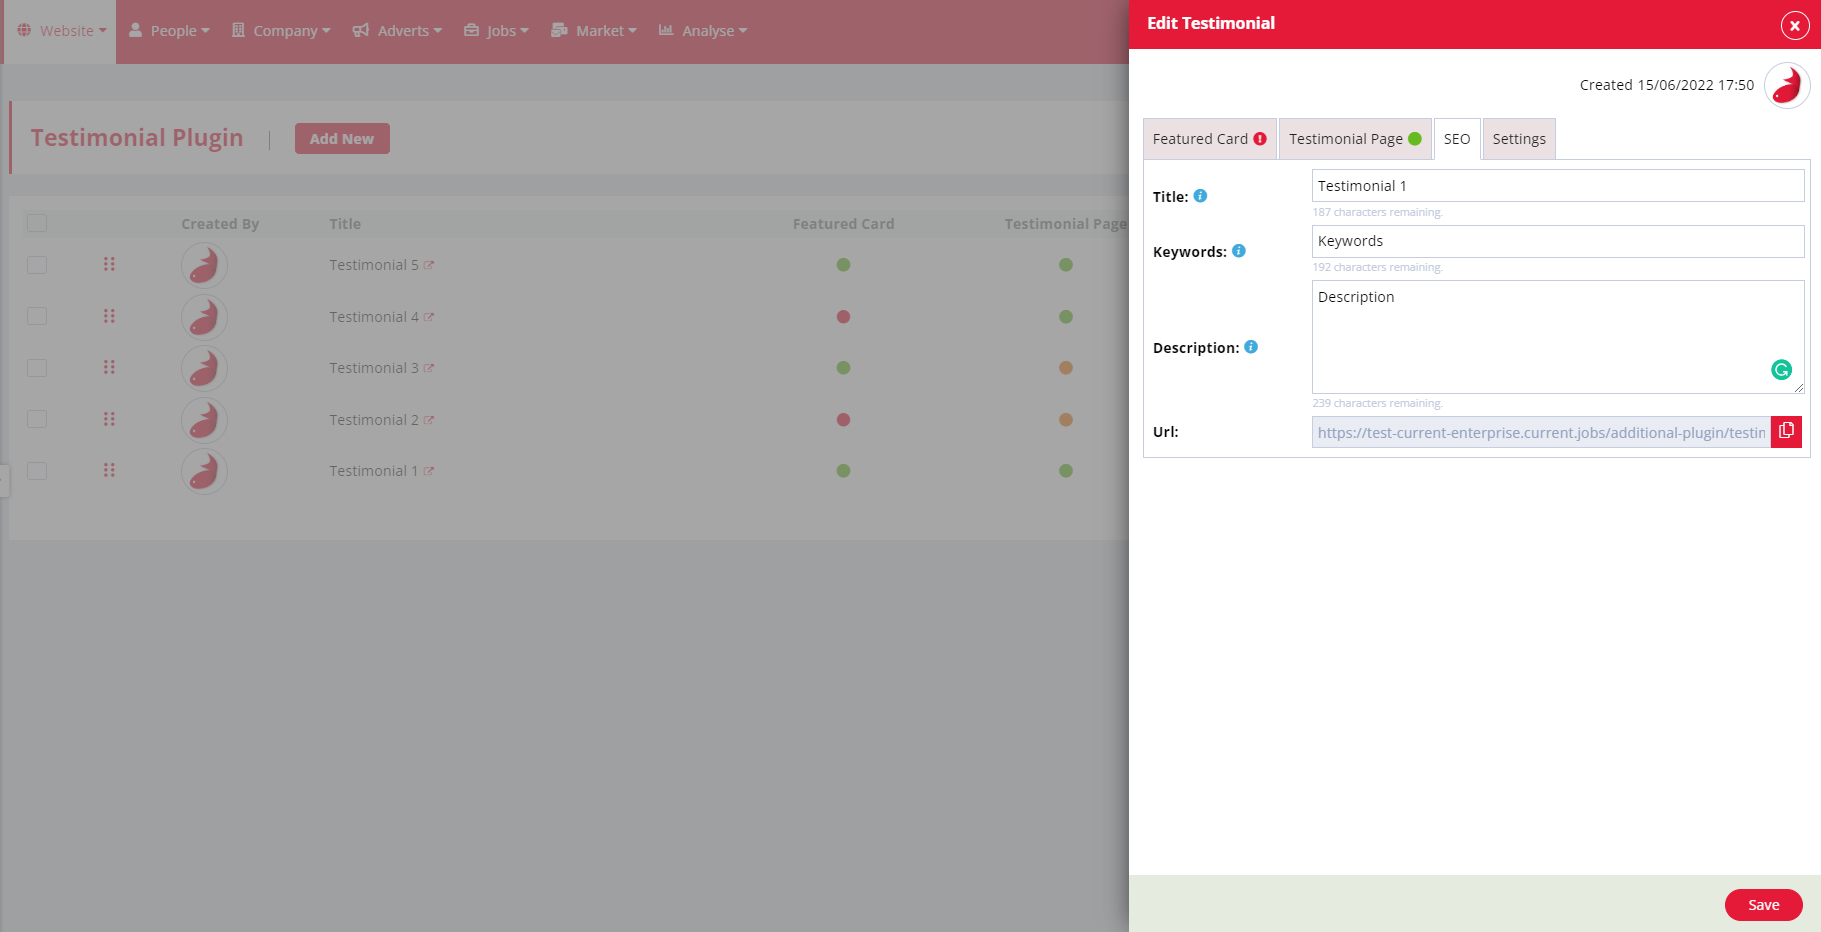
Title - SEO page title
Keywords - SEO page keywords
Description - SEO page description
Social Image - The social image slot allows you to give your Testimonial member a specific image to use when sharing on social media.
In order to get the best results for your Testimonial social image when using the below ‘Social Image’ slot, we would advise only using file names that are all text characters with no spaces, numbers, or special characters. E.g. - TestimonialImageOne.Png.
There are a few websites that can be used to ensure Testimonial social posts are appearing as expected detailed below -
https://developers.facebook.com/tools/debug/
https://cards-dev.twitter.com/validator
https://www.linkedin.com/post-inspector/
URL - This field will display a read-only version of the Testimonial record URL. There is a click-to-copy button that allows the URL to be copied to a clipboard.
Settings
The settings tab includes contact details, a linked user field and well as 'List Page' toggle.
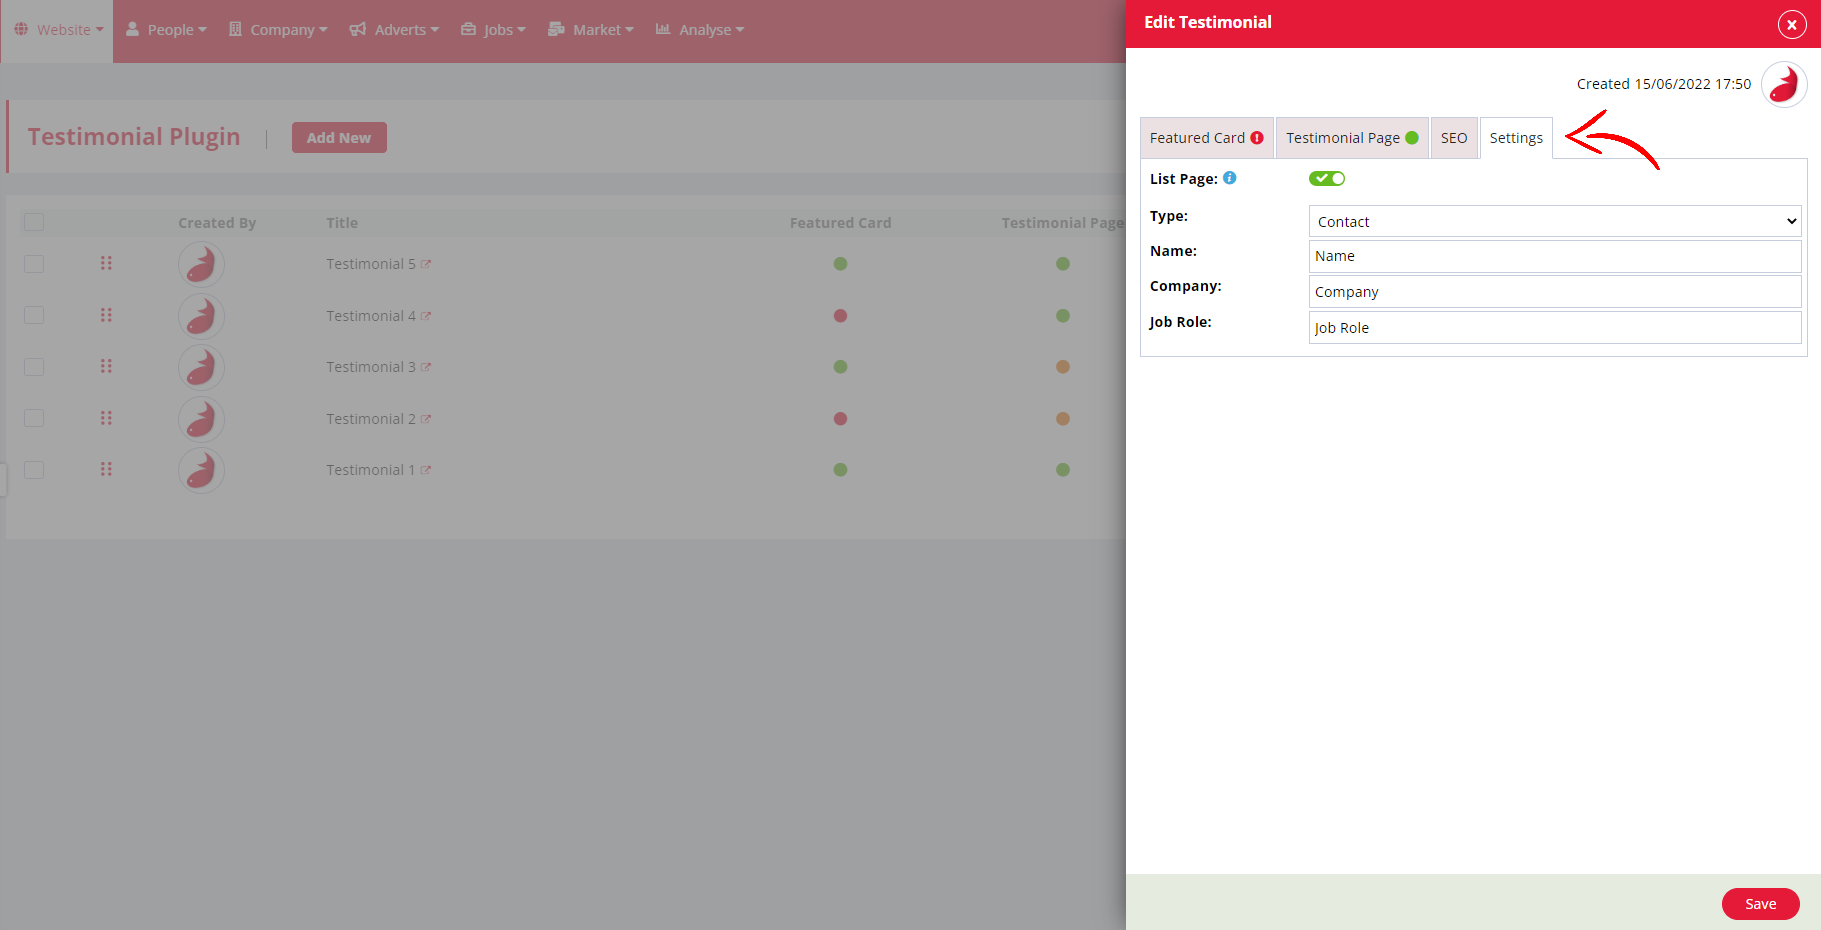
List Page - This toggle controls the visibility of each record that will appear on the Testimonial list page.
Type – This drop-down allows you to choose if this testimonial is from a contact or a candidate. You can use this to refine what shows on specific testimonial pages.
Name - This is the name field from the testimonial.
Company - This is the company field from the testimonial.
Job Role - This is the job role/title of the person giving the testimonial.
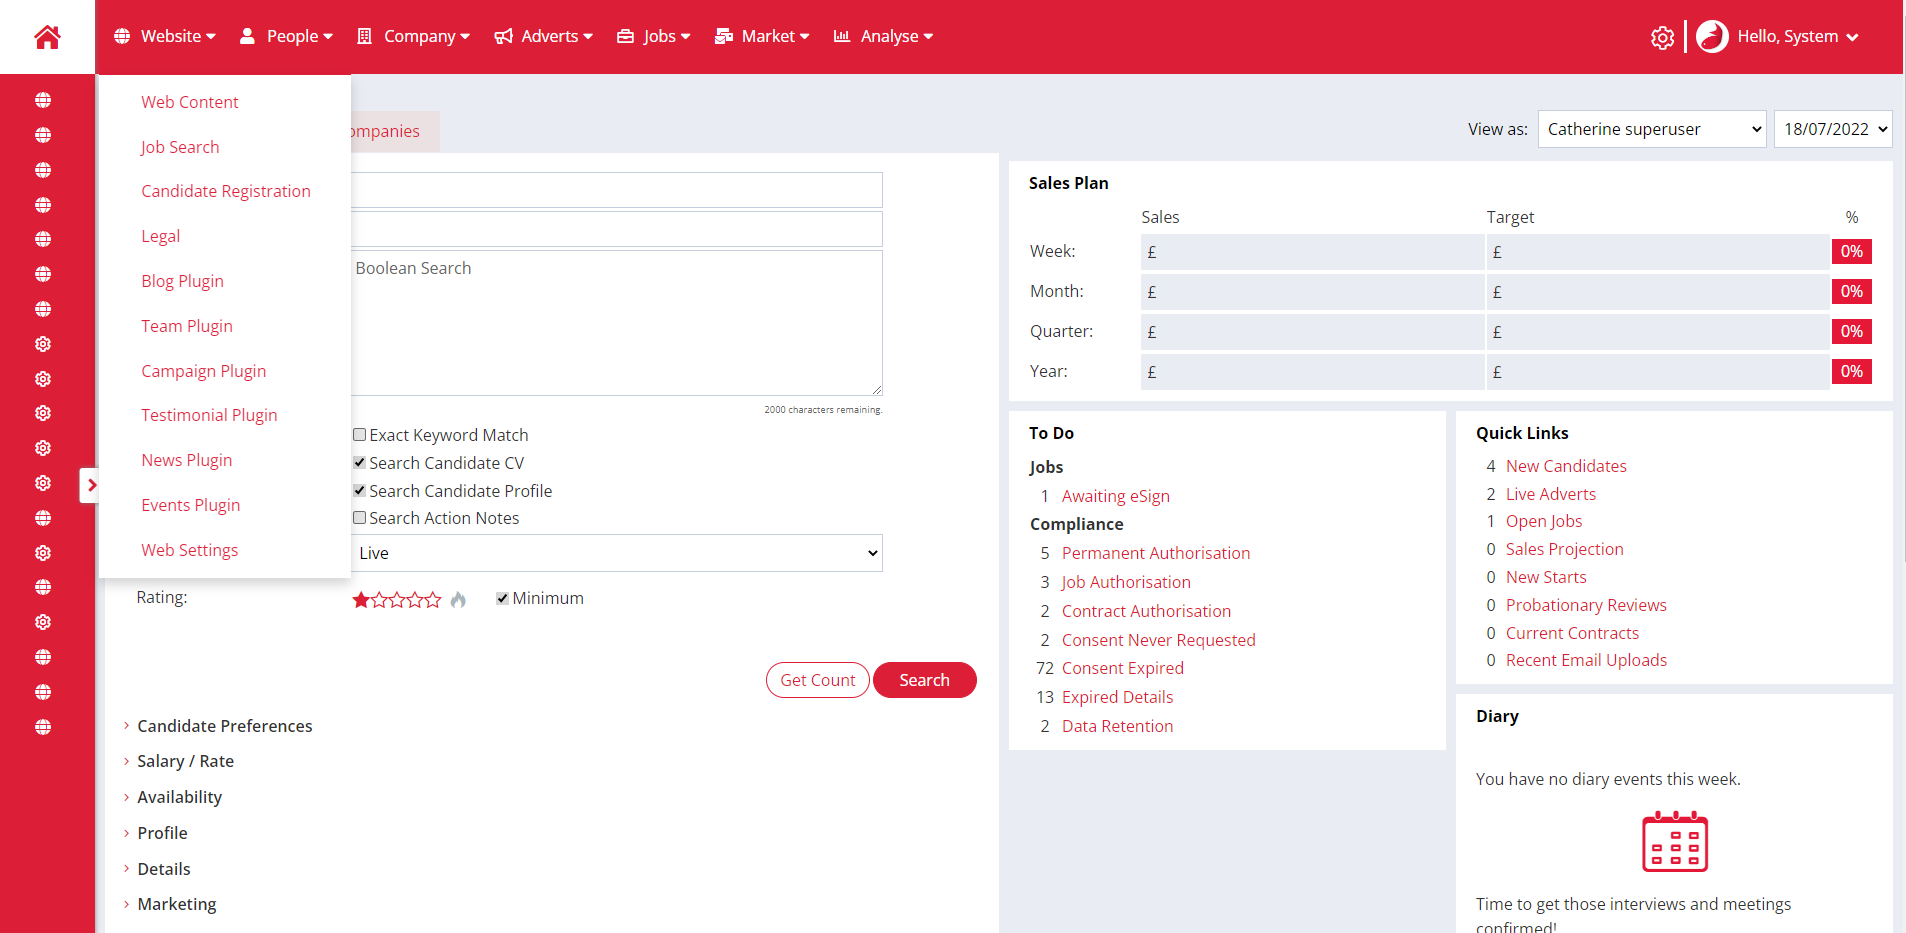
Testimonial Plugin - Breakdown
The Testimonial plugin is located within the Website > Testimonial Plugin area of the CMS.
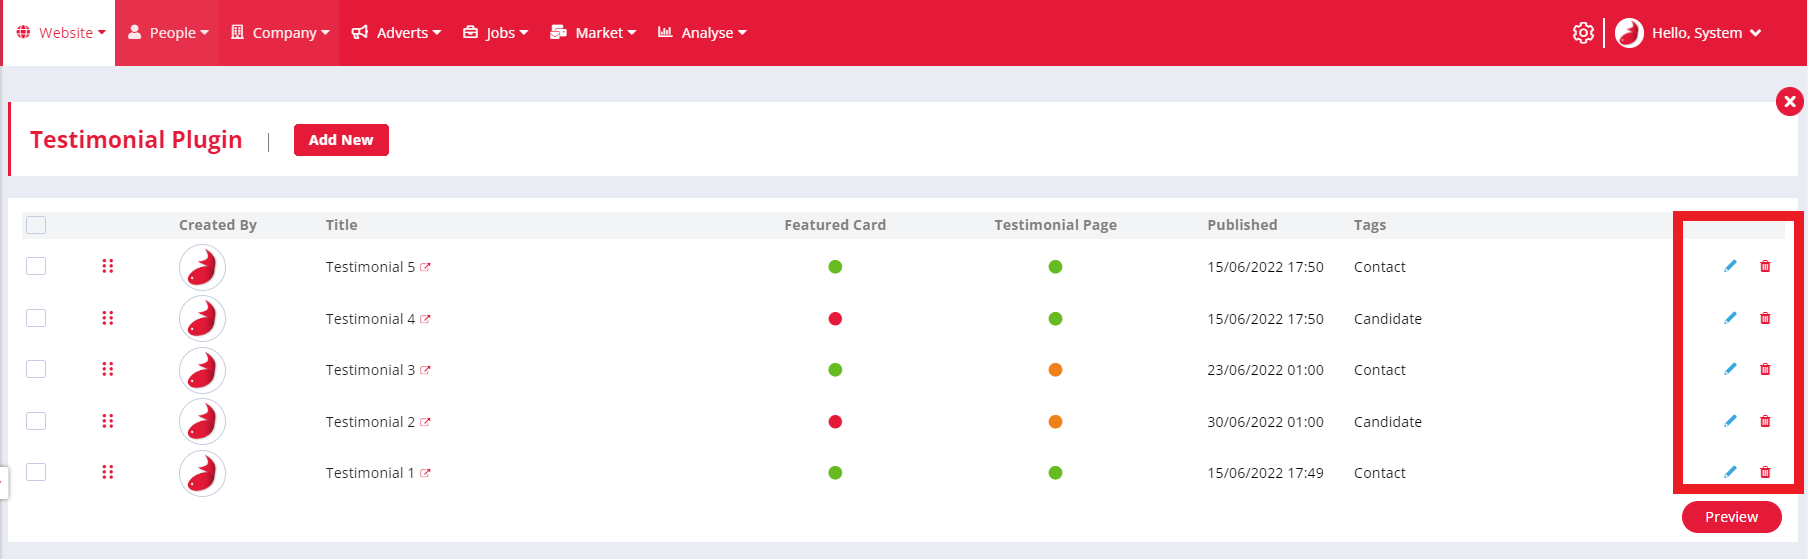
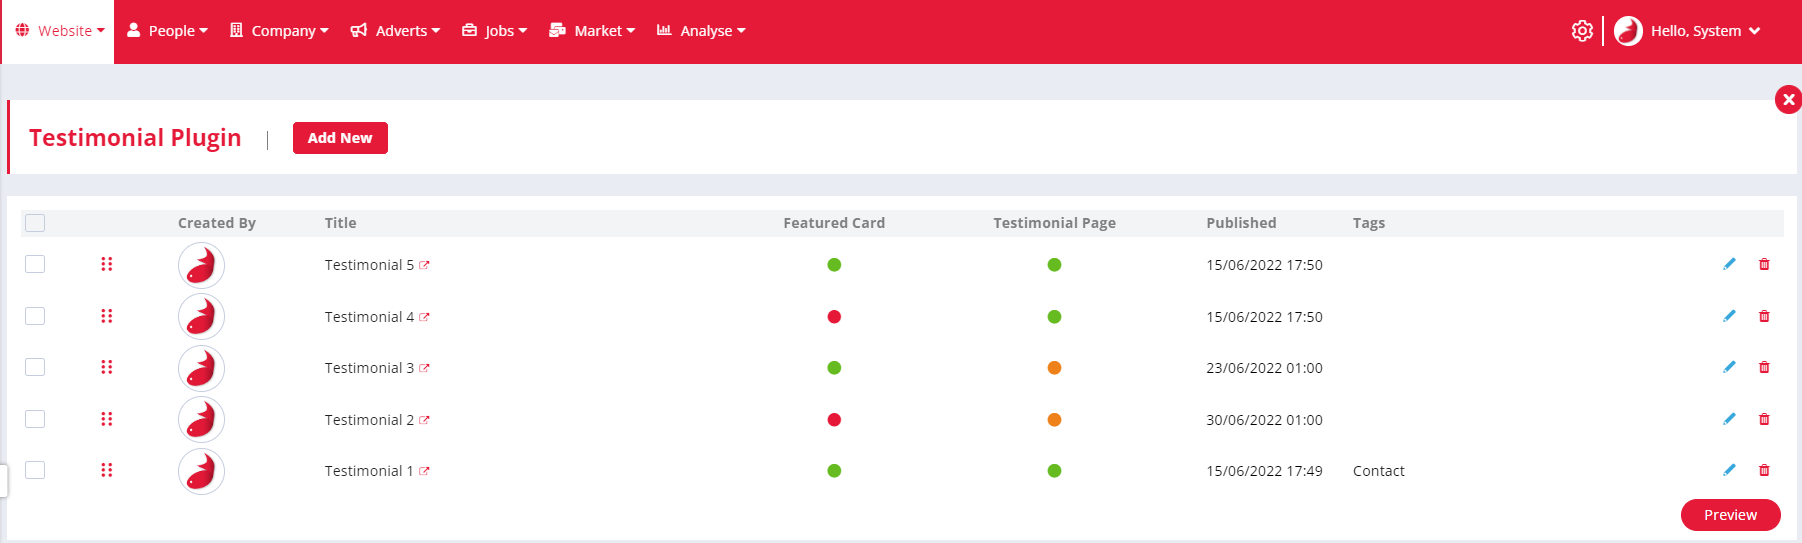
List Page
When navigating to this page, you will be presented with an overview of any current Testimonials you already have created.
The list page will consist of the following columns:
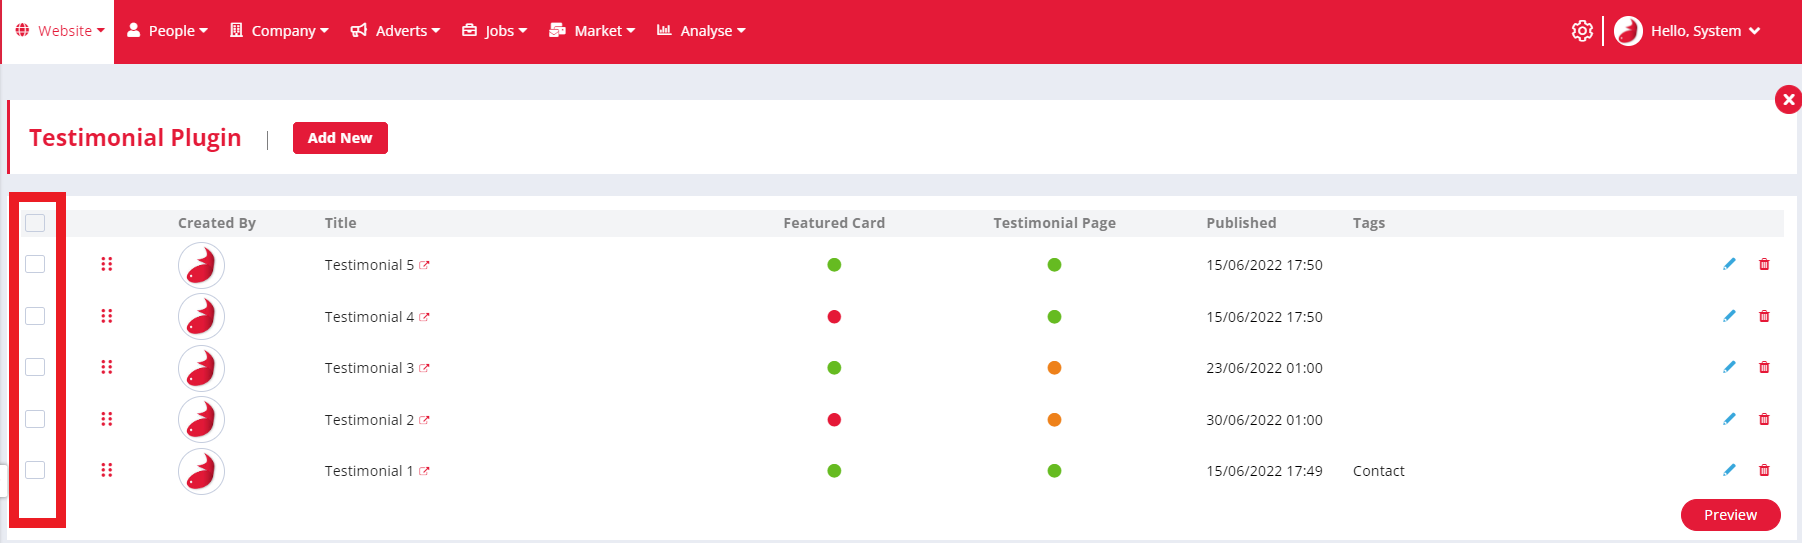
Checkbox
The checkbox column will enable you to select multiple records to delete at once. The delete icon will appear and replace the column headers once a checkbox has been selected. Clicking the delete button will display a confirmation pop up. Clicking OK will confirm you wish to delete this record. Clicking the X in the corner will close this, and not delete your record.
Re-order icon
Next to the checkbox column, you will find the re-order icon. This icon indicated your list of Testimonials can be re-ordered via drag and drop functionality. Simply click and drag your record to the position you wish for this to appear on your website.

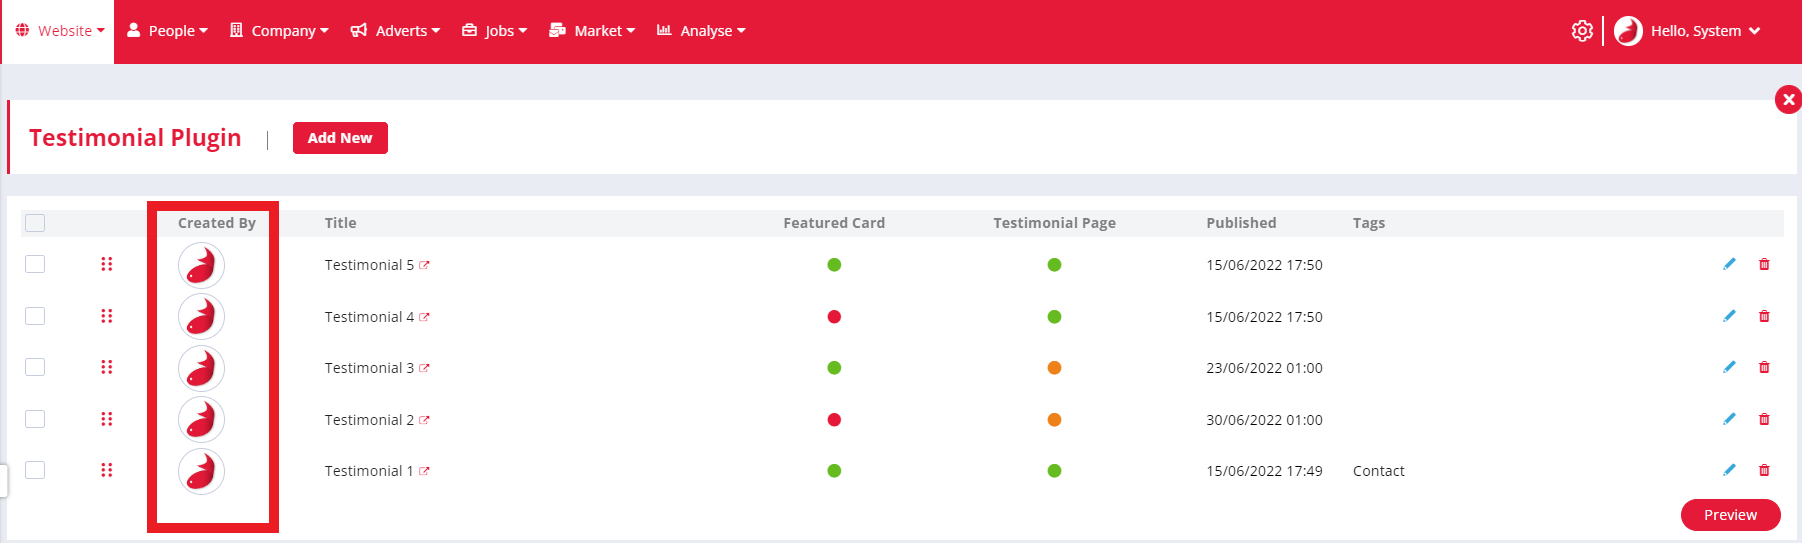
Created by
You will see there is a created by column on the overview page. This will display the image of the system user that has created this Testimonial post. This can be managed via System > My Account.
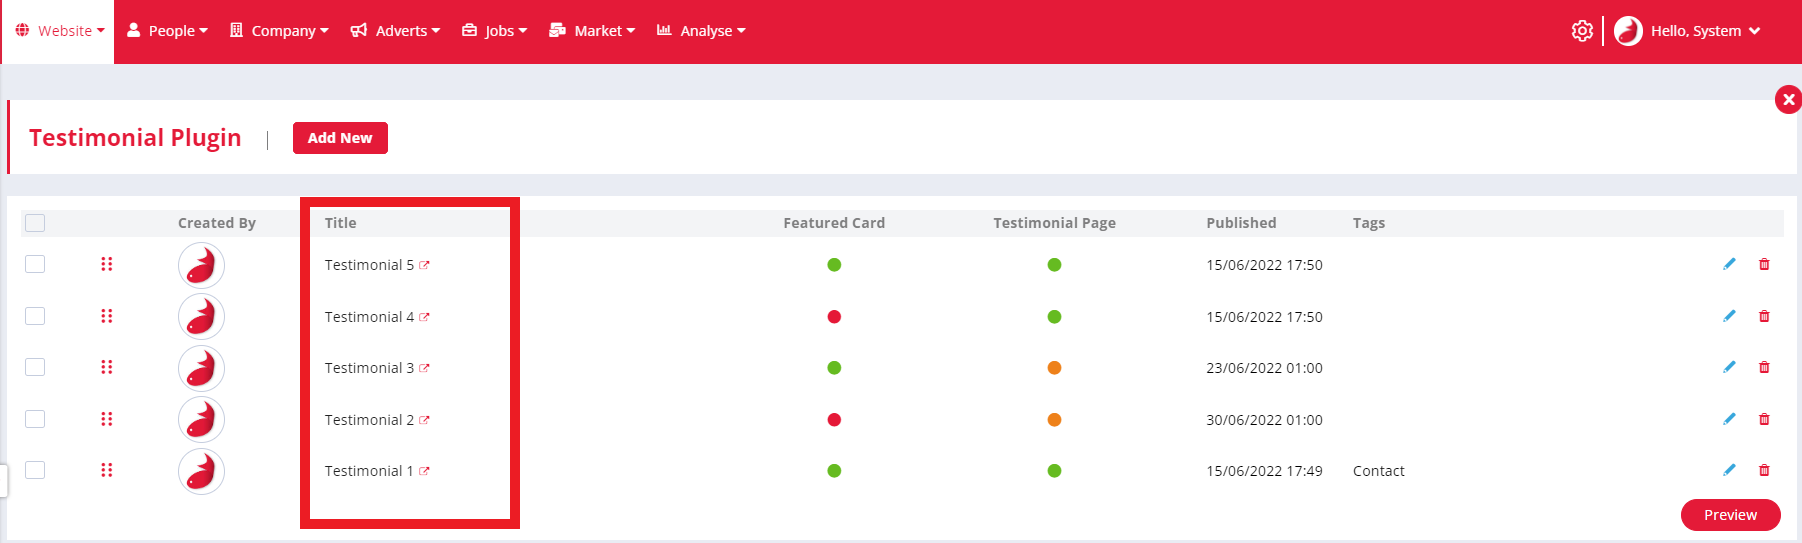
Title
The title column will contain your Testimonial title text. This column is populated by the title field when creating or editing a Testimonial record. The title field is a required field and cannot be left blank when saving.
The view page icon will open up the record you are viewing in a new tab. This will display the list view Testimonial page you have selected.
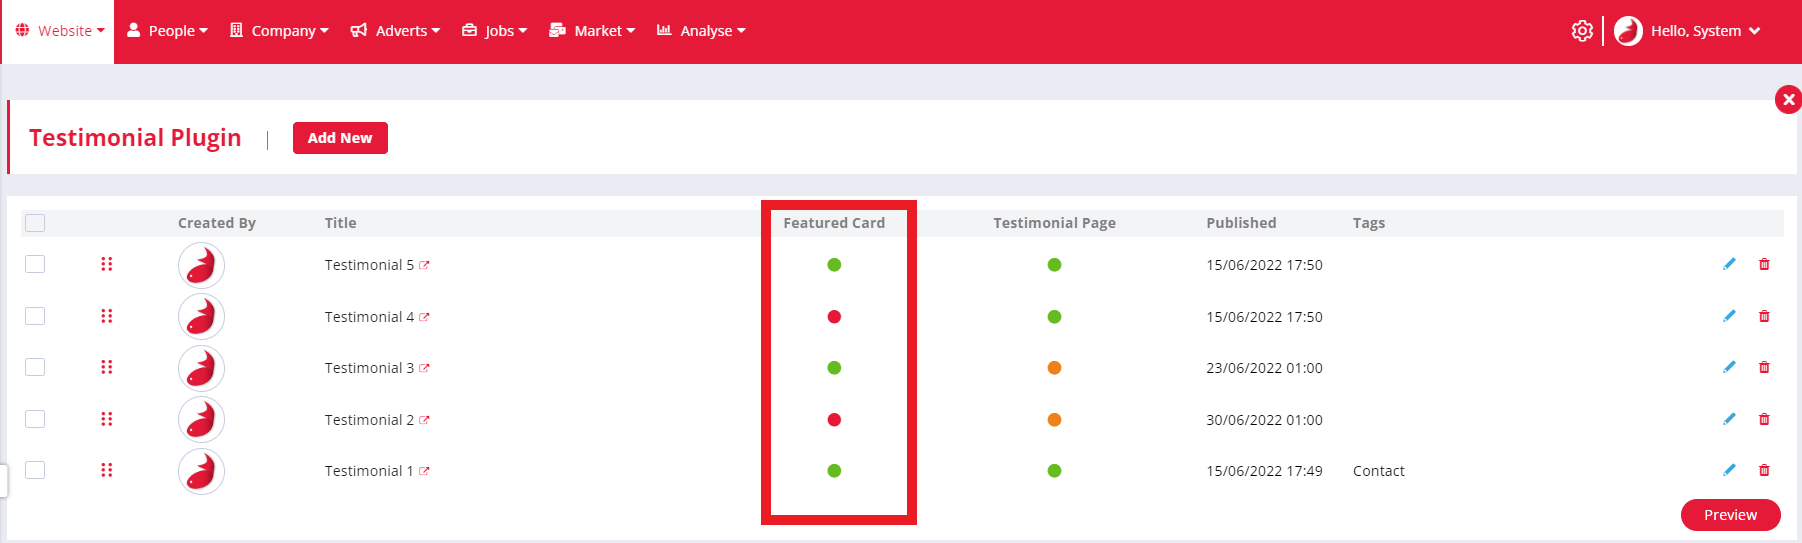
Featured Card Status
The featured card column indicates the visibility of the record from within an additional plugin. There are three different statuses available, these are detailed below:
-
Green – Enabled
-
Red – Disabled
Green – Enabled
Red – Disabled
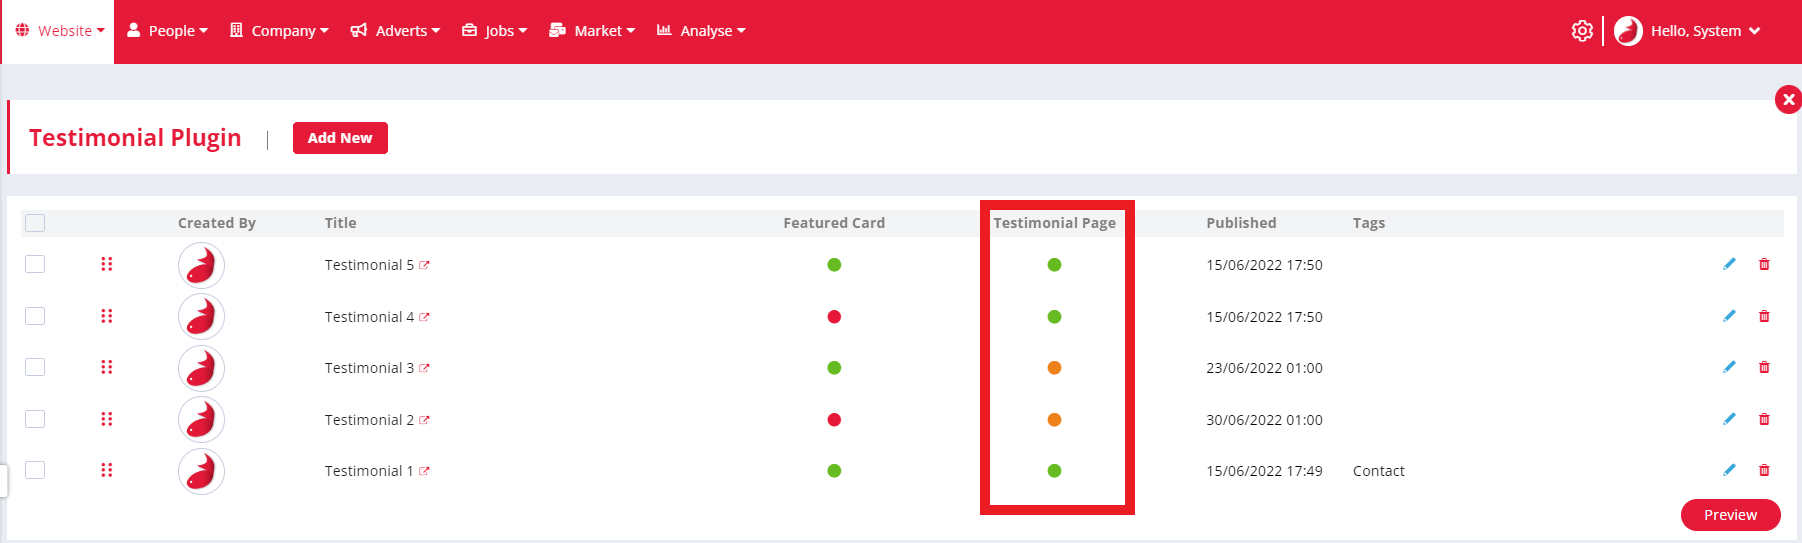
Testimonial Page Status
The Testimonial page status column indicates the visibility of the record on a plugin page. There are three different statuses available, these are detailed below:
Green – Published and live.
Red – Draft with no date set to publish.
Orange – Unpublished and scheduled to publish on the set date.
* You can set a publish date to be in the future to schedule Testimonial posts to publish automatically.
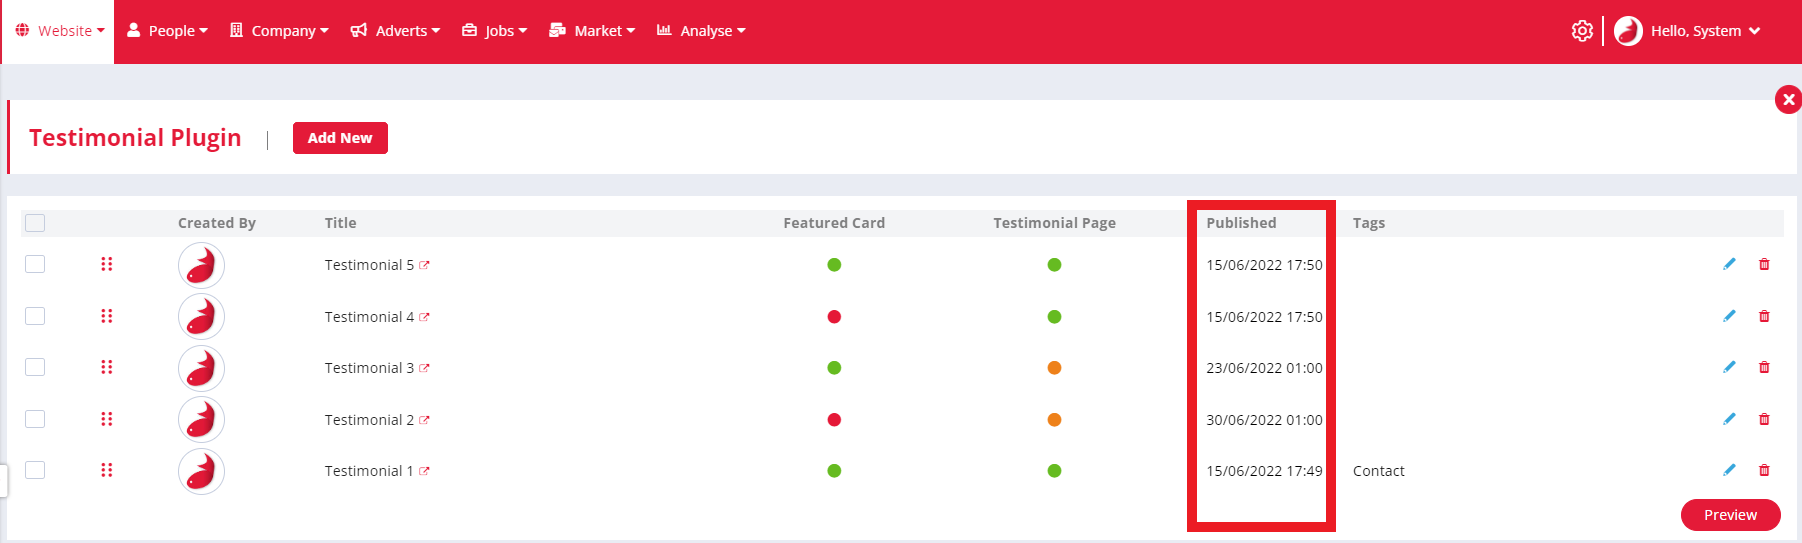
Published
The published column will contain the date and time that your Testimonial record was published or is set to publish, to your live site. This column will not include a date and time if the record is saved in draft status.
Tags
The title column will contain the text populated in your tags field. This can be added and edited by navigating to the featured card tab in the create/edit view. Tags will allow you to refine your Testimonial record on your website into different groups.

Action Buttons
The action buttons will consist of two icons to the right of the screen. These buttons are linked to an action, these are detailed below:
Edit - The pencil icon will allow you to click to edit your record. You can also click anyone along the record row to edit.
Delete – The trashcan icon allows you to delete a single record from your Testimonial list. Clicking this will display a pop up to confirm you wish to delete your record.