We know that the changing trends and demands on your business often require flexibility when it comes to user access. Whether there is a need during those busy periods to focus activity during office hours or to enable employees to have remote access; user login restrictions allow you to control your system access to fit your business.
In Firefish Super Users have the ability to set time based restrictions to control when users can log into your system or to set IP address restrictions, limiting access to the system to only whitelisted IP addresses.
Restrictions can be applied globally (for all users) or per user:
Global User Restrictions
Per User Restrictions
Restricted Access Warnings
Global User Restrictions
Global restrictions allow you to control which devices can be used to access your system and during which times they are allowed to access it. If global user restrictions are set, all users but Super Users will have these restrictions applied unless a specific user has individual restrictions applied.
Super Users are exempt from all user restrictions to allow management access. Global user restrictions will be applied to all other users.
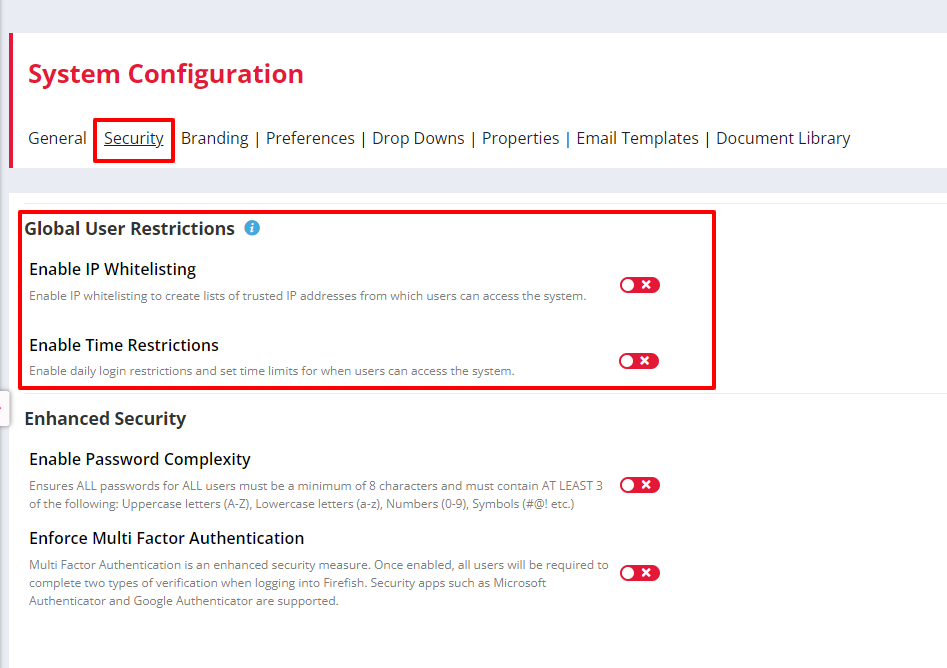
Super Users can enable login restrictions by going to Settings > System Configuration > Security. On this page within the section Global User Restrictions, you have the ability to Enable IP Whitelisting and/or Enable Time Restrictions:
Enable IP Whitelisting
Enabling this setting allows you to build a list of trusted IP addresses which can access your system. When disabled, there will be no IP address restrictions for your users, meaning they'll be able to login from anywhere.
If you are adding an IP Address you will need the Public IP Address of the Device that you are using to access Firefish. To find this; simply open up an Internet Search on that Device (i.e your home computer) such as Google, and type What is my Public IP Address?
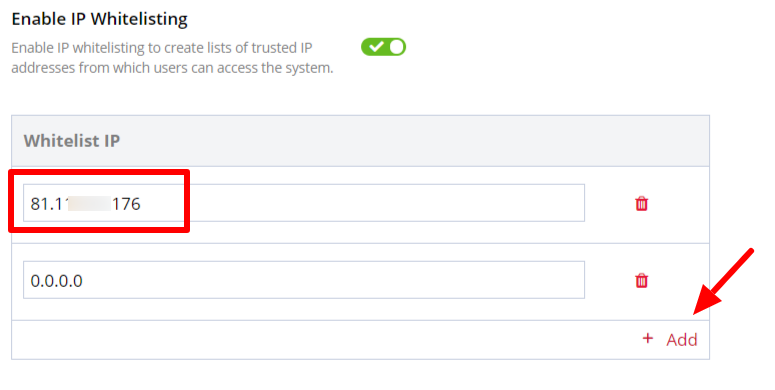
Click on the red switch to enable this setting - the first time you enable IP Whitelisting, your current IP address will be auto-populated in the list to get you started.
We recommend keeping your current IP address in your Whitelist to avoid kicking yourself out of the system upon clicking Save.
Simply click +Add to enter any additional IP address you want to Whitelist:
Click Save at the bottom of the page to activate your restrictions.
Your system will now only be accessible from the IP addresses you have entered into the list. You can disable these restrictions at any time and don't worry; Firefish will remember all of your saved IP addresses unless you choose to delete them.
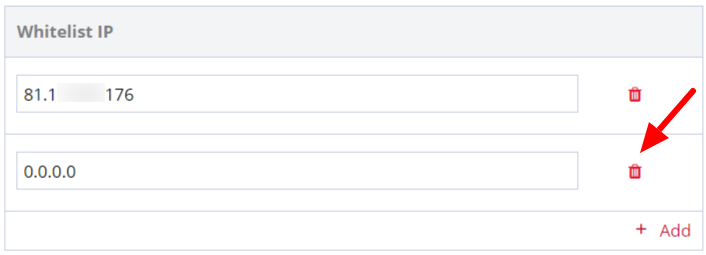
To delete a whitelisted IP address, click on the bin icon next to the one you want to delete and hit Save, at the bottom of the page, to confirm:
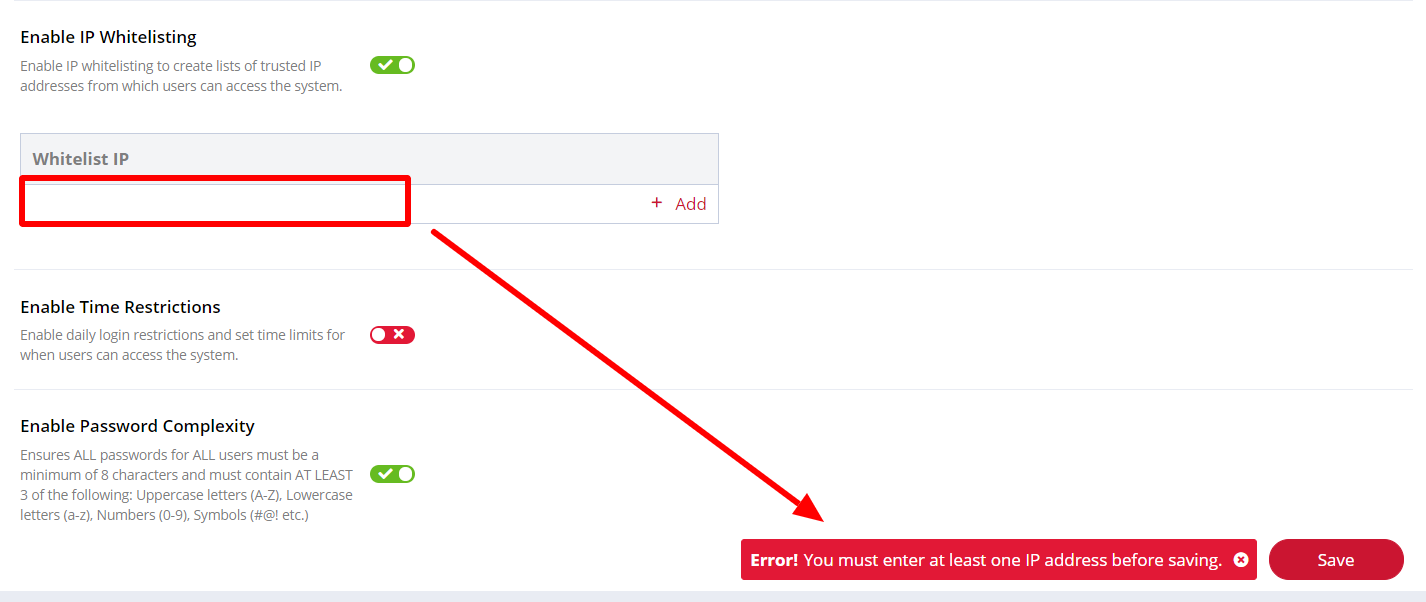
In order to have the IP restrictions active you need to have at least one IP address whitelisted. If you accidentally remove all IP addresses and try to click Save, you'll be reminded that you need to have at least one address entered:
If you can't recall any of your trusted IP addresses, disable and then re-enable the IP Whitelisting setting (without saving) and your current IP address will be auto-populated again as the default listing.
Enable Time Restrictions
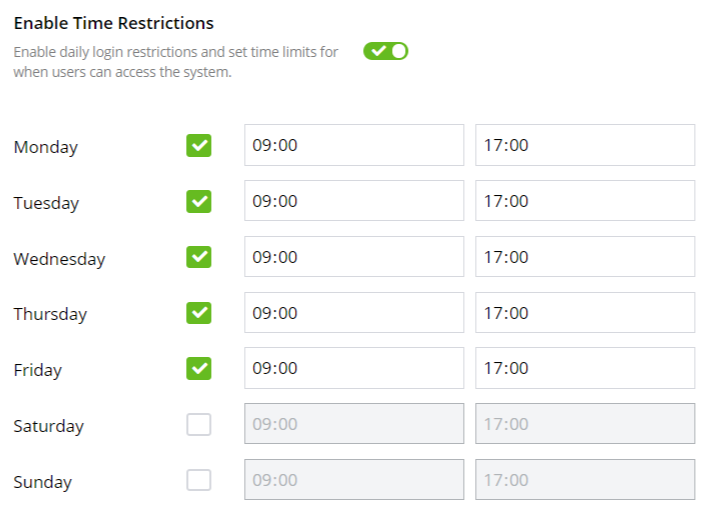
Enabling this setting allows you to set specific time periods where users can access your system. You can choose which times your users can access your system and even enable/disable specific days of the week (i.e. Saturday/Sunday).
Click on the red switch to enable this setting. By default, Monday to Friday will be enabled with a default time period of 9am - 5pm: this means your users CAN access the system during this time frame. You can enable or disable each day by clicking the tick box.
Disabling a day means that access to the system will be completely restricted during that 24hr period:
To edit the daily time frames, simply click into each time field and enter the desired hour/minute. You can also click the X which appears when hovering over each field, to clear the time which is currently populated.
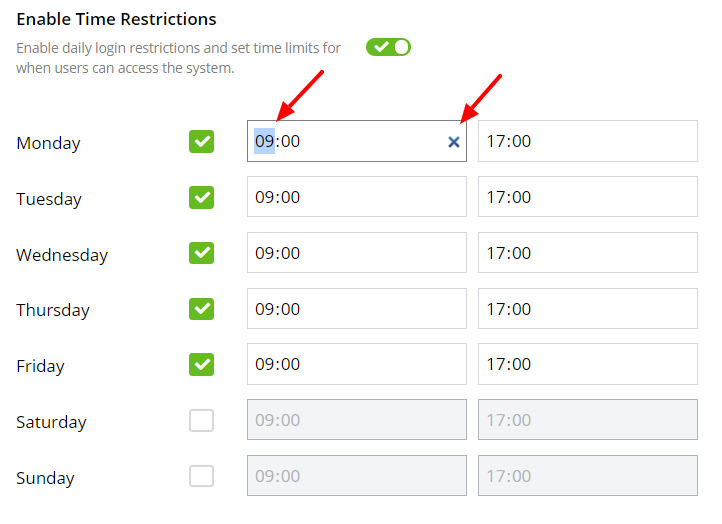
You must ensure that each enabled day has both a start and an end time populated and that they are in chronological order; you won't be able to save changes if the start time is later in the day than the finish time, or if any time windows are incomplete. Remember also that time needs to be entered in the 24hr format.
Once you have made all of your changes, click Save at the bottom of the page. Your chosen time restrictions will now be enabled and your users will not be able to access the system outwith your entered time frames. You can disable these restrictions at any time and don't worry; Firefish will remember any changes you have made and you will see them still populated next time the Time restrictions are enabled.
Per User Restrictions
Whilst your Global User Restrictions can limit the access to all of your users, setting individual user restrictions means you can control system access on per user basis.
Super Users are exempt from all user restrictions.
For example, you may have one or more Users that require remote access, or are based in different time zones and will need to access the system during a different time window.
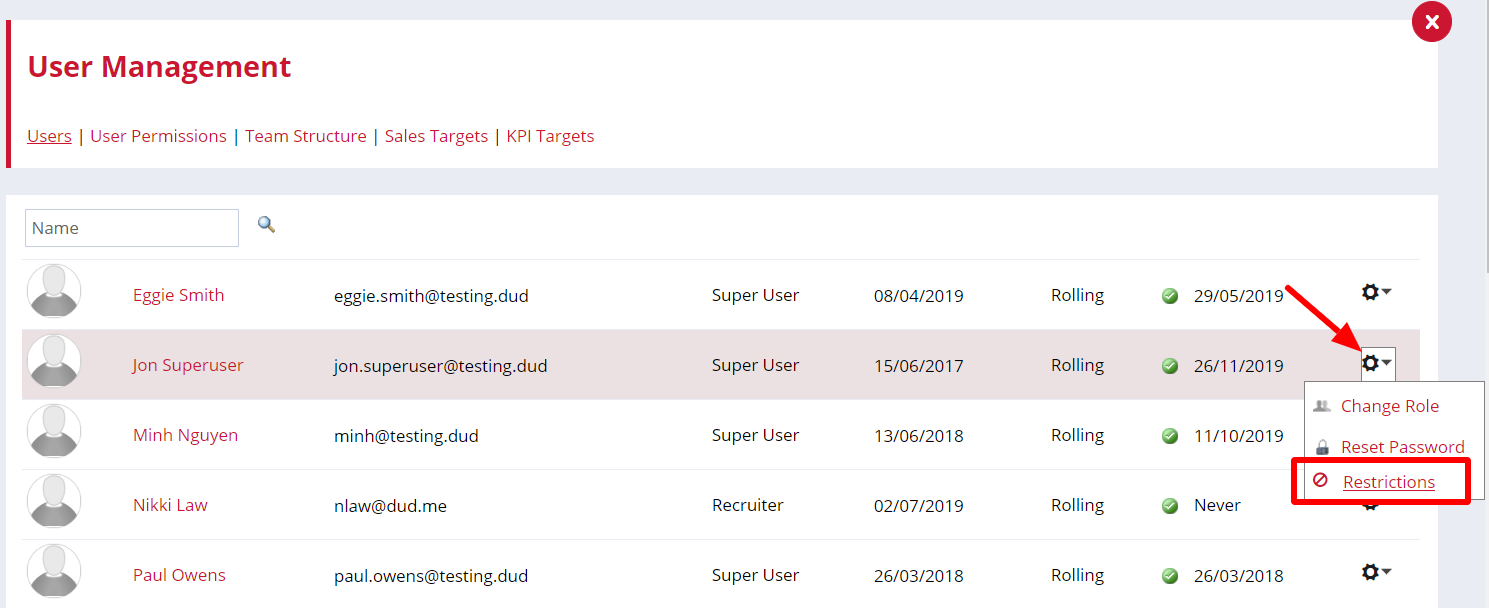
Super Users can set per user restrictions via Settings > User Management > Users. Click the cog > Restrictions next to the user you want to apply restrictions to.
Per user restrictions can only be applied if global user restrictions have been enabled within System Settings. Disabling global restrictions will automatically disable the per user restrictions. If global restrictions are re-enabled, corresponding per user restrictions will also be re-enabled.
Clicking Restrictions will open a side panel allowing you to whitelist any IP addresses or apply time restrictions specific to the chosen user. Use the tabs at the top of the side panel to switch between each setting. The IP Whitelist and Time Restrictions tabs will only be available if the corresponding global settings have been enabled within your System Settings:
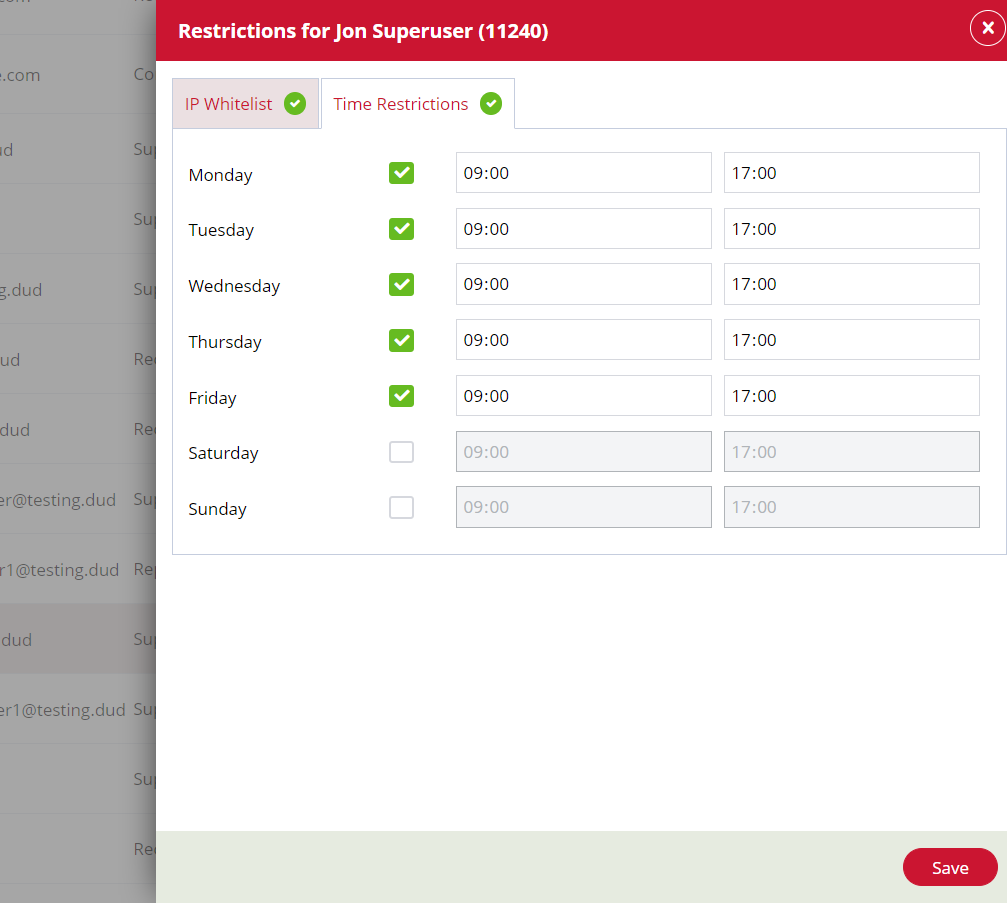
Each setting uses the same functionality as the Global User Restrictions in terms of entering IP addresses and time periods.
Note: As User Restrictions overwrite Global Restrictions you should ensure that the IP address listed by default in your Global IP Whitelist (typically for your office or usual place of business) isn't overwritten within the individual User Restrictions. Instead, you should add User IP Whitelist items in addition to the pre-populated Global Whitelist item.
Once you've completed your changes click Save at the bottom of the sidebar. This user will now be restricted to accessing the system from the listed IP addresses only or during the time frames you've specified.
Restricted Access Warnings
When restrictions are enabled users will not be able to login to your system. If a user attempts to login they'll see the following message:

If a user is logged into the system at the same that restrictions are enabled, they'll see the following message the next time they try to navigate to another page:

In this instance the user should close the browser and they'll be unable to login again until the restrictions become inactive.