Once Document e-sign is set up, you can finalise contracts quickly and securely without needing a physical signature. You can also add counter signatures when required, and track the status of all contracts directly from your Dashboard.
⚠️ Important: Firefish will not create contract eSign if users are performing a bulk placement!
Candidate Contracts
When creating a contract placement, you can choose to enable e-sign on the candidate contract.
- Complete and confirm the placement as usual.
- In the contract side-panel, select the candidate contract template that you would like to use, and click Create.
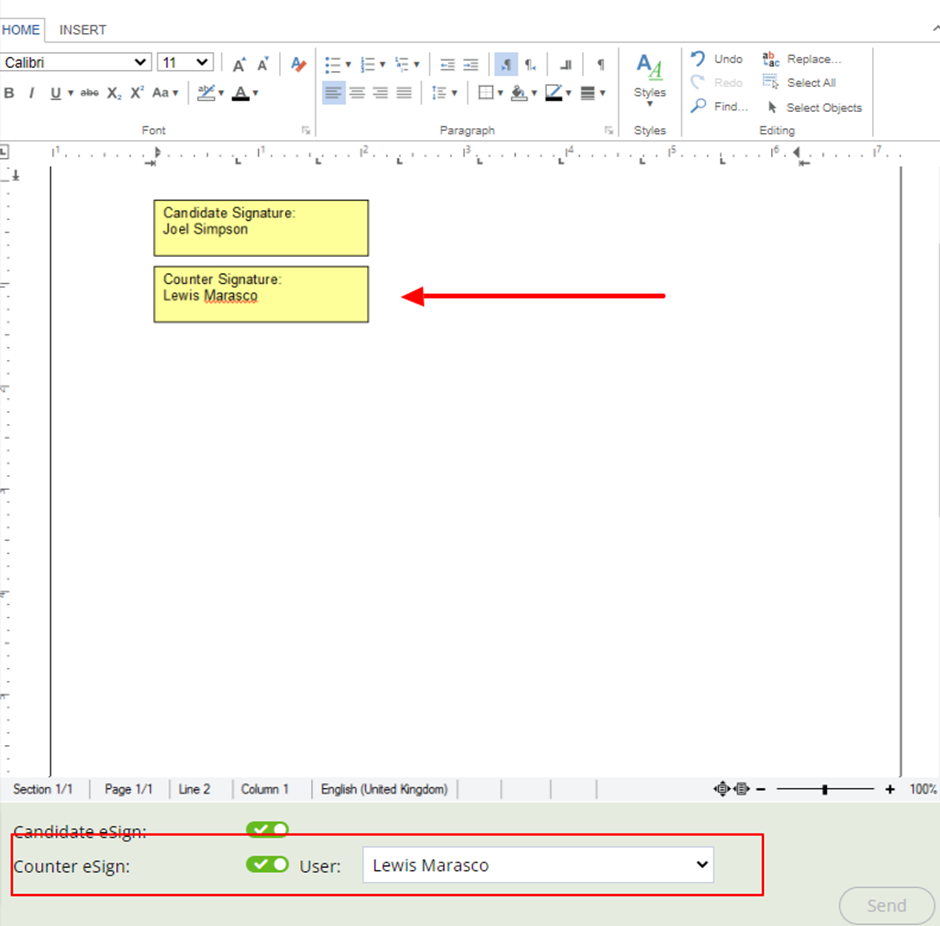
- At the bottom of the side-panel, enable Candidate e-sign (disabled by default). This will insert a candidate signature box into the document.
- You can drag and drop the signature box to reposition it.

- You can drag and drop the signature box to reposition it.
- If required, enable Counter e-sign to add a counter signature from one of your Users.
- Selecting a User will add their signature box directly below the candidate’s.
- You can change or remove signature boxes at any time.
Once set up, the candidate contract is ready for e-sign, and you can move on to the employer contract.
⚠️ Note: Disabling Candidate e-sign will automatically remove all signature boxes, including countersignatures.
Employer Contracts
Employer contracts follow the same process as candidate contracts.
- Log the candidate placement and take the necessary steps as per the above with their contract.
- Create the employer contract in the side-panel.
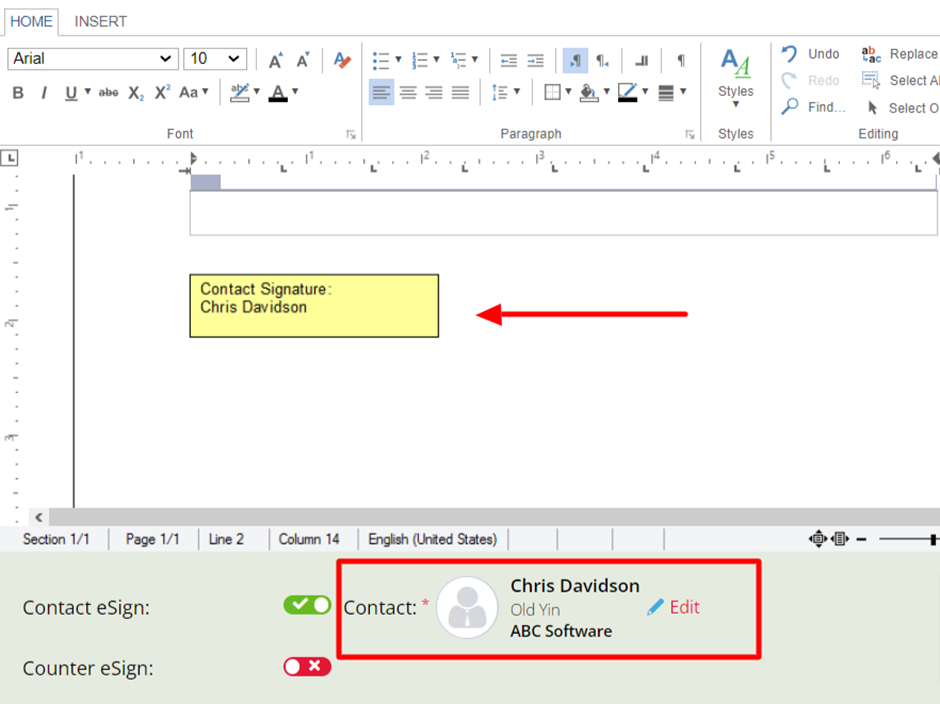
- Enable Contact e-sign (disabled by default).
- Firefish will prompt the user to select a contact.
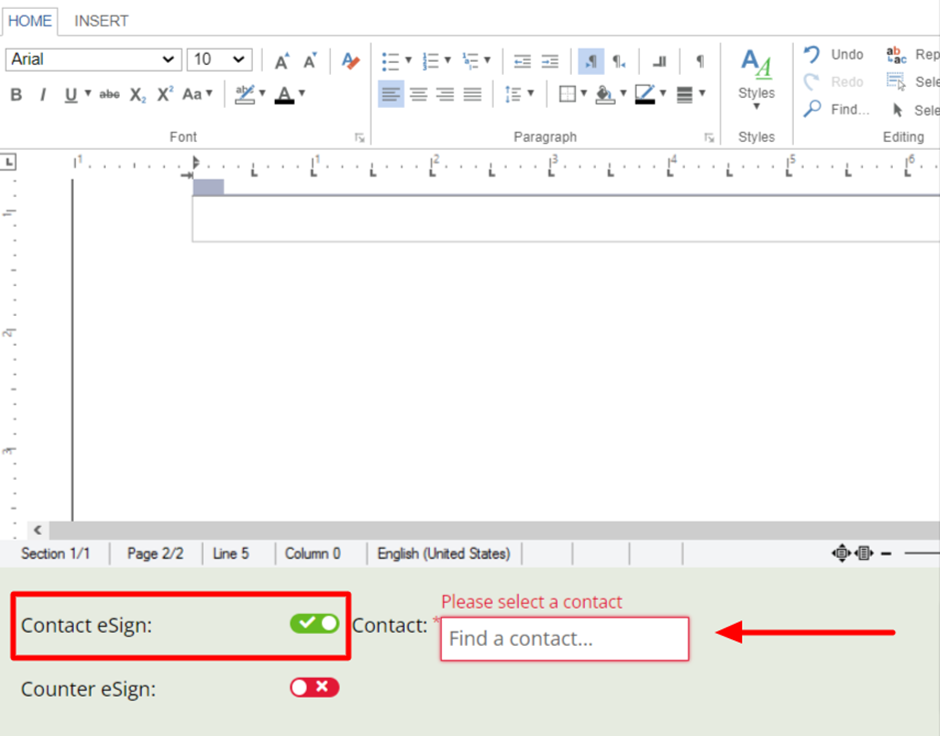
- By default, the system will suggest the job’s associated contact, but you can search for another linked contact if needed.
- Firefish will prompt the user to select a contact.
- Firefish will automatically add the employer signature box to the document.
- If required, you can also enable a countersignature (see Candidate contracts section for details).
Once both contracts are prepared, click Send to complete the placement. This will send emails to the candidate and employer with links to sign their contracts.
Signing a Document
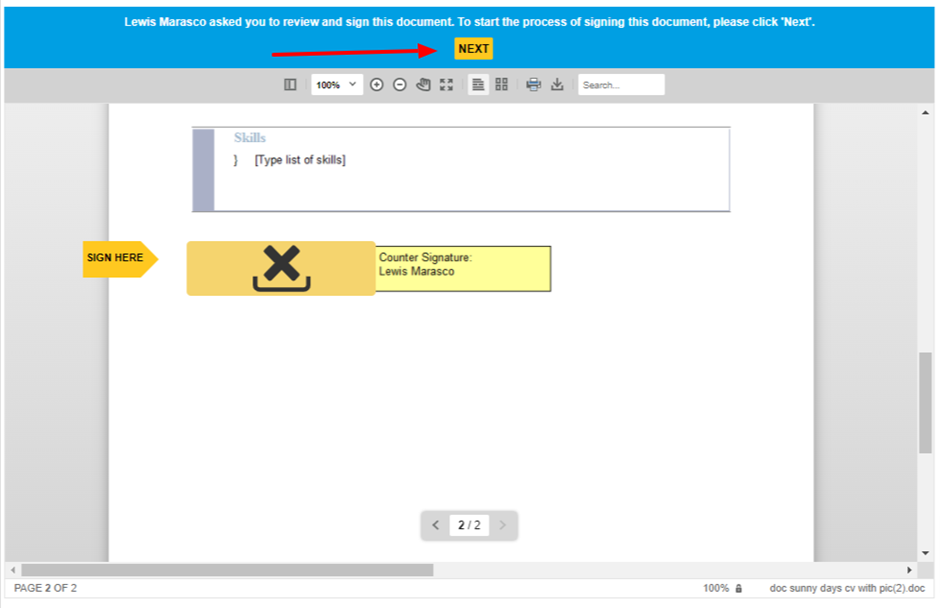
When a candidate, employer contact, or User providing a countersignature clicks the email link, the Document e-sign page will open.
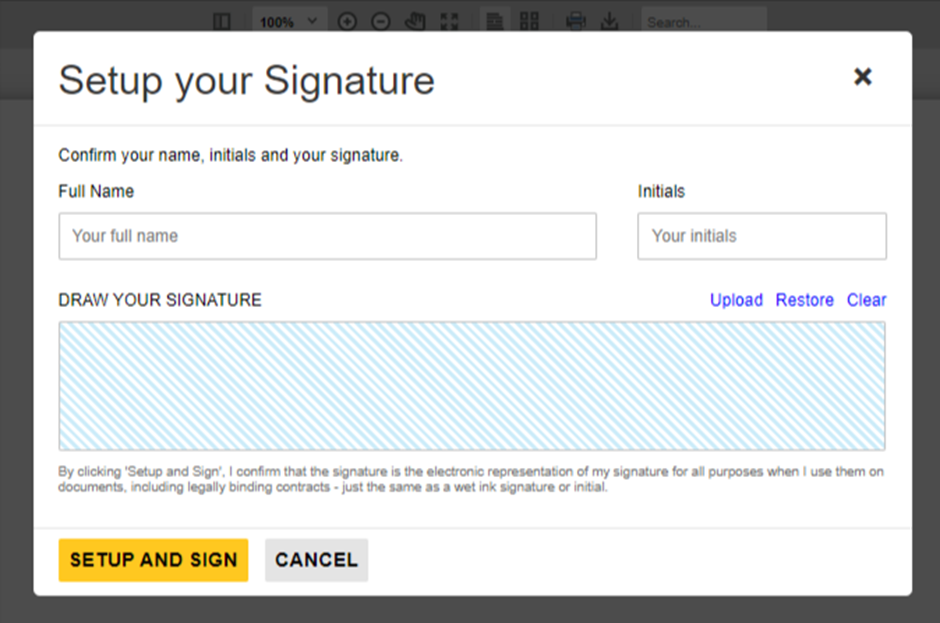
- Click Next in the e-sign panel.
- A signature modal will appear. Enter your name, initials, and draw your signature (using a mouse, pen, or finger on mobile).
- Click Setup and Sign to confirm your signature.
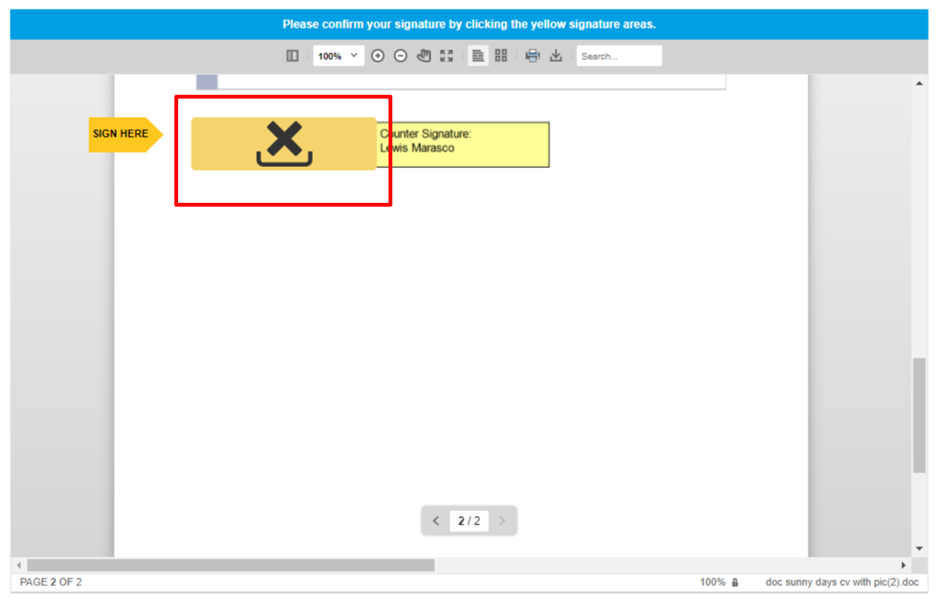
- Click the signature box in the document to place your signature.
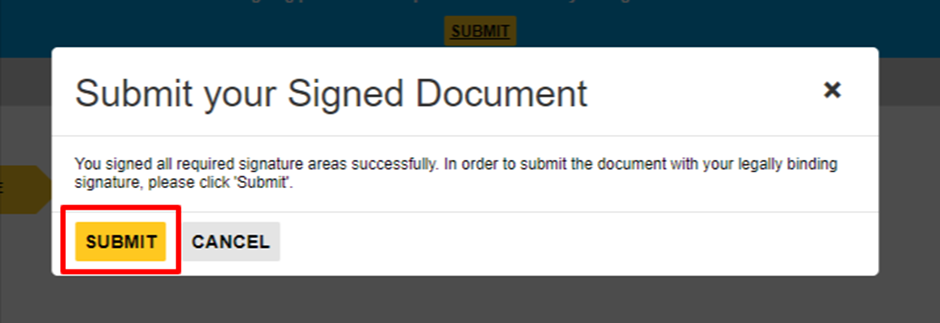
- In the submit modal, click Submit to finalise.
The document will now display a timestamped signature. Once submitted:
- The signing link expires.
- If the candidate or employer requires to re-sign the contract, the user must delete the original document and the contract process repeated.
- Once the candidate or employer has signed the contract it will be finalised and locked for editing.
Status tracking:
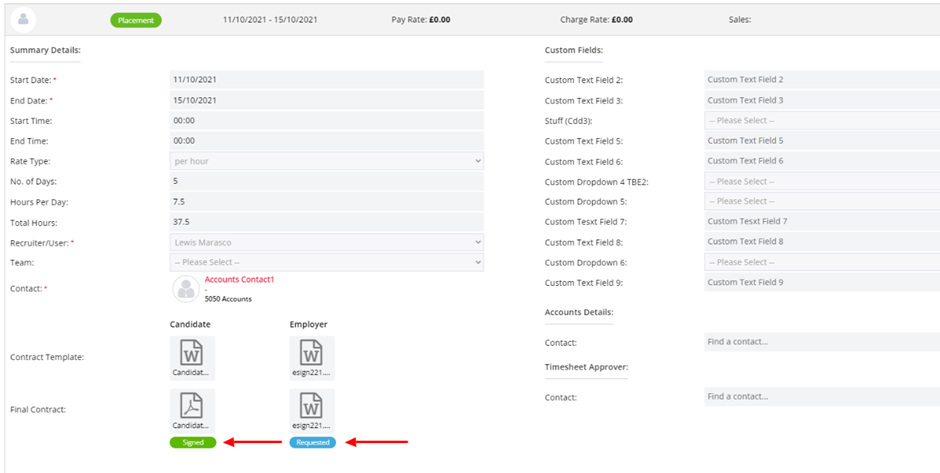
- Contracts awaiting signature show as Requested on the placement summary.
- Completed contracts show as Signed and generate a PDF copy, sent to all parties.
- Users can monitor e-sign status from the placement tab on the job record.
To Do List, Actions and Reports
Awaiting e-sign
From your Dashboard, go to Jobs > Awaiting e-sign to track contracts.

- All users can view contracts here.
- You will see the document status of Requested or Signed, with corresponding dates.

- You can preview the original placement emails and link to candidate, contact, job, or company records.

- Firefish will automatically remove reminders from the to-do list once the candidate or employer signs the contract. Users can also remove them manually if needed.
Signed document actions.
- Candidate-signed documents create a Candidate Contract Signed action (recorded on candidate and job).

- Employer-signed documents create an Employer Contract Signed action (recorded on contact, job, and company).

- Firefish will also record completed countersignatures.
- Users can filter these actions in Recent Activity under Document Signed.

Reports
The following reports include signed contract actions:
- Analyse > Standard Reports > Jobs > User Action Summary Report
- Analyse > Standard Reports > Exports > Export Actions Report
In reports:
- Candidate Contract Signed actions display the candidate’s name in the User column.
- Employer Contract Signed actions display the contact’s name in the User column.