Firefish gives you the option for additional security when accessing the system by enabling multi-factor authentication, IP whitelisting, time restrictions and password complexity. These security settings can be applied on both global and individual levels.
What is Multi-Factor Authentication (MFA) ?
Multi-factor authentication (MFA) is a method that grants a user access to a system or application only after presenting 2 pieces of evidence specific and unique to that user. For Firefish, this consists of an email address and password with the addition of a 6 digit authentication code. This code is generated in an Authenticator App that has been downloaded to a mobile device.
Authenticator Apps
To use MFA you will need to download an Authenticator app to a mobile device as you will need this to generate your 6 digit code whenever logging in.
Firefish MFA supports the two most widely available and free to download Authenticator apps:
Microsoft Authenticator
.png?width=670&height=352&name=Untitled%20design%20(92).png)
Google Authenticator
.png?width=670&height=352&name=Untitled%20design%20(93).png)
These can be downloaded via your preferred app download method.
Enforcing MFA for All Users
Super users can choose to enforce MFA for all users (MFA doesn't apply to the candidate or employer portals).
To enforce MFA for all users:
-
Go to Settings
-
Choose System Configuration
-
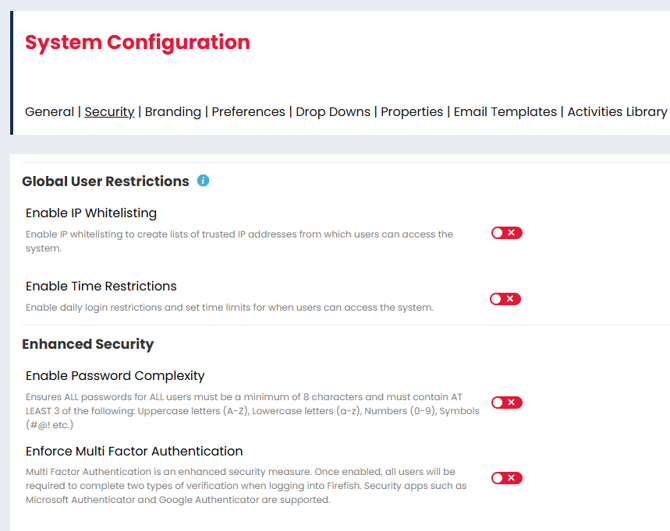
Open the Security tab
-
Scroll down to the section titled Enhanced Security
-
Click the red slider to activate Enforce Multi Factor Authentication
-
Click Save
Using MFA for the First Time
Once MFA has been activated for your users, they will each need to take the following steps when they next login:
- Login on your usual login page
- The user will get a pop-up such as the below example. Scan the QR code on your mobile phone.
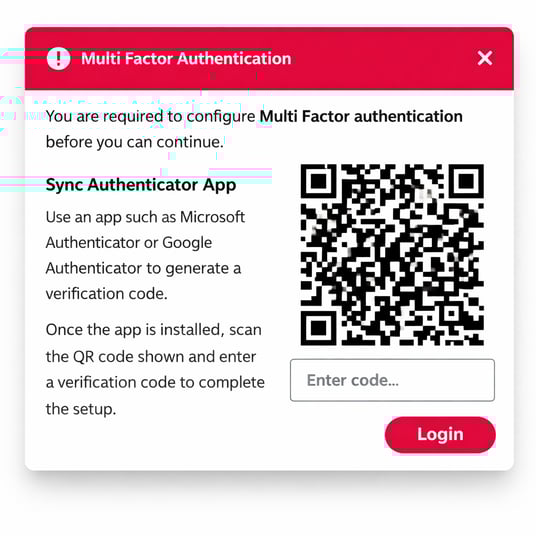
- Your authenticator app will generate a 6 digit code which you can enter on the pop-up on your computer.
- Login.
They are now configured for MFA and will be presented with an MFA challenge each subsequent time that they login to Firefish or until the setting is disabled.
If you are an Enterprise user, MFA can be enforced from your primary site only and will apply to all sites.
Enabling MFA as an Individual User
You can choose to enable MFA as an individual user, but only if MFA has not been enforced for all users.
To enable MFA as an individual user:
-
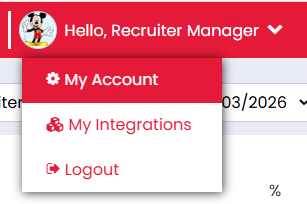
Go to Hello, [Name]
- Select My Account
- Scroll to the Multi Factor Authentication section at the bottom
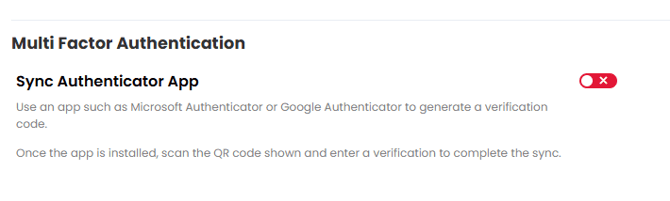
- Toggle the Sync Authenticator App setting on
- Scan the QR code which generates with your mobile
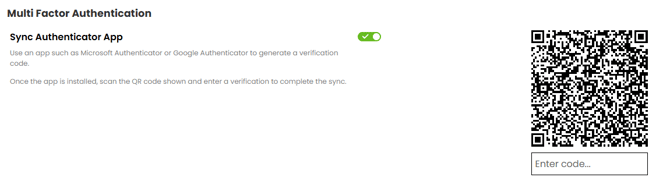
- Enter the code you are provided with into the field below the QR code
- Click Save
You're now configured for MFA and you'll see the MFA challenge next time that you login to Firefish or until you disable this setting.
If MFA has been enforced for all users you will not have the option to disable the setting.
Resetting the Authenticator App
If you ever need to reset your Authenticator App, for example, if you change mobile devices you can do this easily.
-
Go to Hello, [Name]
- Select My Account
- Scroll to the Multi Factor Authentication section at the bottom
- Select Reset
.png?width=670&height=160&name=Untitled%20design%20(97).png)
Logging in with MFA Enabled
Once your configured for MFA you'll be presented with an MFA challenge after entering your email address and password, each time that you login to Firefish:

You'll need to enter a new code each time you login and this will be automatically generated in your Authenticator app.
If you have MFA configured, but don't want to be presented with the MFA challenge for a period of time, you can click the checkbox for Remember me for 30 days - you won't see the MFA challenge again for this period of time.
Can't Access the App?
If you can't access your Authenticator app then you can click Having trouble? Email code and you'll receive a 6 digit code via email. This code will be valid for 60 minutes.
Other Security Settings
Accessing Global User Restrictions
Additional security settings can be accessed on a company wide level by a Super User:
- Go to settings
- Open System Configuration
- Click Security
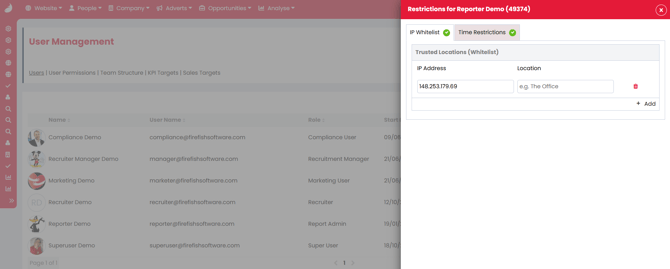
IP Whitelisting
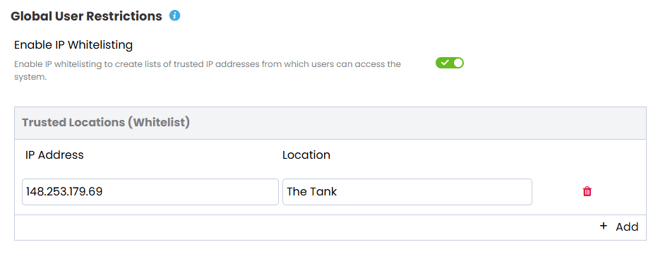
IP Whitelisting allows you to mark certain IP addresses as safe, meaning that your users can only log on from these IP addresses. For example, you might only want users to login whilst they're in the office.
To set this up:
- Enable IP Whitelisting
- Click Add
- Enter the IP address
- Give the address a location
This will only impact users. There will be no impact to candidates or contacts logging into their respective portals.
Time Restrictions
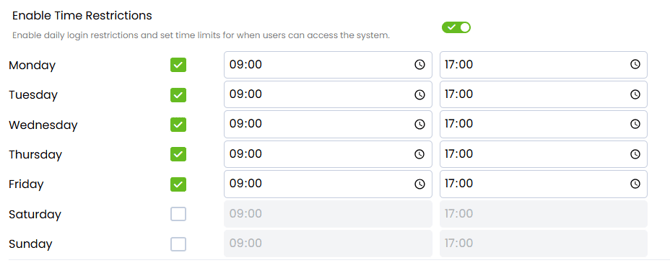
If you only want your team to be able to login during certain hours or on certain days of the week then:
- Enable Time Restrictions
- Tick the days that you would like the time restrictions to apply on
- Set the hours that you would like your users to be able to login during
This will only impact users. There will be no impact to candidates or contacts logging into their respective portals.
Password Complexity
This ensures ALL passwords for ALL users must be a minimum of 8 characters and must contain AT LEAST 3 of the following: Uppercase letters (A-Z), Lowercase letters (a-z), Numbers (0-9), Symbols (#@! etc.).
Setting User Restrictions Individually
Super Users can apply IP Whitelisting and Time Restrictions to individual users:
- Go to settings
- Open User Management
- Locate the user on the Users list
- Select the cog to the right of their name
- Press Restrictions
- Apply the relevant restrictions