You can connect your personal email address to Firefish so that all emails you send from the system come from your own inbox. This means replies go directly to you, and Firefish logs your email activity against candidates, contacts, and vacancies.
To set up your personal email, follow the steps below depending on which provider you use: Microsoft, Gmail, or another provider.
- What is a personal email in Firefish?
- Before you begin
- Set up with Microsoft 365
- Set up with Gmail
- Set up with another provider
- Testing and confirming connection
- Troubleshooting and common issues
What is a personal email in Firefish?
A personal email is your own email address (e.g., joe.bloggs@agency.com) that you use to send and receive messages within Firefish.
Connecting a personal email allows all your email activity to come from your own inbox, improving visibility and consistency for your clients and candidates.
⚠️ You must not use an alias email address. The email must be your direct, primary email account.
Before you begin
Before setting up your personal email, ensure the following:
- Your Super User has configured System Email Settings for your account. Learn how
- You have access to the email account you want to connect.
- You are not attempting to use an alias or distribution group email address.
Set up with Microsoft 365
- Navigate to Hello > My Integrations.

- Go to the Email Settings

- Click Login.

- Follow the on-screen instructions provided by Microsoft.
- Grant Firefish access to your email and calendar.
- Once authorised, you will return to Firefish.
- At the bottom of the page, enter your email address into the Send Test Email To field and click Test & Save.

💡Top Tip: Calendar and task sync options appear after a successful connection. You can enable these for automatic diary management.
Set up with Gmail
- Navigate to Hello > My Integrations.
- Go to the Email Settings

- Click Sign in with Gmail.

- Sign in to your Google account.
- Allow access when prompted.
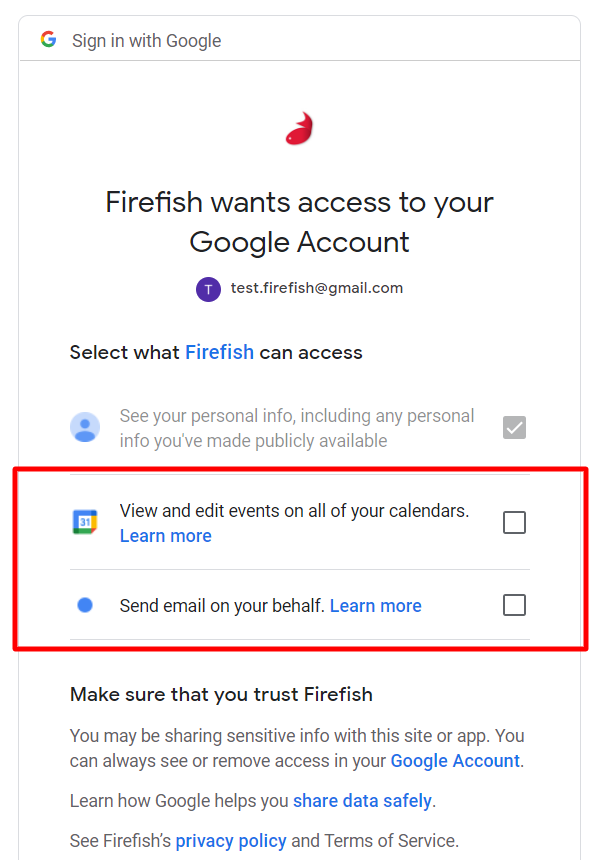
- Once authorised, you will return to Firefish.
- At the bottom of the page, enter your email address into the Send Test Email To field and click Test & Save.
💡Top Tip: Calendar and task sync options appear after a successful connection. You can enable these for automatic diary management.
Set up with another provider
- Navigate to Hello > My Integrations
- Go to Email Settings.
- Add your email password or app-specific password if required.
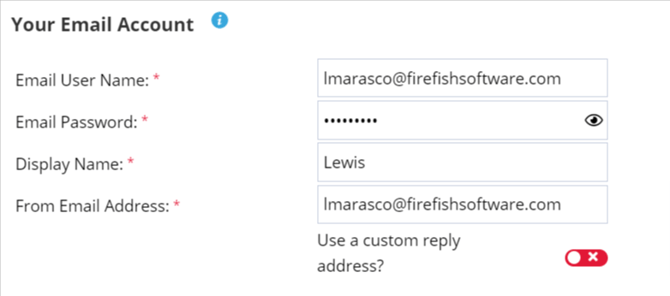
- At the bottom of the page, enter your email address into the Send Test Email To field and click Test & Save.
Testing and confirming connection
After clicking Test & Save, you should see a “Completed Successfully” message confirming connection to your email was successful.

You can now send emails directly from Firefish using your connected email account.
Troubleshooting and common issues
If your email does not connect successfully:
- Try logging out of your email account and signing in again via an incognito/private browser.
- Ensure the email account is not an alias or shared mailbox.
- Check your organisation’s security settings to allow third-party integrations.
Still stuck? Check our troubleshooting FAQs