System Email Settings
Set up your System Email Settings to connect Firefish to your Email Accounts
Your Firefish System Email Settings allow you to connect your whole Firefish system to your email Service and is used to send out automated emails. Setting this up also allows individual users to create their own personnel email settings.
System Email Settings send all the automated, generic emails from the Firefish such as your Application Acknowledgements, Job Alerts, GDPR Emails and Registration Emails.
As these are generic emails from your company rather than a specific user, we'd recommend setting these up with a generic email account such as hello@ or info@
Microsoft 365
1. Start by going to Settings > Integrations > System Emails.
2. Select Microsoft 365 from the Email Service options:

3. Click the Login button on the right hand side - you'll be redirected to Microsoft's sign in page. Once you have completed the sign in steps there, you'll be automatically redirected back to Firefish and your login will be authenticated:

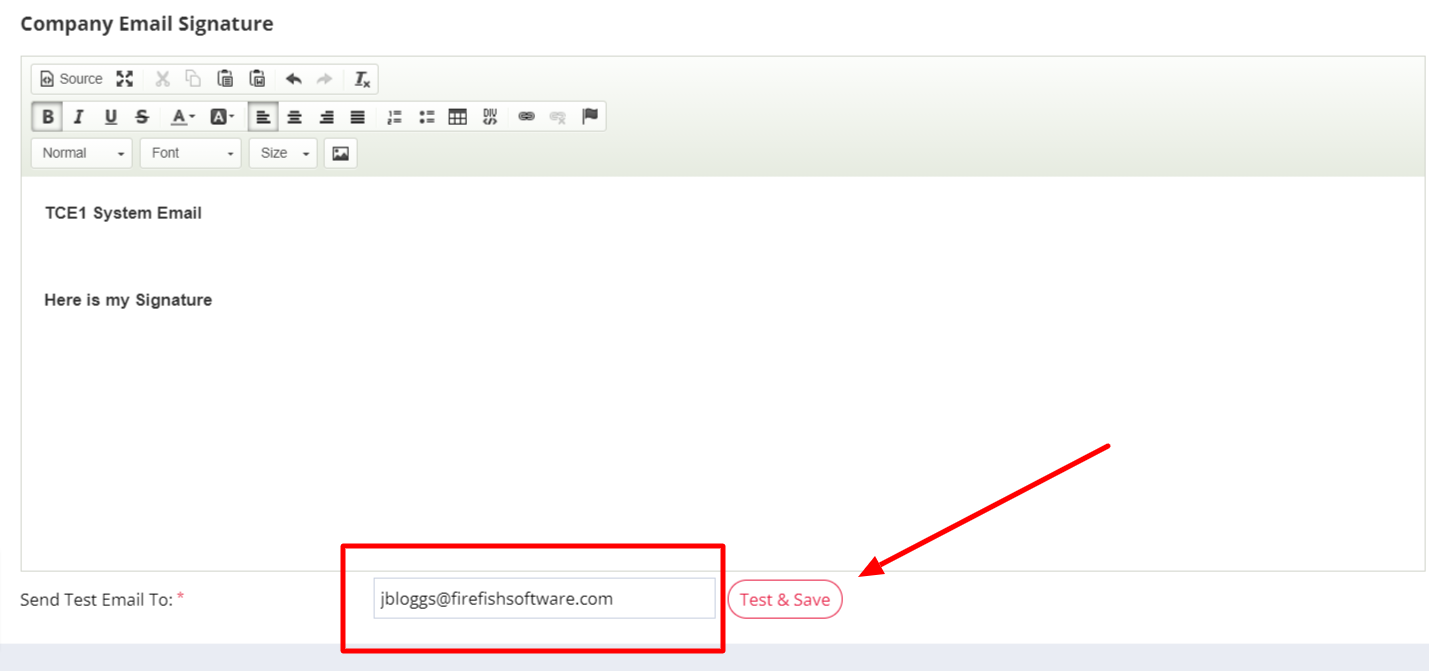
4. Now set up your signature, enter an email address in the space provided and click Test and Save. This will generate a test email for you and also save your Email Settings in Firefish!

Gmail
1. Start by going to Settings > Integrations > System Emails, then select Gmail as the Email Service options:

2. Click Sign in with Google - you'll be redirected to Gmail's sign in page.
You'll then be prompted to select the account you wish to use:
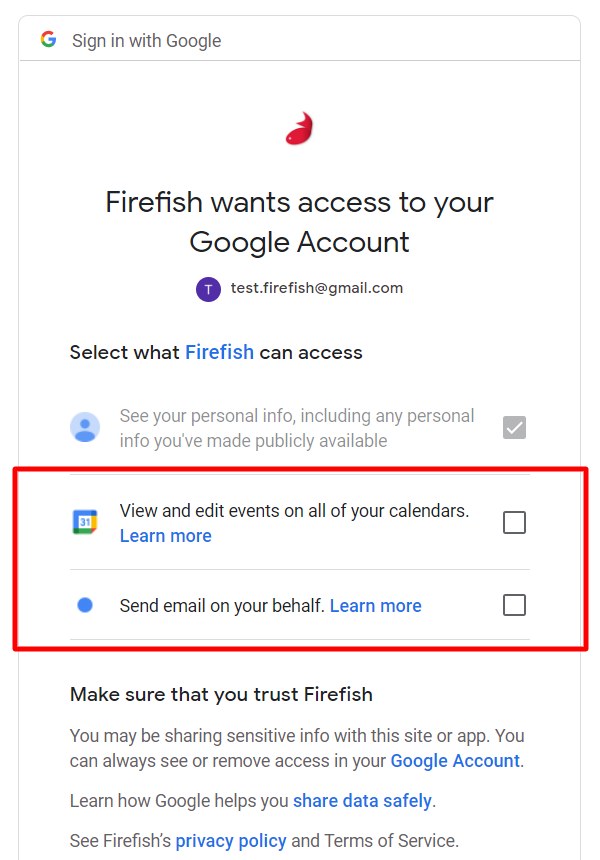
Ensure you give Firefish access to the ALL permissions to ensure you can use Email and Calendar functionality within Firefish:

Once this is done, click Continue - You'll be automatically redirected back to Firefish and your login will be authenticated.
4. Finally set up your signature, enter an email address in the space provided and click Test and Save. This will generate a test email for you and also save your Email Settings in Firefish!
I'm using an SMTP server
This option would be used when using emails servers administered from domain registrar companies such as Go Daddy, Ionos or 123 Reg.
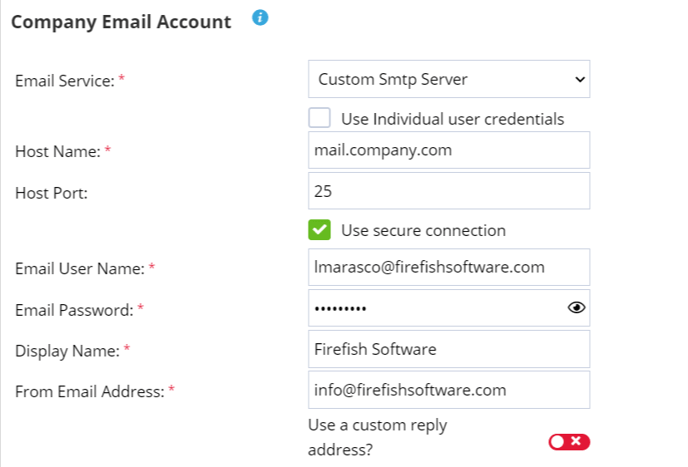
1. Click through Settings > Integrations > System Email then select Custom SMTP as the Email Service.
If you have multiple users or you’re using a generic email for the company account and a different for your own, make sure you tick to use individual user credentials so all users can set up their personal emails.
2. Enter your host name (usually something like mail.companyname.com or smtp.123reg.com)
3. Enter the host port number. The most common ports are 25 or 587. Use secure connection is usually unticked when using port 25 and ticked with port 587. If it fails test, try the opposite combination to what you tried first.
4. Pop in your email user name and password for your email account (different to your Firefish login details).
With SMTP accounts you can choose the Display name, that’s the name that appears in the receiver’s inbox as well as the from email address, the email address you want to display as having been sent from.
5. Now set up your signature and save your settings!
Test your email settings
Now it's time to check that everything has been set up correctly!
Enter the email address you'd like to send your test email to, then select Test & Save Settings to make sure you've got the correct email settings. If you have, you'll receive an email to the address entered, which will also show you how your email signature looks.

If the test fails, check out our Email Troubleshooting Article.
