
Contents
Navigating to On Assignment
You can access the On Assignment page in a couple of ways:
- Open the Opportunities menu and select On Assignment.
- Or use the Current Contracts quick link on your dashboard.
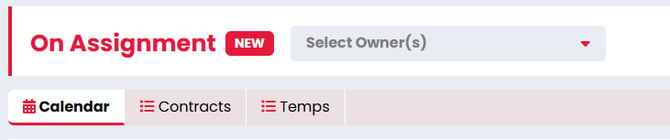
Calendar View
The On Assignment calendar is your planning grid where you plan visually - seeing every available candidate, laying their shifts and placements out across time.
The calendar is candidate-centric: each candidate appears once, no matter how many jobs or companies they're working across the period. That keeps the view clean and lets you see a person's whole week at a glance, rather than the same name repeated row after row. 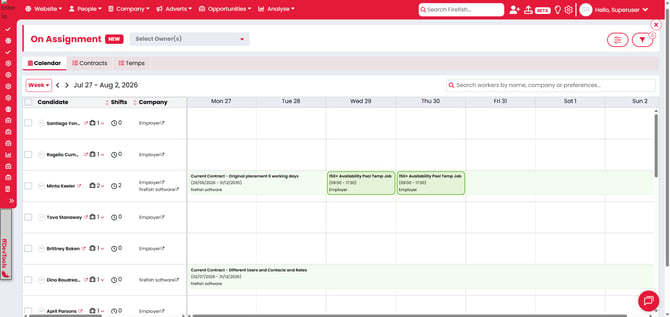
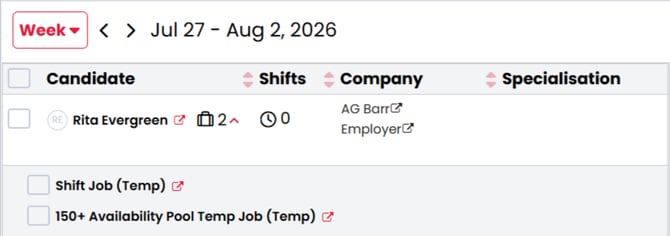
When a candidate has more than one job/company association, the Candidate column shows an accordion you can expand to see each one. This is also how you pick out a specific job when you're selecting candidates for a bulk action.
Actions from the calendar
The calendar isn't just for looking — you can act on candidates without leaving the view:
- Open a shift or placement's details - select any existing entry on the grid to review or manage it individually in the side panel.
- Bulk actions - select candidates (and specific jobs via the Shifts accordion) and email, message, roll on or terminate them together.
- Add a status - set an availability status straight from a candidate's date cell.
Contract List
If your agency uses the contract workflow, you'll see a tab for your contract placements. 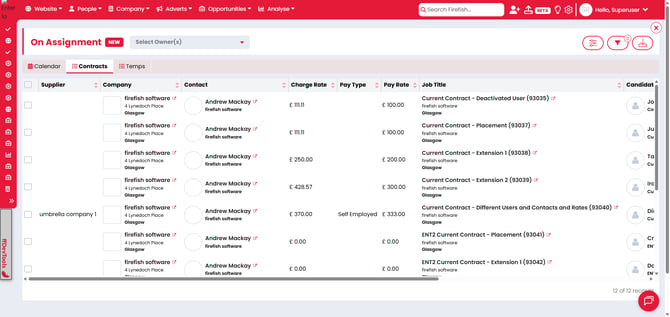
Each row on the contract list represents a single placement, with the candidate, company, owner and pay details laid out across the columns. You can select, reorder and filter columns exactly as you're used to.
Within the contract list view you have the option to perform the following bulk actions:
- Message
- Roll On
- Terminate
Temp List
If your agency uses the temp workflow, you'll see a new Temp tab.
The temp list works a little differently from the contract list: instead of one row per candidate, you get one row for each shift a candidate is booked on. So a candidate working two shifts on the same day appears on two rows — one per shift — which makes it easy to see exactly what's happening and when.
To keep the list focused on what matters right now, it opens with two filters already applied:
- Date is set to Today, so you're looking at today's shifts.
- Booking status is set to Confirmed, so you only see shifts that are locked in.
Exporting your list
If you have the export permission, you can export the current list to work with elsewhere.
- Set up the columns and filters so the list shows exactly what you want to export.
- Select Export from the toolbar.

If you don't see the Export option, you don't currently have the export permission — your system administrator can enable it for you.
Configuring the columns
The columns available in both the calendar and list view are yours to shape. Select the 'Edit Columns' option from the view you're on to choose which fields appear and in what order.
- Select Edit Columns. The panel shows your current columns in the order they appear on the grid.

- Search for a field, then tick it to add it.
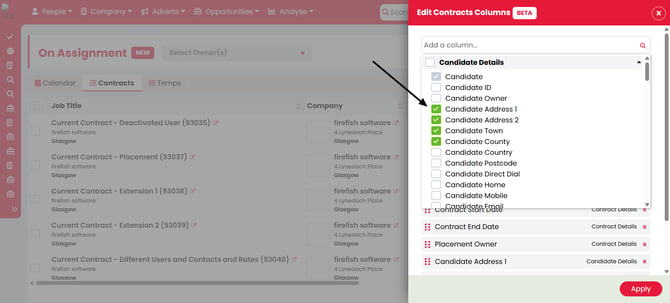
- Drag the fields into the order you want.
- To remove a column, untick it.
- Select Apply to update the list.
Superusers also have the option to save a column configuration that will be the default for all users.
The Job Totals columns available on the calendar view are calculated live from the active shifts and placements in the period you're looking at:
- Shifts counts the candidate's active shift bookings.
- Jobs and Companies count how many distinct jobs and companies they're working across.
- Hours and Days sum the time from their shifts and placements.
- Pay, Charge and Margin show the summed financial totals for any Contract placements.
Note: List and calendar columns are separate, adding columns to one list view won't touch anything you've set up on the calendar or other list view.
Filtering
Filters narrow down to the candidates, jobs and dates you're planning around. Select Filters from the toolbar to open the Filters panel.

The available filters are based on the columns you've chosen so the more you tailor your columns, the more you can filter.
Quick filters and the Advanced Filters panel work together: applying both combines the criteria rather than replacing one with the other.
On the calendar view Filtering affects both what you see on the grid and the Job Totals:
- If a filter removes some of a candidate's shifts or placements, the candidate stays on the calendar and you'll see only the entries that match.
- If a filter removes all of a candidate's shifts or placements and there's no other reason for them to appear, the candidate drops out of the view.
Note: List and calendar filters are separate, clearing filter from one list will not update anything you've set up on the other list or calendar view.