Create and edit a formatted CV from an original CV in your CRM.
You can easily create and edit a formatted CV in Firefish so you're confident that your candidate CVs always look great before you spec them out to a client.
![]()
You can create a formatted CV from anywhere you see the CV button. This includes candidate records, candidate searches and to do lists.
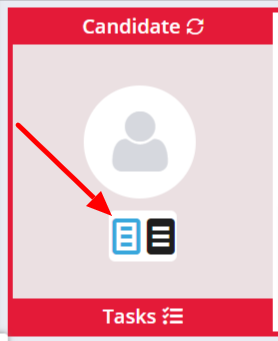
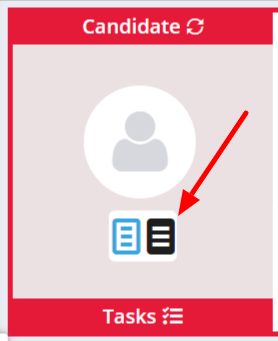
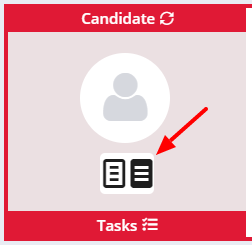
You can edit a formatted CV from anywhere you see the black CV button:
Set up user permissions
If you're a Super User, you can choose which users can edit a formatted CV over at Settings > User Management > User Permissions.
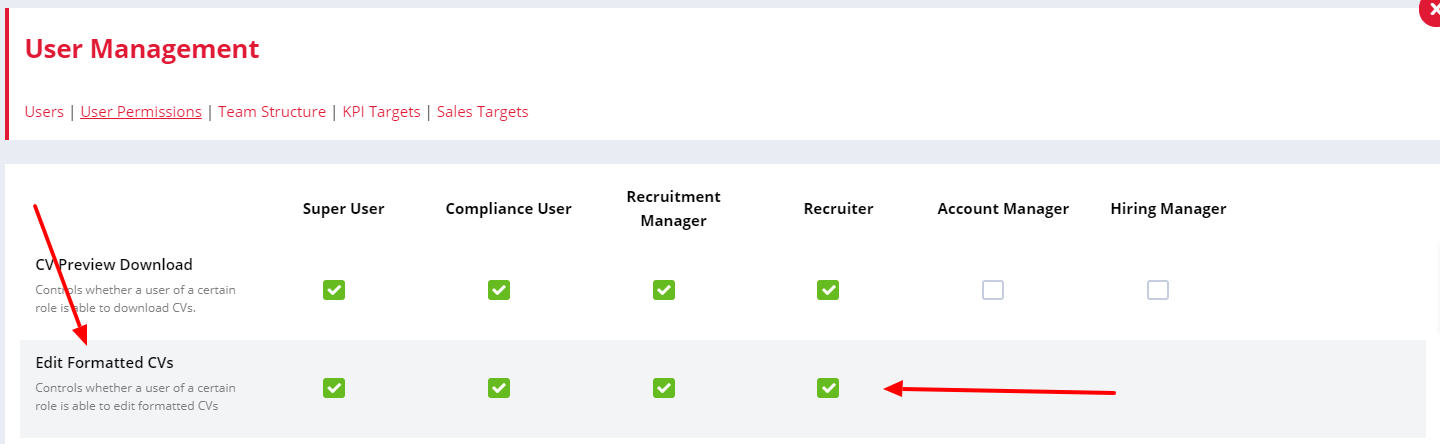
Tick or untick the relevant boxes to control who should be able to edit a formatted CV.
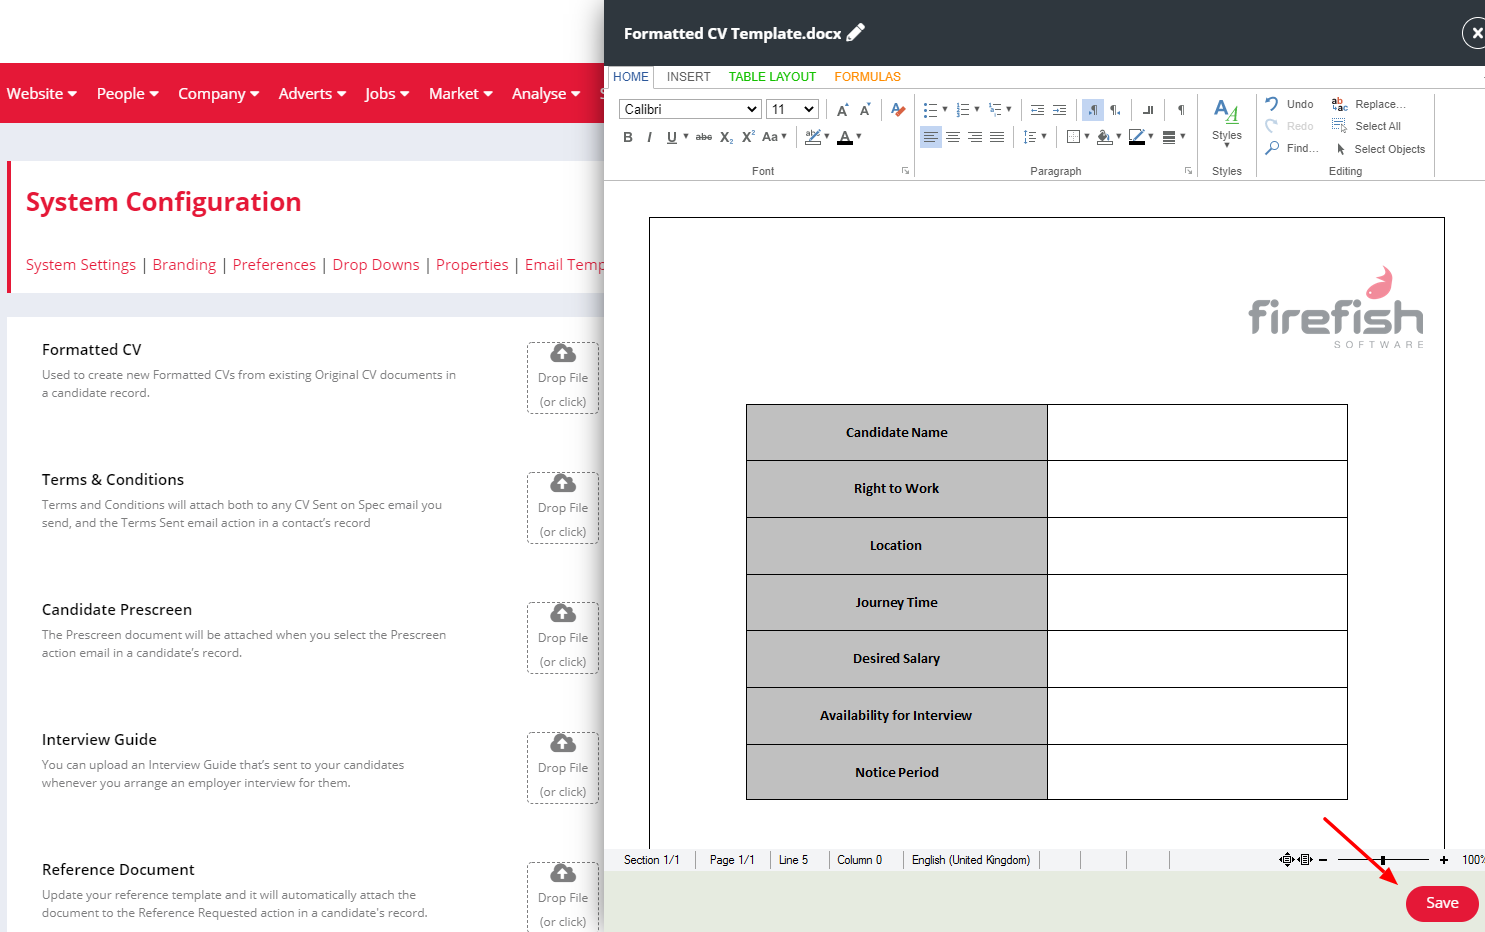
Uploading your Template
Before creating a formatted CV, you'll first need to upload a document that will be used as a template. For best results we recommend uploading in word document format.
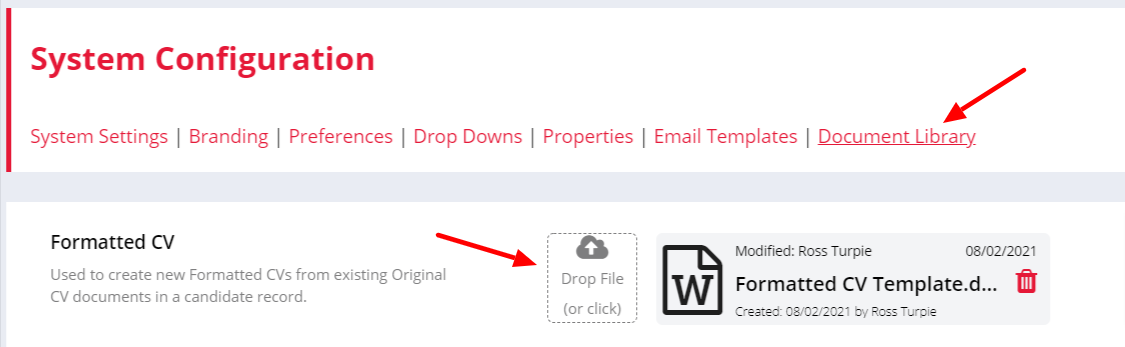
A Super User can upload a template document via Settings > System Configuration > Document Library.
To upload a new document you can either drag and drop into the Drop File icon or click on the icon to choose the document from your computer.
If you need to make any changes to your template after uploading, you can click on the document to open and make your changes. Here you can also edit the document name by clicking on the pencil icon in the header.
Remember to click Save before leaving the page to ensure your changes are not lost.
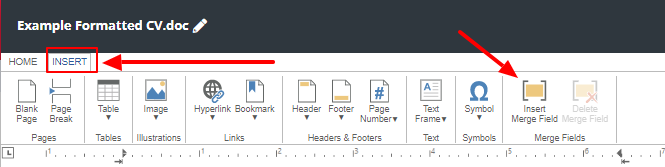
Adding merge fields to your template
You can add merge fields to the Formatted CV template.
Any merge fields you add will automatically be replaced with the relevant candidate info whenever a recruiter Creates a Formatted CV.
To add a merge field click on the Edit button, and then on the Insert tab.
Next, click on the location in the document where you'd like to add the merge field, then click the Insert Merge Field button.
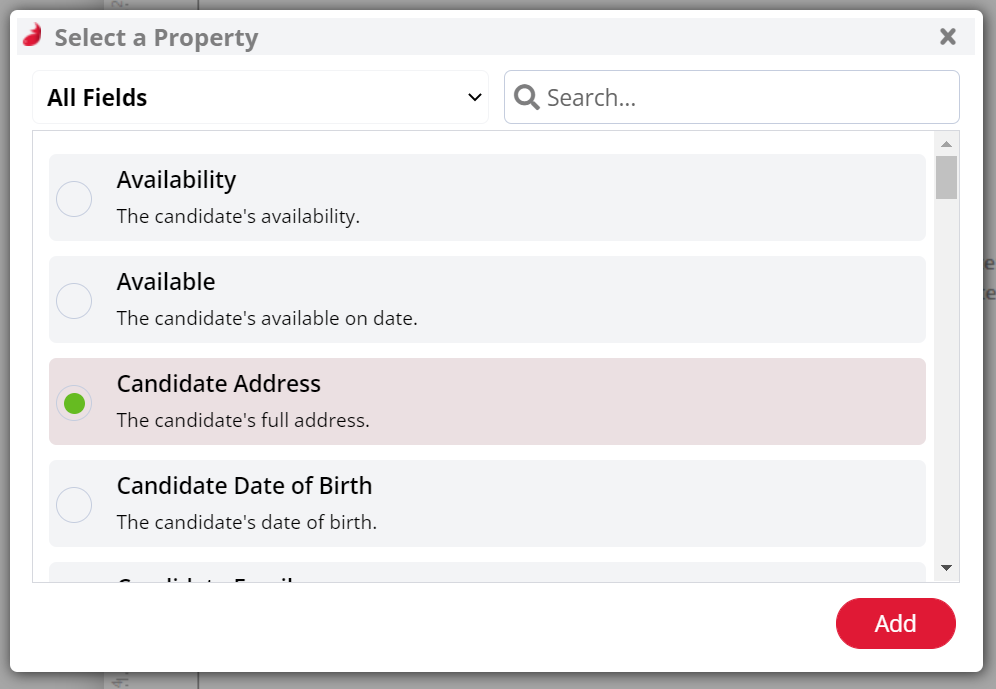
This will open up the pop-up below that allows you to select from a range of candidate and branding information.
Just select the one you want and click Add to insert it into the template.
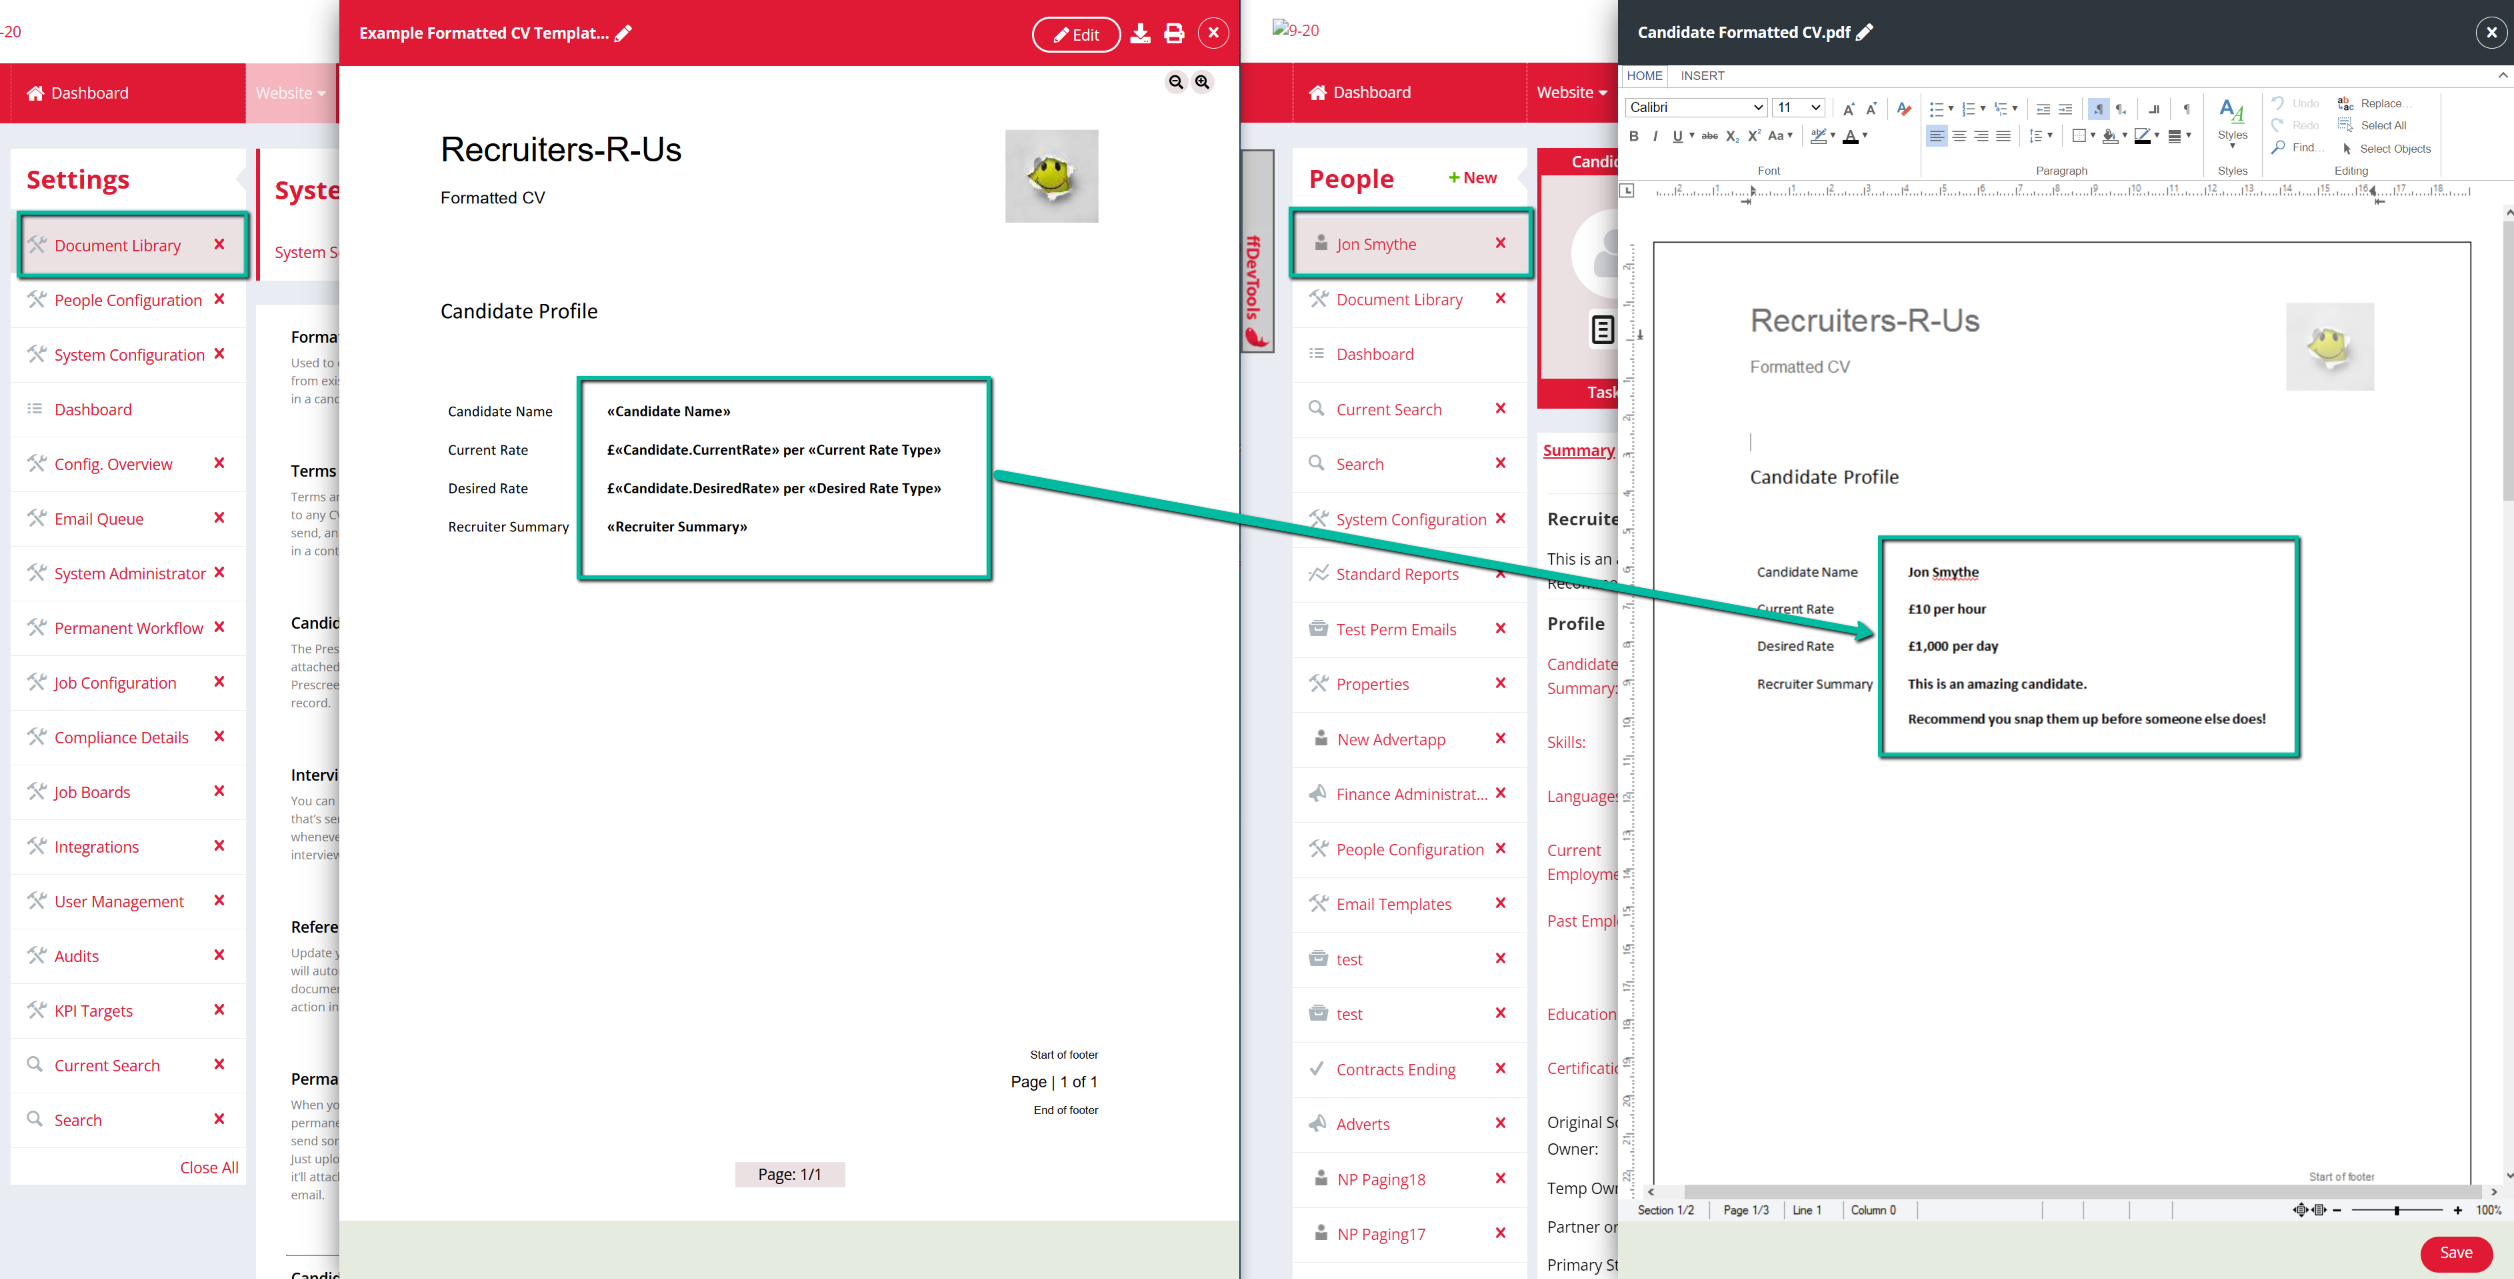
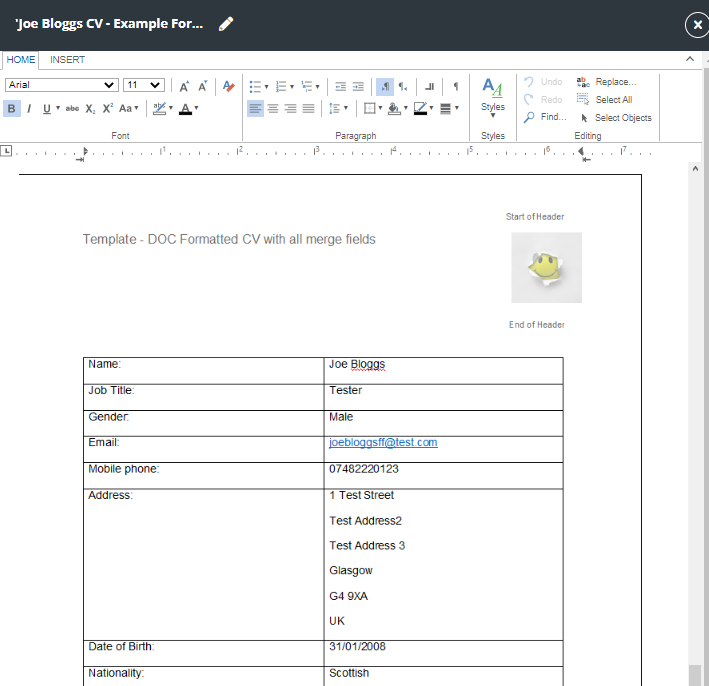
The image below shows (on the left) how your template will look when you've added merge fields to it, and (on the right), how those fields get replaced with the candidate info whenever the recruiter creates a formatted CV for them.
Creating a formatted CV
Now you have a formatted CV template uploaded, you can create a formatted CV when previewing a candidate's original CV throughout the system.
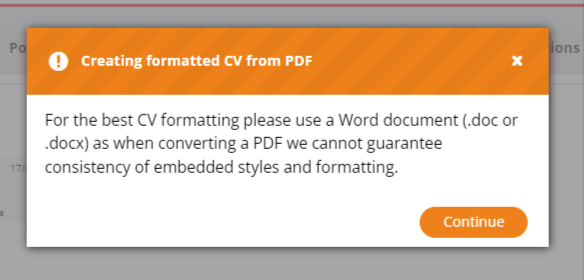
Note: We do recommend formatting a CV from an original CV that is a Word document (.doc or .docx filetypes). As .PDF files are not designed for editing, we cannot guarantee consistency of embedded styling, spacing and formatting. When attempting to create a formatted CV from an original PDF, you'll see this notification message as a reminder:
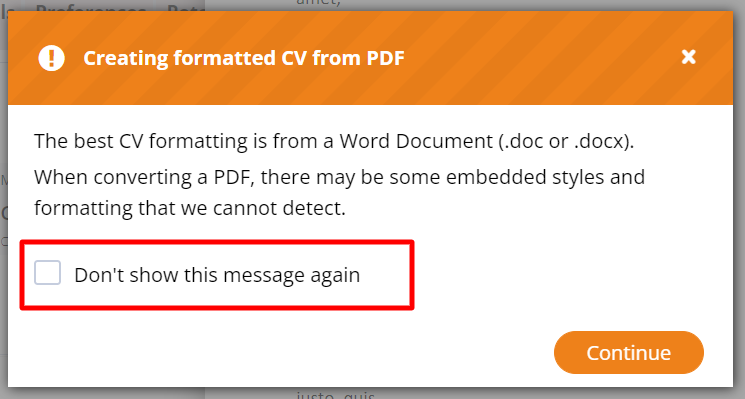
If you tick the highlighted checkbox, you won't see this message displayed again.
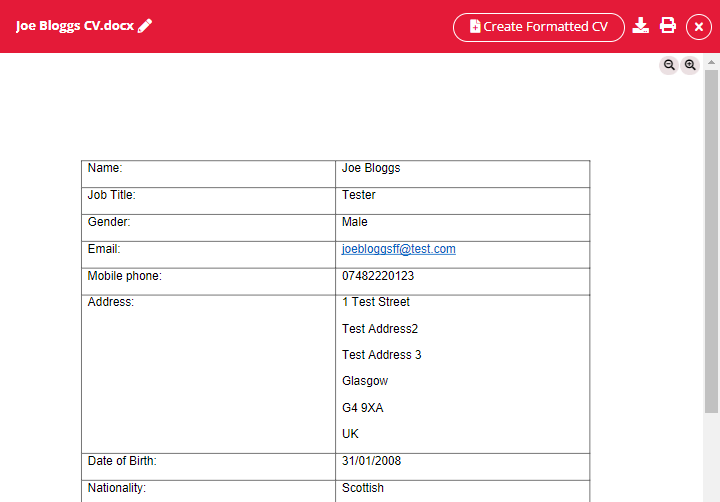
Providing user permissions allow, you can click the 'Create Formatted CV' button in the header of the CV preview:
Clicking the 'Create Formatted CV' button will generate a new formatted CV document - this will contain the header and footer from your formatted CV template as well as the main body content from both your formatted CV and the candidate's original CV.
All font styles will be pulled from the original CV document.
While in edit mode, you can make necessary changes to the candidate's formatted CV before clicking 'Save'.
You can also edit document name by clicking on the pencil icon in the document header.
The new formatted CV will be saved in the candidate's record - the file name will be a combination of the Formatted CV template document and the candidate's original CV. The file type of the new formatted CV will be saved as PDF.
Uploading a formatted CV
You also have the option to directly upload a formatted CV if you've already created this out with Firefish.
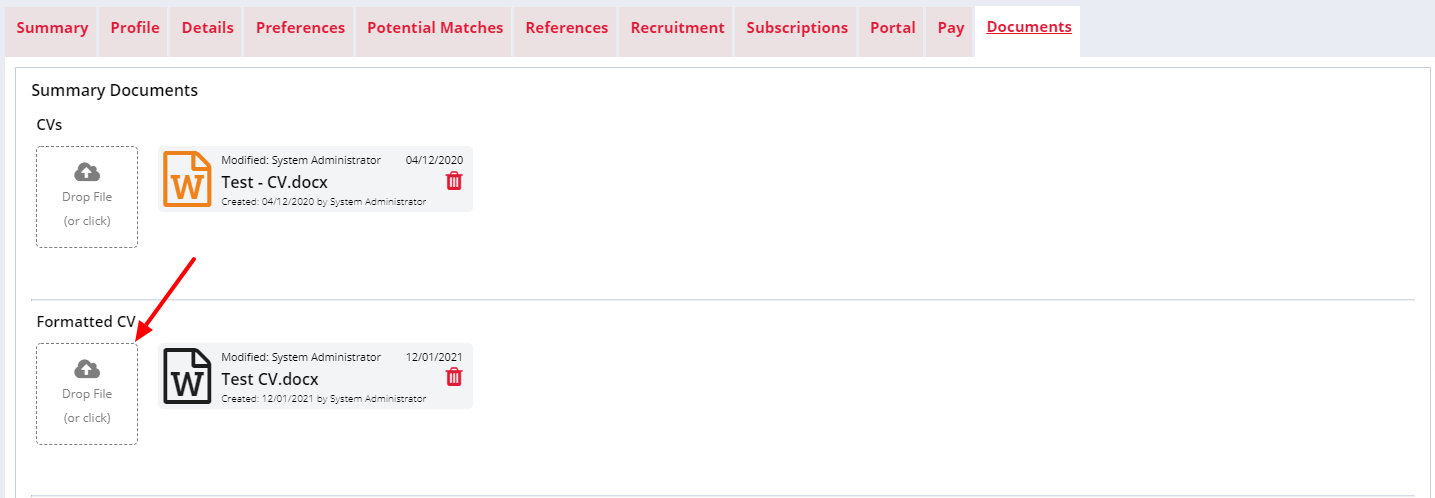
Go to the Documents tab on the relevant Candidate record and you will see a Formatted CV section.
Here you can upload the Candidate's CV if the relevant one isn't already on the record by clicking the upload button as shown below:
Once a formatted CV has been uploaded, you can edit the CV using the black CV icon:
Editing a formatted CV
When viewing a candidate's formatted CV, click the 'Edit' but to make any changes.
Please note: You will not be able to edit a formatted CV on mobile - this is a desktop feature.
Once the formatted CV has loaded in Edit mode, a tool bar will appear at the top of the panel so you can make amendments to the formatted CV.

You can make most changes you can make in a Word Doc. For example, you can change the font, font size, bold or underline text and change the text colour.

The Insert Section also allows you to add blank pages, tables, images, shapes, hyperlinks and charts.
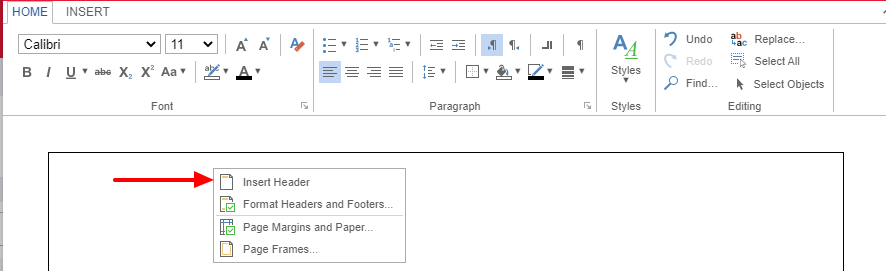
You can also add a Header or Footer in the Insert section by clicking Edit Header or Edit Footer:

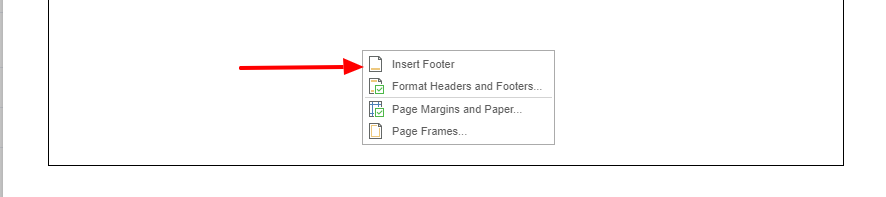
Another way you can add a Header or Footer to a formatted CV is to right click at the top or the bottom of the page and select Edit Header or Edit Footer:
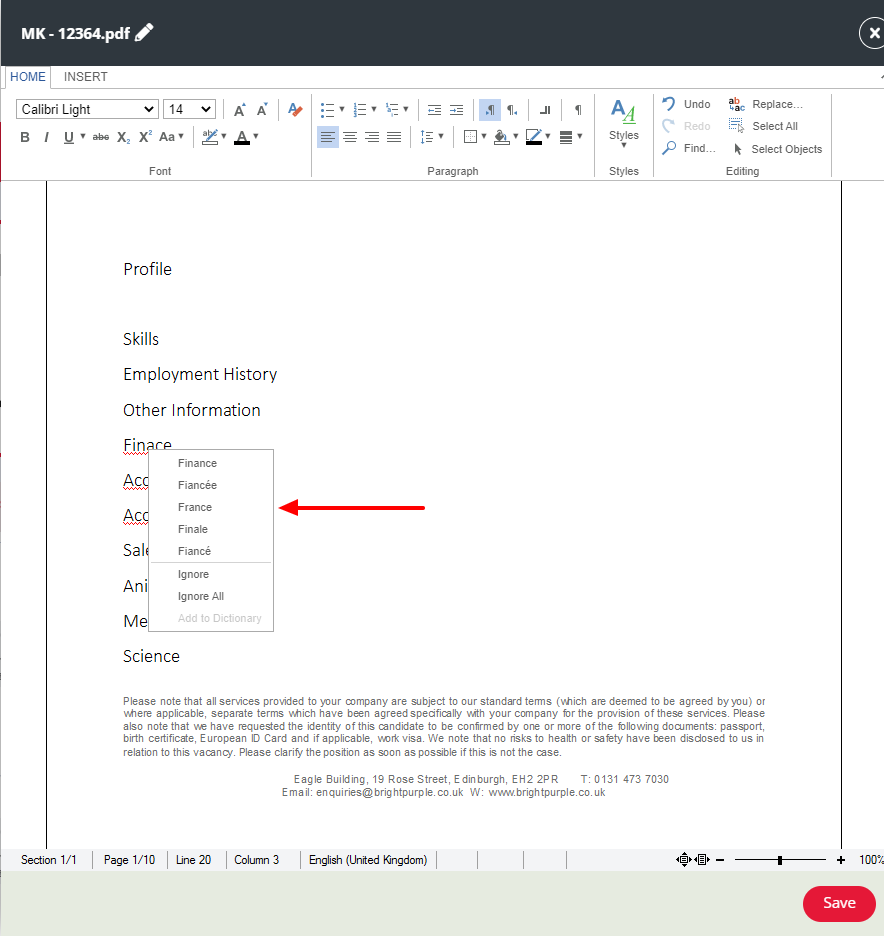
When editing the Formatted CV our Spellchecker will look to see if a word(s) is underlined with red this means that this word has been misspelt.
To view the spell checker suggestions right click on the word which will give you the option to correct the spelling, ignore it or ignore all the word(s).
Click the Save button at the bottom of the panel to update the document with your changes.

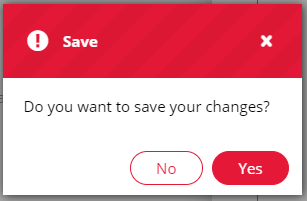
If you click the cross next to the Save button without clicking Save first, you'll get a prompt to let you know your changes will be lost.
Edit formatted CV - Things to know
Formatted CV’s PDF Reminder
As PDF documents aren’t designed to be editable, users may experience unexpected formatting changes when using the Create Formatted CV feature when the original candidate CV is in PDF Format.
As this is a limitation with the document type itself; we have added a notification modal that will be shown to a user whenever they attempt to create a formatted CV from an original PDF:
CV button is greyed out
If you try to create a Formatted CV but the Create Formatted CV button is greyed out, this means the document cannot be edited.
The file types you can edit in this feature are:
-
.DOCX
-
.RTF
-
.DOC
-
.PDF
Excluded file types:
-
.TIFF
-
.TIF
You can solve this issue by simply re-saving the document as one of the accepted file types in the list above and uploading again.
Connection lost
If you see the error message shown below, something has stopped the connection between the browser and server (this is usually to do with an internet connection).
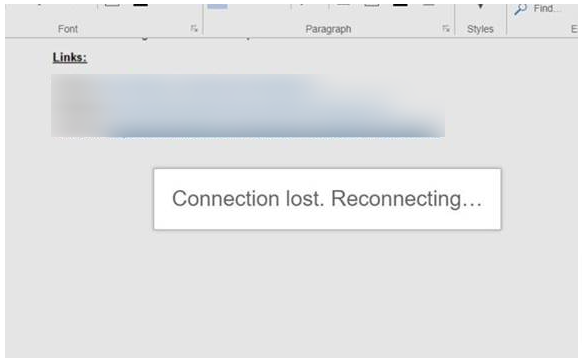
The text control editor will try to reconnect automatically. If that doesn't fix the problem, you'll need to close the side panel and reopen it again.