Note: The new Timesheets feature is currently in early access Beta and available to a select number of users. If you're interested in taking part in the next round, get in touch with your customer success manager.
This guide follows the weekly process for agency users. For an introduction to statuses and the overall workflow, see Getting started with Timesheets. Clients can use Review & Approve Timesheets - Employer Guide .
In this guide
- Find and review the week's work.
- Create missing Timesheets.
- Record worked time and rates.
- Add supporting documents.
- Send emails or messages to candidates & contacts.
- Send for approval and follow up.
- Approve or reject in Firefish.
- Correct and resubmit.
- Check history and saved evidence.
Find and review the week's work
- Open Timesheets in Firefish.
- Choose the working week and check the dates shown.
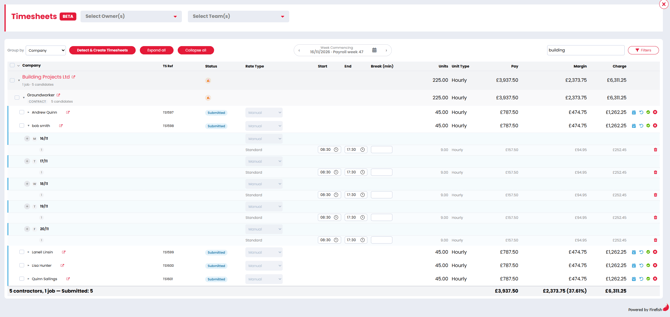
- Choose a view, then use search and filters to find the work you need.
- Expand the relevant groups and Timesheets to review their daily entries.
The week follows your agency's configured start day, which may differ from Monday to Sunday.
| View | Useful for |
|---|---|
| Company | Reviewing a client's work, with Jobs and candidates underneath. |
| Parent Company | Reviewing Companies under their immediate Parent Company. |
| Job | Focusing on a particular assignment. |
| Candidate | Reviewing a candidate's work across their Jobs. |
Search by candidate, Company or Job name. Filter by owner/team, Company, Candidate, Job, status or Unit Type to narrow a larger week. Ownership follows the Placement Owner for Contract and Job Owner for Temp.
Check the week, search and active filters if work seems missing. Select a sortable column heading to change the order, then select it again to reverse it.
Review an individual Timesheet
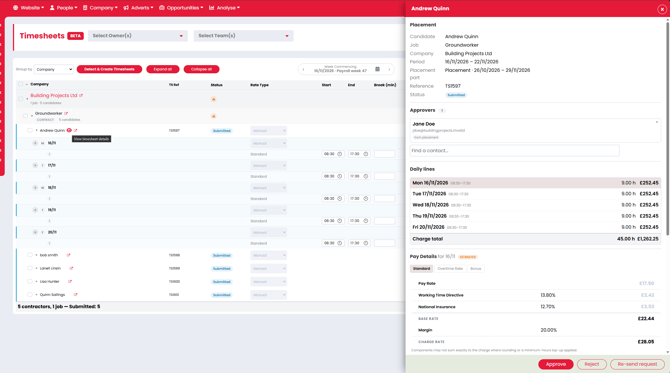
Expand its daily entries to check dates, worked time or Units, rate types and figures. Open the detail panel when you need the relevant placement details, named approvers, documents or history.
Closing the panel returns you to the same week, view and expanded groups.
The list can show expected work before its Timesheet is created. A not-created entry is different from an existing blank Timesheet.
Check totals and bulk selections
Read totals alongside the selected week, filters and subtotal labels so you know which work is included.
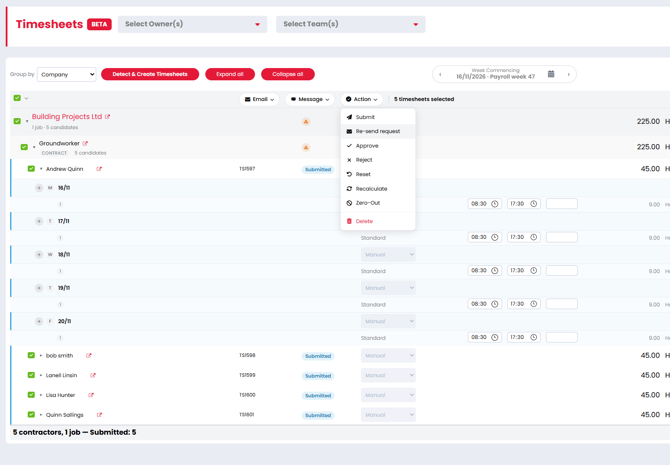
Tick individual Timesheets or use a group selection, then check the selected count before an action. A group selection or All includes every matching Timesheet in the selected week, including records beyond those currently visible.
After a bulk action, review completed and skipped records and their reasons. A previous selection does not guarantee every record is still eligible when the action runs.
Create missing Timesheets
You need Create & Edit Timesheets. Check that the relevant placements or bookings cover the dates you expect, then:
- Choose Detect & Create for the week.
- Choose from the creation types your agency has enabled.
- Review the proposed work and any messages, then confirm.
- Check the resulting Timesheets and daily entries.
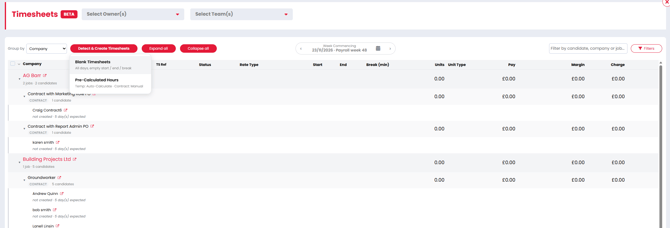
| Type | What is prepared |
|---|---|
| Blank | Daily entries with values left for completion. Contract dates follow the Placement part, including applicable weekends; Temp has an entry for each detected shift. |
| Pre-calculated | Entries using the relevant placement or shift information. Temp normally uses the hours and rates already recorded against its shifts. |
Creating does not submit for approval. If your agency allows blank submissions, an approver with editing access can complete the entries later.
Why can there be two Contract Timesheets in one week?
Each Placement part has its own Timesheet. An original part ending Wednesday and an extension starting Thursday have separate Timesheets for their respective dates and rates.
For Temp, a candidate's shifts for the same Job and week belong to one Timesheet. Separate shifts retain separate entries.
What happens to cancelled or absent Temp work?
A cancelled associated shift remains as zero-hour Zeroed Out work. An absence is recorded as zero on the linked entry. A booking deleted because it was entered in error removes its unapproved entry. Approved and Processed work has additional protection.
Record worked time and rates
You need Create & Edit Timesheets, and the current status must allow editing. For Approved or Processed work, use the correction process.
- Expand the daily entries.
- Check worked dates, rate types, time or Units and relevant breaks.
- Make the permitted changes and save.
- Wait for the save to finish, then check the updated values and totals, including any displayed rounding adjustment.
Invalid changes are refused without replacing the previously saved values. Read the message and correct the entry before continuing.
Hours, days and blank values
Your agency chooses the hourly entry method:
- Start & End Times: enter the actual worked times and relevant break information.
- Units: enter the hourly quantity directly.
Daily rates always use Units for the number of days worked. Units can include up to two decimal places.
A blank means a value has not been entered. A valid zero counts as supplied. Required values must be supplied before either approval or rejection, even if the Timesheet was submitted blank.

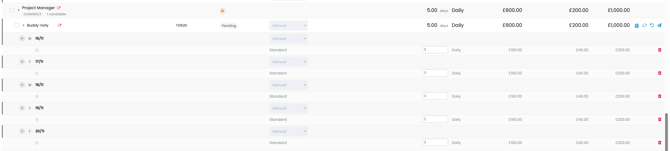
Split shifts and Additional Rates
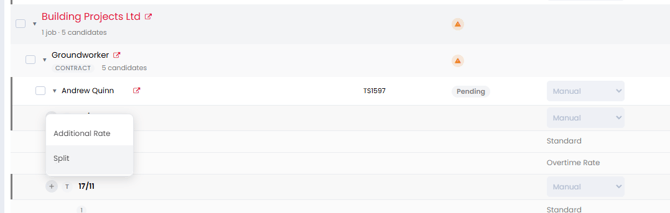
Use Split for separate shifts on the same day, such as morning and evening work. Use Additional Rate for work recorded against another available rate, such as overtime.
Check the selected rate and its unit type before recording the quantity. The same rate can be reused on another shift where it applies. Review every entry for the day; a daily total does not replace the separate shift and rate detail.
Automatic and Manual rates
Changing worked times or Units on an automatically calculated entry keeps automatic calculation active and recalculates the relevant rates for the revised work.
Where permitted, deliberately switch to Manual before overriding a rate. A Temp override of an existing booked rate requires a reason. Changing the quantity on a Manual entry retains its chosen rate and updates the total.
If no usable Temp rate applies, read the reason and resolve the rate card or booking. An ad-hoc Manual rate is not a missing-rate fallback.
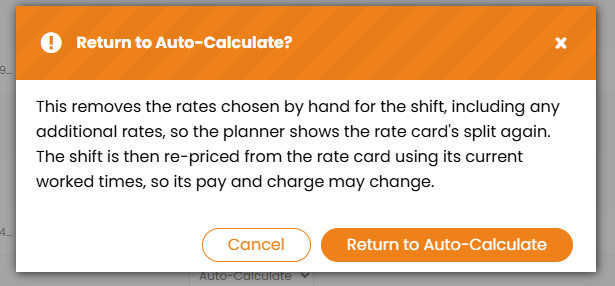
Returning to automatic calculation shows a warning. After confirmation, the rates are calculated from the currently entered worked times or Units, rather than restoring the original scheduled hours. If calculation fails, the existing Manual values remain and the failure is shown.
Temp rest warnings
Actual Temp hours can be saved with an inline rest-conflict warning. Review the warning and keep the recorded work accurate. Planning future shifts follows its own rules.
Add supporting documents
Open the Timesheet's detail panel and document area. Use the available upload control, then check the file is listed and opens correctly.
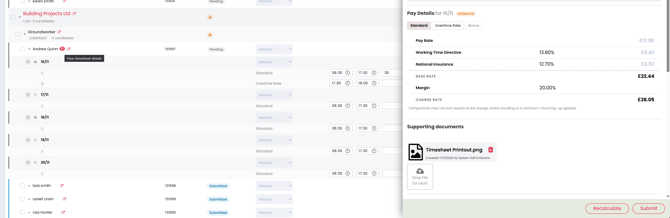
Documents are optional; their absence alone does not block an otherwise permitted approval. Users with the relevant access can add documents at any status, including Approved or Processed, without reopening solely for an upload.
Viewing, downloading and removal follow your document access and the Timesheet's status. Permission to add a later file does not grant permission to remove every saved document.
If evidence is added after work has been collected by a third party, make sure that recipient receives it through the appropriate route. Uploading a file does not guarantee automatic onward delivery.
Contacting Candidates, Hiring Managers and Timesheet Approvers
Use Email or Message to contact people associated with your selected Timesheets. For example, you might need to check recorded hours or follow up on missing information.
- Choose the working week and use filters to find the relevant work.
- Select the Timesheets and check the selected count.
- Choose Email or Message.
- Choose who to contact from the available recipient options, such as Candidates, Contacts (The Hiring Manager linked to the Temp Job/Contract Placement) or Timesheet Approvers.
- Choose an existing template where appropriate, or write your message. Check the recipients and content before sending.
- Complete the send using the usual Firefish Email or Message process.
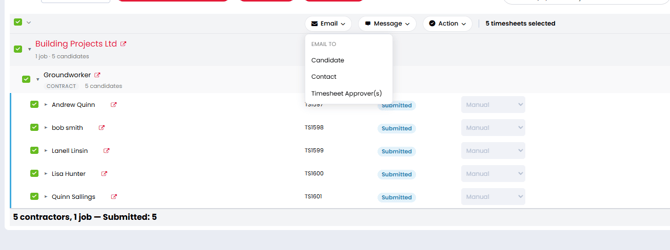
Check the recipients carefully where several selected Timesheets relate to the same candidate or client. The number of selected Timesheets is not necessarily the number of people you will contact.
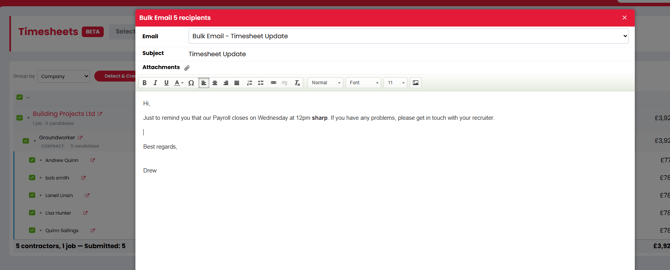
These are general communication actions. To send Timesheets for approval or issue a fresh approval link, use the submission and resubmission steps below.
Timesheet Update Templates can be set and configured in the Activities Library by navigating to System Configuration -> Activities Library -> Jobs -> Timesheets
Send for approval and follow up
Check the Timesheets are created for the right week, ready for review and have the correct named approvers. If they are blank, your agency must allow blank submissions and the approver needs editing access.
- Select the Timesheets you want to send, checking the week, filters and selected count.
- Choose Submit for approval, or submit an individual Timesheet from its detail panel.
- Review the messages and confirmation, then complete the submission.
- Check results for records not sent and the reasons given.
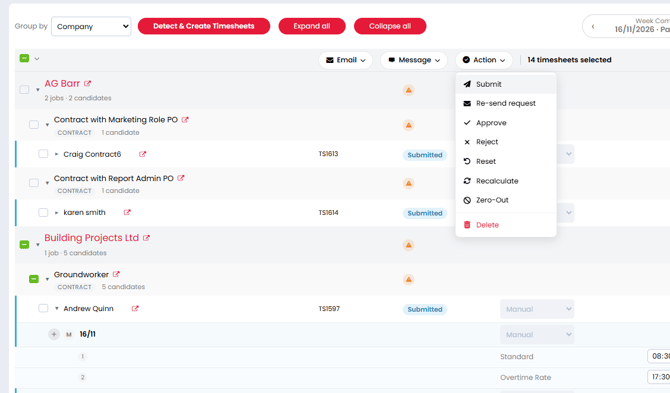
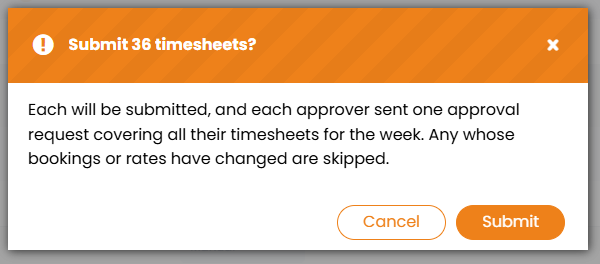
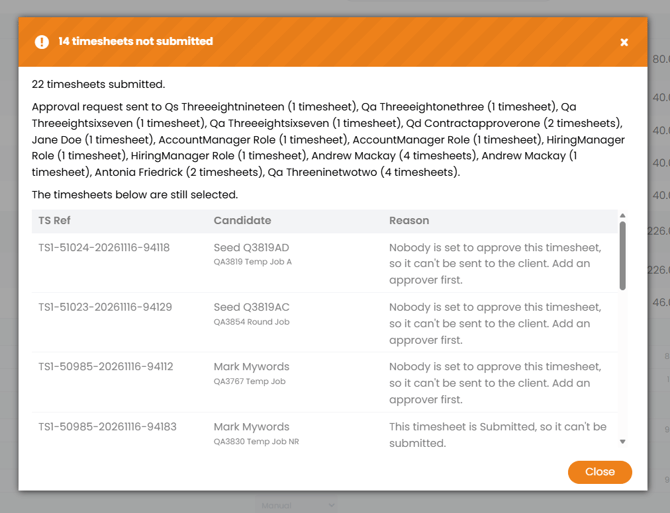
Firefish sends the named approvers a secure link for the relevant week's authorised Timesheets. They do not need a Firefish login. Requests may be grouped by approver and week.
Submit for approval releases work for review. Ordinary Email and Message actions are separate communication tools.
For changes to the recipients, follow Manage client approvers. Share the Review & Approve Timesheets - Employer Guide when a client needs help.
Placement, booking or rate changes
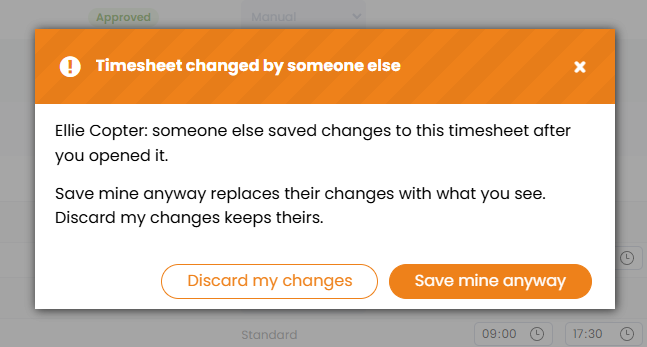
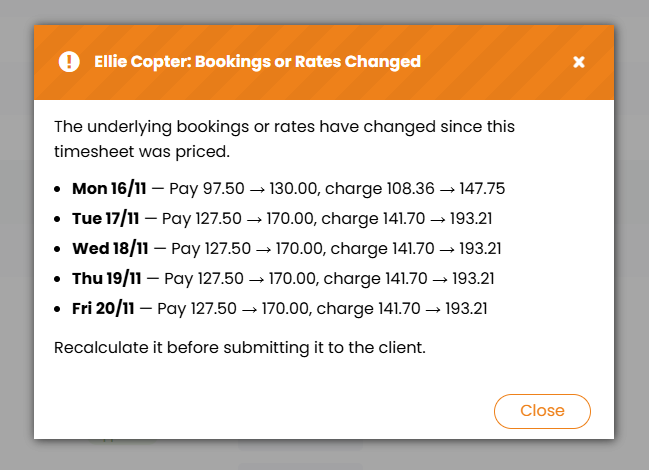
If source work or rates have changed, you'll be prompted to recalculate the timesheet prices before sending it. If someone else has updated the timesheet whilst you're on the page, you'll be warned separately and have the option to save your changes anyway.
Bulk submission skips affected records and lists the reason. Review them individually before deciding how to proceed.
Outstanding and Overdue work
Filter by Submitted or Overdue and check history before following up. Agency reminders can include an immediate reminder when submitted work becomes Overdue, or daily/weekly summaries of outstanding work.
Work must be submitted before it appears to the client or in their approval reminders. Overdue does not mean the approval link has expired. Approval remains possible while the link is valid.
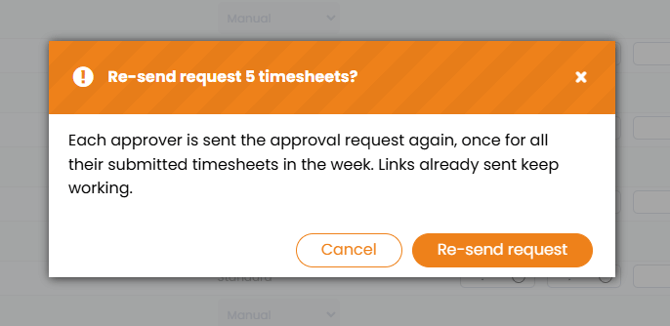
Send a fresh link after expiry
- Find the Timesheet and check the client is still a named approver.
- Resubmit it for approval, individually or with other eligible Timesheets.
- Check the submission result and history.
- Ask the client to use the link in their new email.
Links issued before Payroll Cut Off expire at the end of that week's cut-off day. A fresh link issued after cut-off expires at the end of the next Payroll Cut Off day. The old expired link stays expired.
Hours approved after cut-off go into the next payroll run. Check payment timing with your payroll team.
Internal approval must be enabled and you must qualify under the internal approval user selection. Editing permission alone does not grant approval.
Review every daily entry, required value, relevant figure and supporting document before deciding. Required values must be supplied for approval and rejection; a valid zero counts as supplied.
Approve
- Select the reviewed Timesheet or open it in the detail panel.
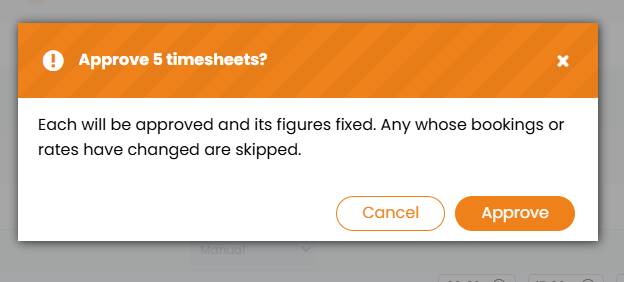
- Choose Approve and complete the confirmation shown.
- Check the approval result.
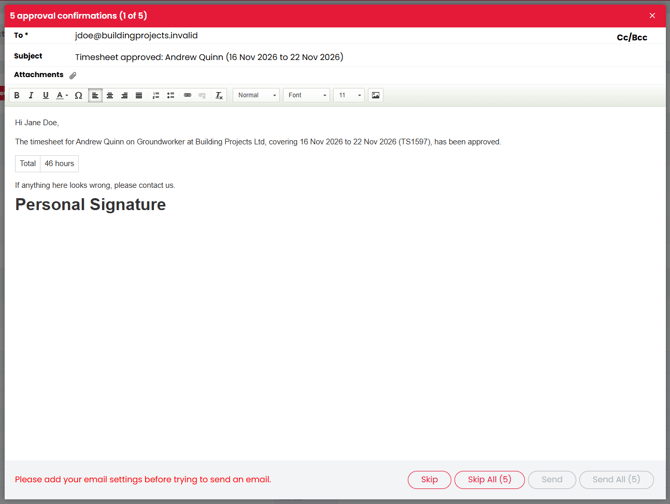
- Send or skip the internal approval email activity using your agency's process.
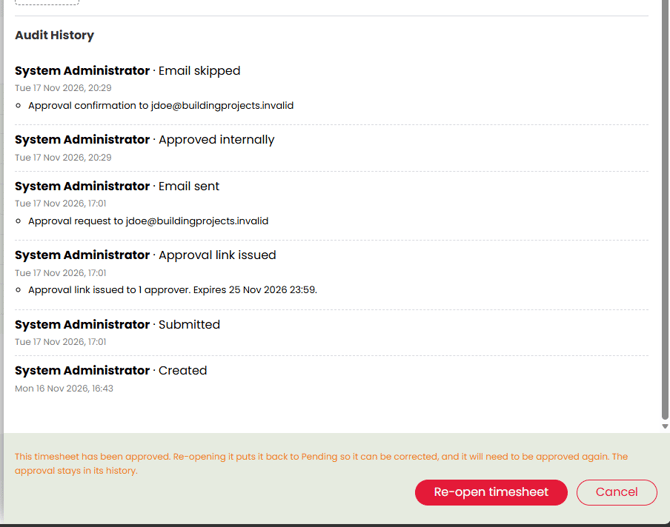
Skipping that email activity does not cancel approval. Each affected Timesheet records who approved and when, including bulk decisions.
Reject
- Choose Reject for the reviewed Timesheet.
- Select a reason, adding an explanation if you choose Other.
- Confirm and check the Rejected result.
The reason is recorded in history and the responsible recruiter is notified. Follow the correction steps below before submitting rejected work again.
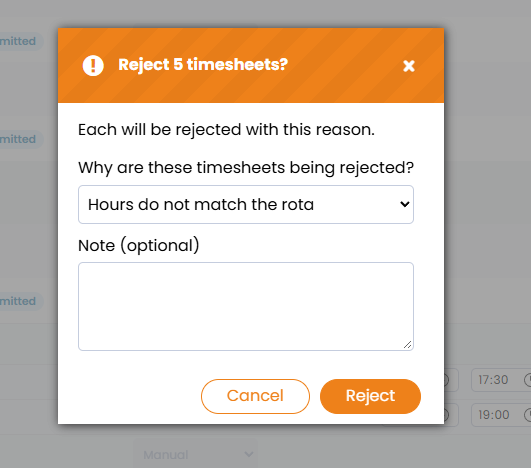
For a bulk decision, use the reviewed selection, complete the required confirmation/reason and check completed/skipped results. The same access, completeness and status rules apply to each Timesheet.
Correct and resubmit
Corrections are handled internally by permitted users. Clients cannot Reset or resubmit from an approval link.
Correct rejected work
- Review the rejection reason and history.
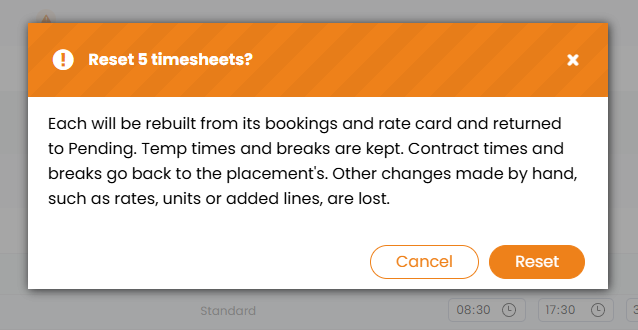
- Choose Reset and read the confirmation.
- After a successful Reset, check the refreshed entries, make corrections and save.
- Review the resulting values and submit for approval again.
Reset recalculates current source values, replaces manual changes and returns the existing Timesheet to Pending. It retains the earlier history. If Reset fails, the previous saved values/status remain, with a visible failure and recorded attempt.
Correct Approved or Processed work
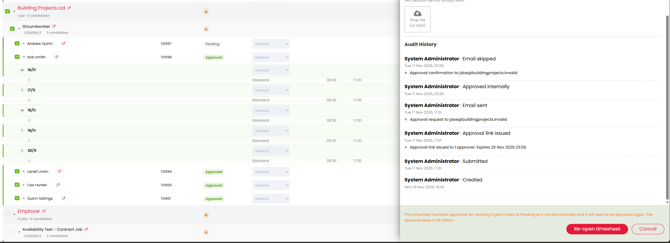
- Review the approval/processing history and why the work needs changing.
- Start the permitted internal correction action.
- Read the warning and confirm only after checking the effect. Cancel leaves the saved values and status unchanged.
- Review the result and follow any prompt to resubmit when Client Approval is enabled.
- Coordinate the corrected work with the responsible payroll or accounts colleague.
Correct the relevant existing Timesheet: the Contract Placement part/week or Temp candidate/Job/week. Do not create a correction duplicate. A correction in Firefish does not automatically reverse work already handled elsewhere.
Other pre-approval actions
| Action | Effect |
|---|---|
| Reset | Recalculates from current source, replaces manual changes and returns to Pending. |
| Zero-Out | Blanks existing rows without deleting them. |
| Delete | Removes the Timesheet, with restoration through Recreate. |
| Recreate | Restores the existing deleted Timesheet rather than creating a duplicate. |
These actions require confirmation and the relevant access/status. The pre-approval options do not grant general permission to delete or blank Approved or Processed work.
Manual Zero-Out leaves values blank. A cancelled Temp shift's Zeroed Out entry instead retains recorded zero hours.
If another user saves while you are editing, review the warning before continuing with your save or cancelling. This does not let an earlier open edit bypass approval protection.
Check history and saved evidence
Use the Timesheet history to follow submissions, decisions, reasons, changes, corrections and processing events. Check the actor, time and outcome when resolving a query; earlier decisions remain part of the record.
Open the document list for the supporting files you are authorised to view or download. Reading history or downloading a document does not change approval or processing status.