A step-by-step guide for logging offers and placements, and every step in between.
This article will walk you through every step from offering a candidate a position to logging the placement as well as what to do if you need to extend or terminate that placement.
- Making an Offer
- Offer Authorisation
- Making a Placement
- Document eSign
- Sales Figures and Splits
- Extensions
- Terminations
Making an Offer
You can make an offer from any stage of the job workflow. To make an offer, select the candidate(s) that you would like to make an offer to and press Offer in the bottom right.
A new screen will open which will allow you to enter the offer details. Any Custom Job Fields which are enabled will auto-populate with based on what you have entered on the Summary tab of the job record, but these can be changed before submitting your Offer. Once you have updated all the details you can click Confirm Offer(s) at the bottom.
Once you submit your offer, emails will be generated to send to the candidate and the contact confirming the offer details. You are able to amend these before sending, or skip them if you wish. The emails generated at the offer stage can be disabled by your Super User, and they can also enable a pop-up which will allow you to unsubscribe your candidate from future marketing emails, SMS and job alerts at this stage.
Offer Authorisation
If Offer Authorisation is enabled on offers, you can click 'Authorise' on the offer details page which will notify your Compliance User of the offer. The Compliance User or Super User will then be responsible for completing the compliance information and placing the candidate.
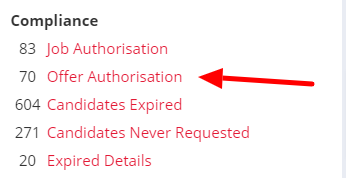
A to do list item will then be created under Offer Authorisation in the compliance section of the dashboard
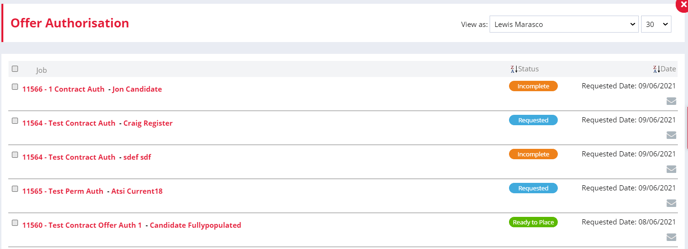
Each to do list item will contain a link to the candidate, job and company associated with each offer. You'll also see the status and the requested date as sortable columns.
The status of the offer authorisation will also show on the job record under the Offers tab.

The status will either be Requested (blue) meaning that no action has yet been taken since the offer was logged, Incomplete (orange) meaning that some compliance information has been completed but there are still some mandatory fields which need to be updated, and Ready to Place (green) which means that that all the required compliance information has been completed.
If Offer Authorisation is enabled, Recruiters won't be able to make placements, which will also be reflected in reporting.
Making a Placement
Once the candidate is Ready to Place, you can select the candidate and click the Place button at the bottom of the page.
Before the confirming the placement, you'll have a final opportunity to edit the placement details.
From this page you can make any amendments to the start date or pay if these have been negotiated since the offer was made.
For Permanent placements you can add any Offer and Contract documents to the Placement Summary.

Document eSign
Upon clicking to Confirm a temporary or contract placement, a window will open giving you the option to choose which Candidate Contract and/or Employer Contract template you want to use for this particular placement. Super Users can upload as many templates as needed within your Document Library. Find out more here.
Note: if you don't see this window it's because these template documents are disabled within your Document Library. If you'd like to use this workflow, get your Super User on the case.
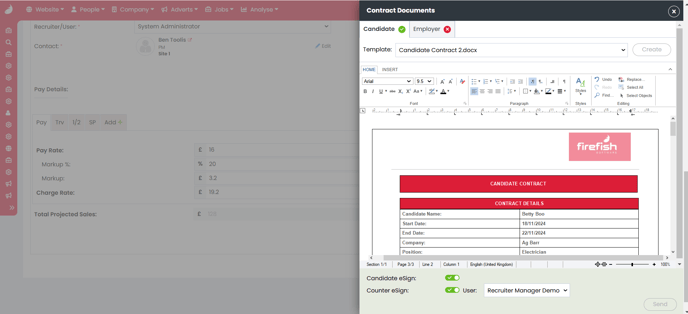
Next, pick the contract(s) that you want to use from the 'Template' drop down then click Create to generate the contract. At this stage any merge fields included in your contract template will be populated with details from the job.
You can also edit the document to make any final amendments:
If for any reason you do not wish to use a contract for a particular placement, just select the 'No Contract Required' option from the 'Template' drop down and this will mark the field as complete:
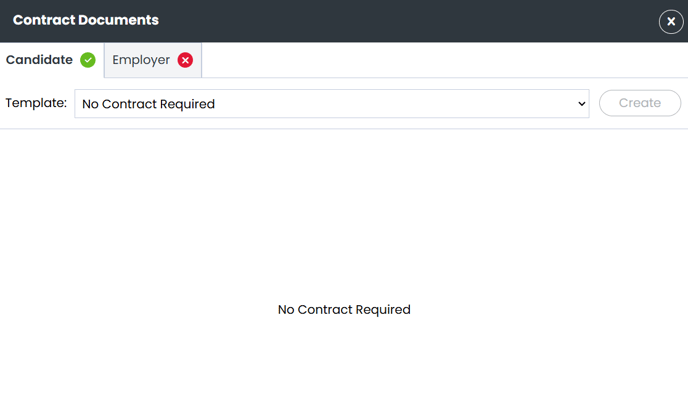
You'll also notice the red cross changes to a green tick once a contract has been completed.
You will also be able to enable your Candidate and Employer Contracts for Document eSign, allowing the candidate and contact to sign their contracts electronically. Full details on how to use this feature can be found here.
Click Send to progress to sending the placement emails. Your Candidate Contract will attach to the candidate email and your Employer Contract will attach to the contact email.
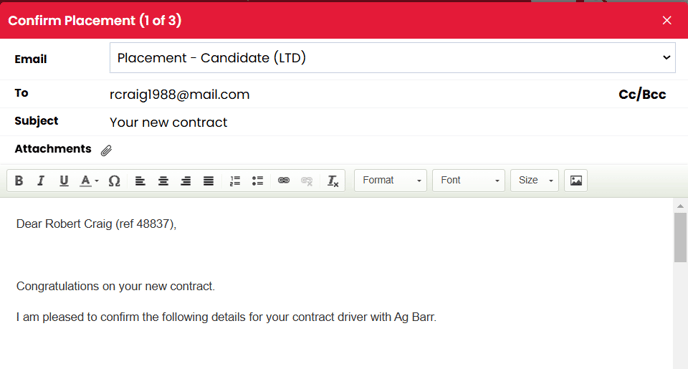
After you've sent (or skipped) the placement emails you'll be taken back to the Placement page where you'll now see the Candidate/Employer contracts saved against the placement
The Contract Template is also saved in case you want to regenerate the contracts after making a change to the placement details. This means merge fields will be populated just as they were in the first draft of the contract.
Sales Figures and Splits
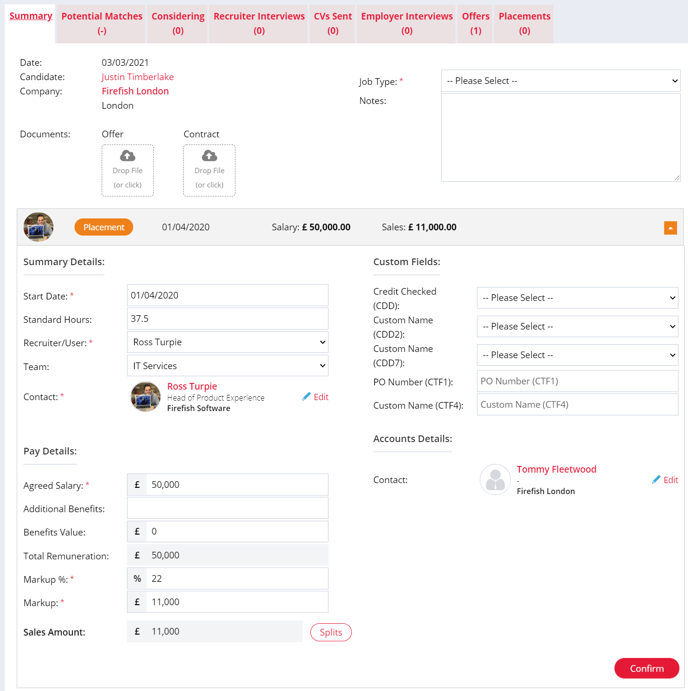
During the process of making a placement, under the Pay Details section, all fields will be auto-populated with values you entered at Offer stage and on the Summary of the job record. You can make any changes or edits to these values which are specific to the individual placement you're making:
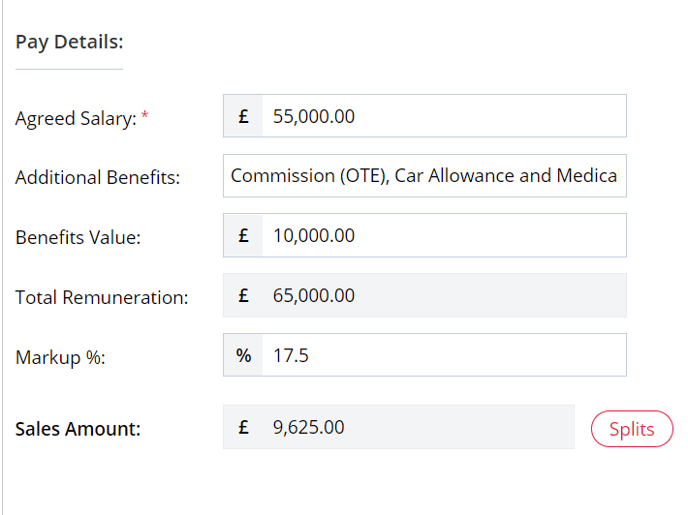
From this page you can add/edit any splits on the placement fee by clicking on the Splits button.
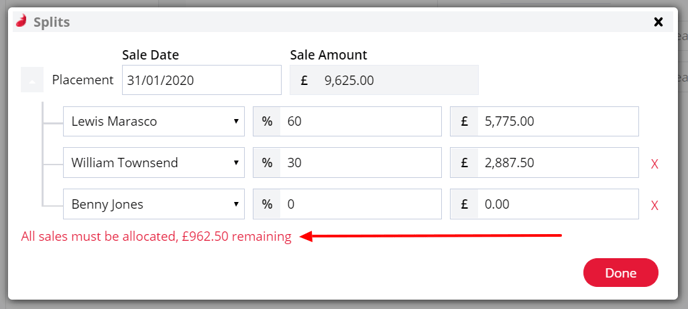
You can add splits for up to 3 Users by clicking + Add Split and selecting the user from the drop down. You can then add in either the split %, or the split £ amount and the remaining field will auto-calculate. Firefish will also remind you of any sales that have not been allocated, then once you are satisfied click Done to save and close the pop out.
Once all of your changes have been made click Confirm and your placement emails will be generated.
Extensions
You can extend a contract or temp placement via the Placement tab on the relevant Job record. Select the cog icon to the right of the candidate, then choose Extend.

This will bring up the extension details page, where you can complete the extension details for your candidate including the new end date and any changes in pay.

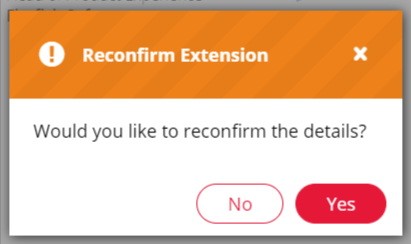
When you click Save you will be asked if you wish to Reconfirm the extension.
- Click Yes to create the extension and generate emails to the candidate, contact, HR and Accounts, which you can either send or skip.
- Click No to create the extension without emails.
Terminations
You can terminate a job at any time from the Placement tab on the job record. To do this click the cog to the right of the candidate's name then choose Terminate.

This will create a new Termination where you can edit the details before confirming. This includes the end date and the reason why the termination has taken place.

Termination reasons are customisable and can be edited by a Super User via Drop Down Settings.
You'll see that a rebate has been calculated automatically for you but can be edited if need be.
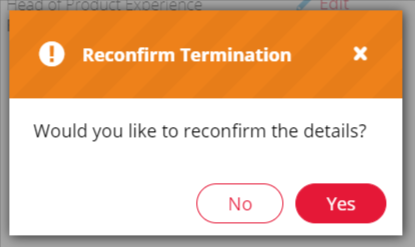
When you click Save you will be asked if you wish to Reconfirm the termination.
-
If you click Yes, emails will be generated to the relevant parties to let them know the termination has been processed.
-
If you click No, no emails will be generated.
Next, you'll be able to decide which of the following actions you'd like to take:
-
Update the candidates Permanent/Contract Status.
-
Log any termination notes against the candidate i.e. what the candidates situation is.
-
Update the candidates star rating.
-
Re-subscribe the candidate to email marketing.
-
Re-subscribe the candidate to job alerts.
-
Reopen the job (Permanent jobs only when there are no other open positions).


