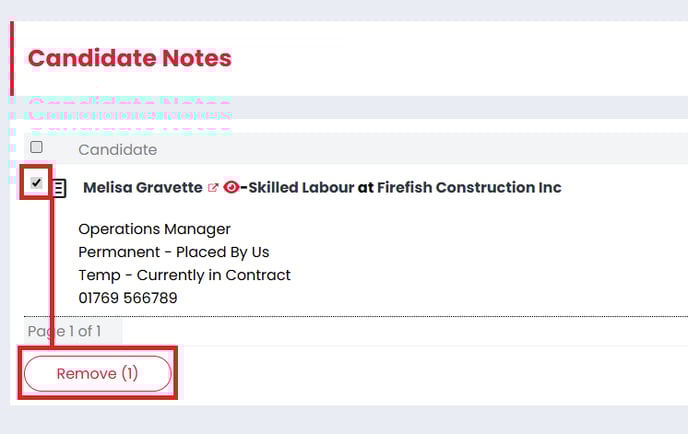
A step-by-step guide to all the actions you can take in the system following a placement.
This guide will walk you through each of the actions you can take within the system following the placement of a candidate from timesheets to bulk roll-ons and probationary reviews.
- Probationary Reviews
- Probationary Reviews
- AWR Reviews
- Managing Timesheets
- Rolling On a Contract
- Notes and Follow-Ups
New Start To-Do List
Firefish will set a New Start to-do list item within the Jobs heading.
This will list all of the new starts you have yet to action, you can perform two actions directly from the list - Check-In or Good Luck.
Check-In will allow you to create a note to confirm you've checked in with the candidate, you can also set a follow-up date and time if you need to.
Good Luck will generate an email to send to the candidate using the Good Luck template.
When you confirm either of these actions the to-do list item will be marked as complete and removed from your To-Do list.
Probationary Reviews
If the setting is enabled in Job Configuration > Permanent Workflow > Placements, you can customise the length of time a candidate will appear in the Probationary Review quick links section of the dashboard.
The default time period is 3 months, but this can be changed to a period of days, weeks, months or even years.

When you make a change to this setting, this will affect future permanent placements, not currently existing ones.

AWR Reviews
If the setting is enabled in Job Configuration > Contract Workflow > Placements, you can customise the length of time a candidate will appear in the AWR Review quick links section of the dashboard.
This will only apply to Candidates in contract placements where the pay type is PAYE, using the start and end date of the placement as the reference. It does not currently account for any paused, combined or restarted AWR clocks.

When you make a change to this setting, this will affect future contract placements, not currently existing ones.

Managing Timesheets
If you have enabled Time Capture, you can log timesheets for your temporary and contract candidates. The Time Capture column will show on the Placements tab:

In the Time Capture column you can easily see the current status of the timesheets for each candidate placed against the contract job. The Time Capture statuses are:
- Completed – All time entries are complete.
- Incomplete - The current weeks time entry is not competed.
- Overdue – The time entry has not been completed for a previous week.
- Submitted - The time entry has been submitted to Tempaid via the Tempaid Integration.
Clicking on the Time Capture status icon will open a side panel allowing you to update the Hours/Days that a candidate has worked for the week, and upload any relevant documents to the timesheet.
The coloured dot in the top left hand corner of the timesheet indicates if the timesheet for the week being viewed is overdue (red), incomplete (orange) or complete (green).

You can adjust the week that you are viewing by using the forwards and backwards arrows in the top left hand corner of the timesheet.
You can set the Rate Type in the Rate Type Column, and adjust the hours worked in the Unit Column. For example, if a candidate worked only 6 hours rather than the planned 8 hours, you can amend the unit field to reflect this:

You’re able to add the details of any additional rates that have been worked by selecting +Add Rate. For example, you may wish to log an overtime or holiday rate. This will add an additional row to the day where you can update the details of the additional rate. If there are multiple rates available, the correct one can be selected from the dropdown:

Once you have made the required amendments to the timesheet you can either save your changes or complete the changes:
- The Save All button saves changes across multiple timesheets
- The Save button saves changes to the timesheet you are currently viewing
- The Complete button completes the timesheet you are currently viewing, making the fields read-only and changing the status to 'Complete'
When a timesheet has been completed, edits can still be made by selecting the blue pencil icon.

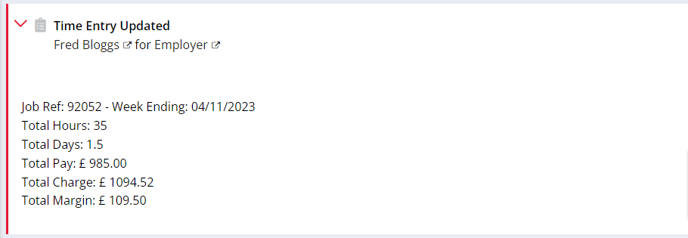
Anytime an edit to a time capture is completed, the following action is added to the Company, Job and Candidate record in their relevant Recent Activity sections:
Rolling On a Contract
Once you have made a Contract Placement, Firefish gives you the option to Roll On that contract by changing the End Date. This can be done for individual contracts or for multiple contracts in bulk. This is particularly useful if you have a high volume of contractors who have their contract updated week-by-week.
To roll on a contract you'll need to navigate to your Contracts Ending to do list, which can be found in the Jobs section on your Dashboard (If you've chosen to call your workflow Temp then this may appear as Temps Ending).

You can extend contracts on an individual basis by selecting the Extend button to the right of each candidate. You're able to choose the Thank You button which will allow you to send a thank you email to the candidate.
If you need to extend contracts in bulk, select the contract(s) that you would like to roll on by ticking the checkbox on the left-hand side then selecting the Roll On button at the bottom of the page.

Clicking Roll On opens a new pop-up where you can select your new contract(s) End Date. You must select a new date that falls after the very last end date of any of the contracts you are rolling on. This new End Date will be applied to all contracts you have selected
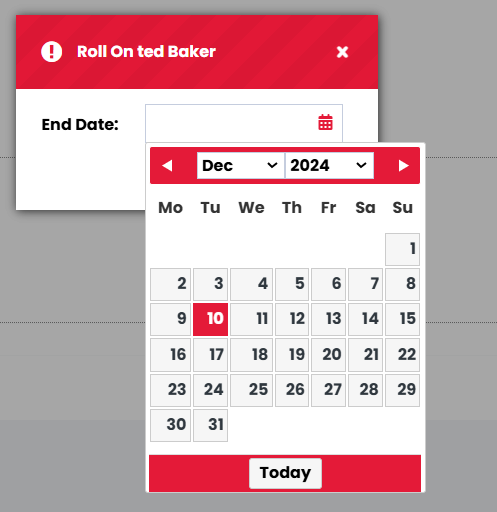
Once you are happy with the new End Date, click Confirm. Your selected contract(s) will now be updated with the new end date and will no longer be listed on the Contracts Ending to do list in the Jobs section on your Dashboard.
Your Sales Figures will automatically be updated to reflect your changes and each candidate will display a new action in their recent activity titled Roll On - Contract. This action displays the new End Date as well as linking to the Job, Contact and Company.
Notes and Follow-Ups
