Save time by selecting dashboard cards or whole dashboards from the Report Library
Use the Report Library to instantly add pre-built Dashboards and Report Cards to your workspace. This helps you get up and running quickly with reports tailored to key areas of your recruitment business - without building each card manually
Accessing the Report Library
To access the Report Library:
-
Go to Analyse from the top navigation bar and Select Reports Dashboard
-
Click into any existing dashboard, or create a new one.
-
Select Add > Library in the top right.

This opens up a side panel for the Report Library.

Here you can browse the pre-made Report Cards and Dashboards, grouped by the kind of information they show e.g. Marketing or Jobs Overview.
Adding a Dashboard from the Report Library
In the Report Library side panel, you can add an entire dashboard by clicking the Add button next to the dashboard name.
This will create a new dashboard containing all the cards in the list.

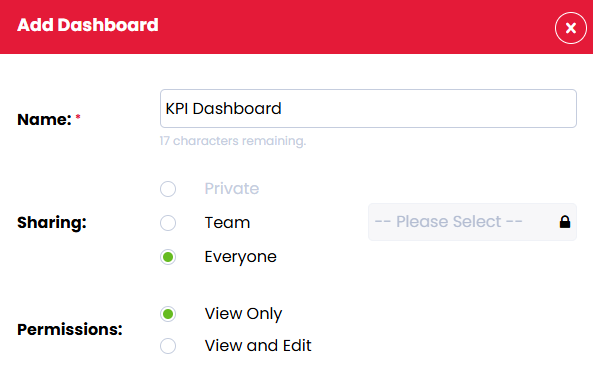
This takes you to the Add Dashboard side panel, where you can rename the dashboard and choose the sharing and privacy permissions.

When you click Save, you are taken to this new dashboard. You can then make any changes you wish.
Adding a Report Card from the Report Library
Selecting any of the Report Cards will show a preview using your own data.
The time period shown for this preview is set to This Year (Quarterly) to allow you to preview the card with a larger amount of data showing.

Once you have selected a Report Card that you'd like to add to your Dashboard, click the Next button at the bottom right of the side panel.
This takes you to a screen where you can make any changes to the Report Card, with the same options available as when you add a card from scratch.

If you decide that this is not the card you want to use, you can click the Back button, which will take you back the Report Library where you can select a new card.
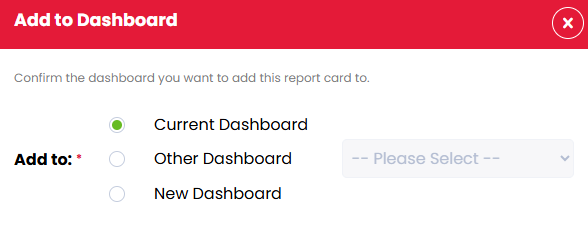
Clicking Next takes you to the final stage of the process, where you choose which Dashboard you want to add this card to.

Once you have made the changes you want, click Save to add the card to your Dashboard. When you save the card, it will be using the date range that you have set up on your dashboard.

If needed, you can then edit the card from your Dashboard in the usual way, by clicking the three dots in the top right corner of the card.
Want to create a Report Card from scratch? Check out how to here!