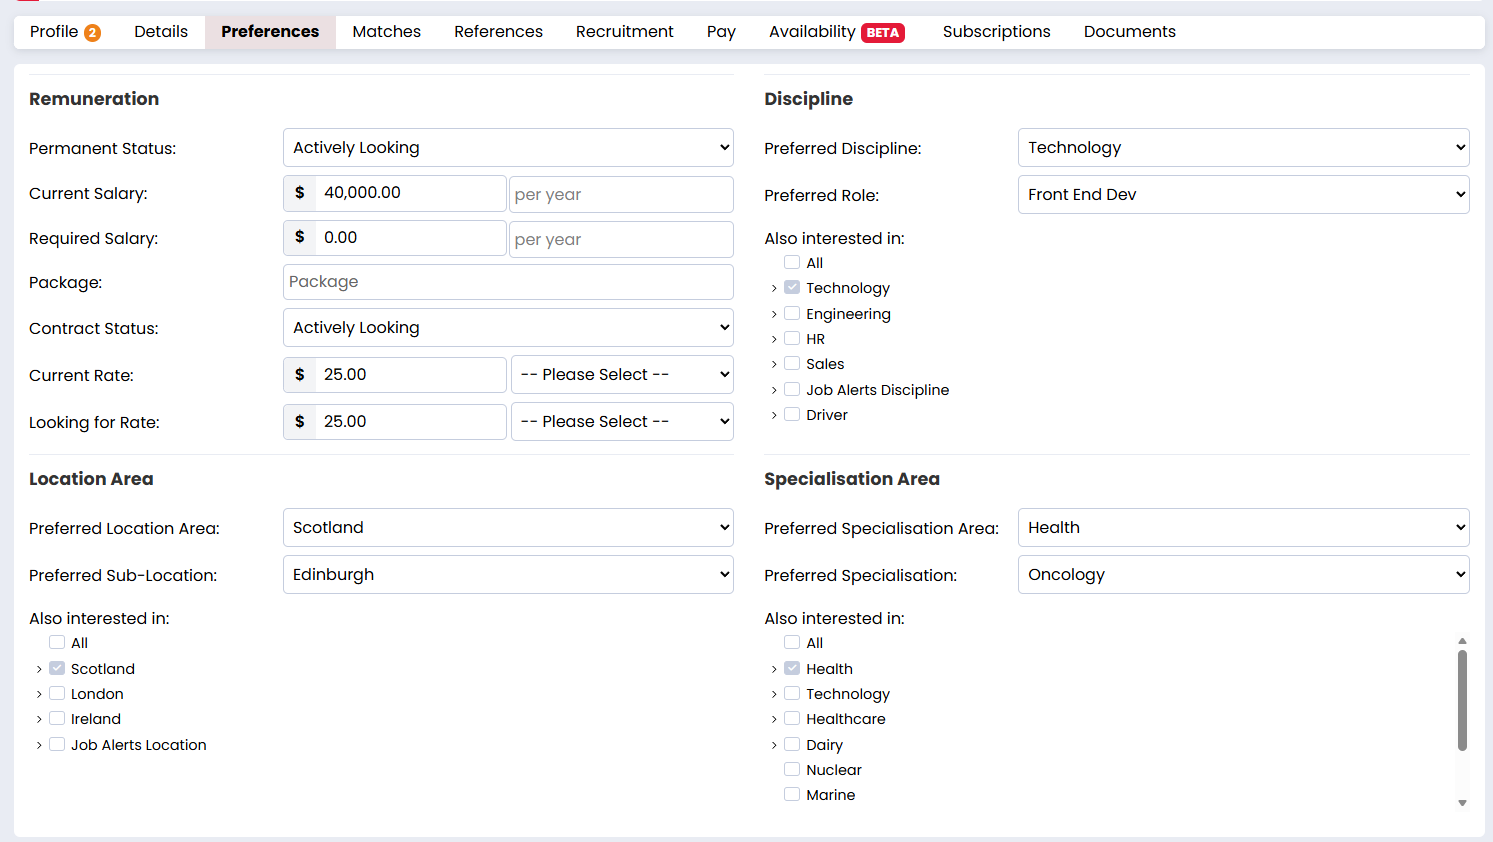
Capturing candidate preferences within Firefish allows recruiters to better align opportunities with what the candidate is looking for. It also helps personalise communications and ensures that job alerts or suggestions are relevant to each individual.
What Are Preferences?
Preferences allow you to code candidates based on their desired:
- Discipline and role
- Location and sub-location
- Specialisation and sub-specialisation
- Permanent job status
- Temp or contract job status
- Current salary
- Desired salary
Ensuring you code your candidates correctly allows you to get the most out of your data.
When candidate's are properly coded they can be matched to contacts and jobs, and they will be automatically sent job alerts when you create new adverts (Professional and Enterprise only).
Having candidates preferences set up also means that searching, building useful talent pools, bulk emailing, and reporting will be a much more worthwhile and easier process.
You can also mark specific preferences as required for profile completeness, to ensure that any important information is called out when missing.
Learn more about why preferences matter here.
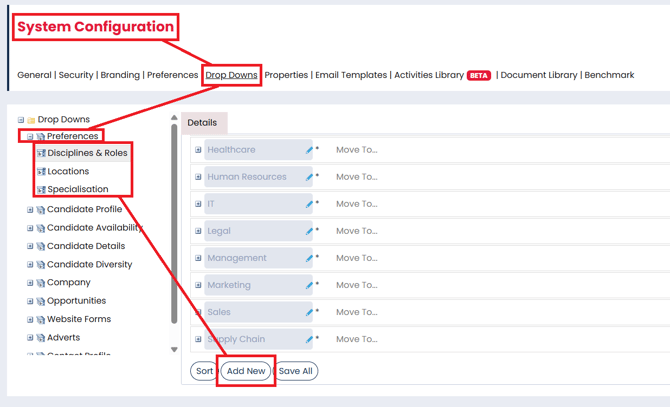
How to Create New Preferences
Super Users can create new disciplines/role, locations/sub-locations and specialisations/sub-specialisations by taking the following steps:
- Go to the setting cog.
- Select System Configuration.
- Open the Drop Downs tab.
- Select Preferences on the left hand side.
- Click into the section you wish to add a preference to.
- Select Add New at the bottom.
- Type out the name of the new preference.
- Save All.
You may wish to add a new sub-preference. If so you can:
- Go to the setting cog.
- Select System Configuration.
- Open the Drop Downs tab.
- Select Preferences on the left hand side.
- Locate the main preference that the sub-preference will sit under.
- Select the + button to the left of the preference.
- Select Add New.
- Type out the name of the new sub-preference.
- Save All.

Learn more about amending preferences here.