- Engagement Indicators
- Star Ratings
- Hotness
- Profile Completeness
- Tasks
- Notes
- Call & Message
- Meeting
- Recruiter Summary
- Top Skills
- Personal Details
- Languages
- Employment History
- Education
- Candidate Summary
- Professional Memberships
- Certifications
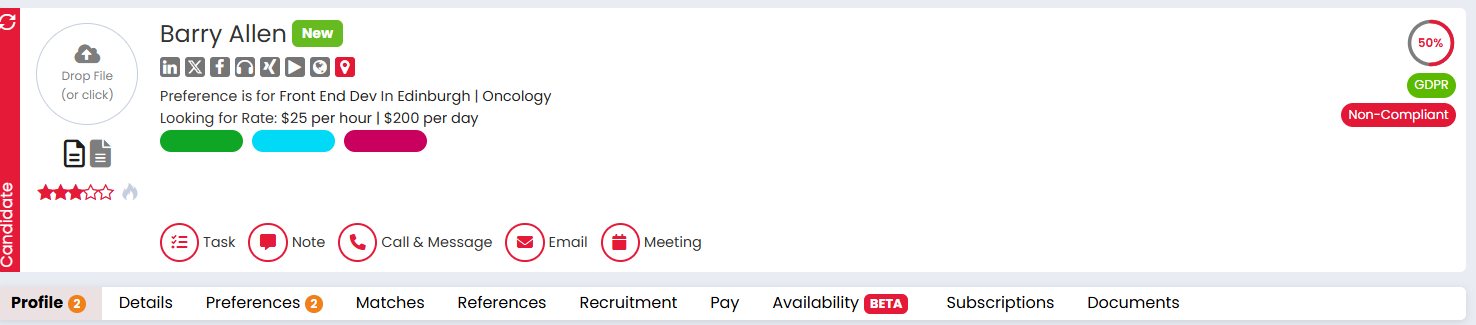
The Candidate Header
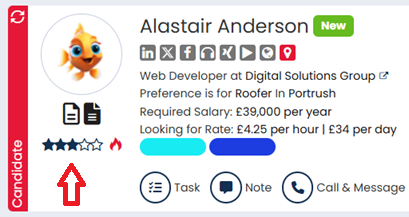
The candidate header is the top section on a candidate record. It allows you to see, at a glance, the candidate's engagement indicators, star rating, hotness, required salary, current job title and employer, and their preferred discipline and location. You can also upload a picture of the candidate, which you'll be able to see wherever the candidate shows throughout the system.
Via the candidate header you can also perform certain actions such as merging records, considering the candidate to the jobs, scheduling meeting, leaving notes, and much more. You can learn about all of these features below.
Engagement Indicators
Engagement Indicators are customised colour coded lozenges which allow you and your colleagues to see at a glance if you candidates have been recently engaged, or how far they have been in recruitment workflows.

You can customise up to 10 unique categories:
- Go to Settings
- Select People Configuration
- Open the Engagement Indicators tab to help you track what's most important to you.
- For guidance on building new Indicators, see here.
Star Ratings
With star ratings you can rank your candidates from 1 to 5 to indicate to the rest of your team how good a match the candidate is likely to be to your roles. It means that those ranked low can be quickly dismissed, or to indicate that those ranked highly are likely to be a good fit. This will remain on the candidates until a user changes it.
To amend a candidates star rating you can click the stars in the candidate header, under their profile picture. This allows you to rate a candidate from 1 to 5 stars.
The stars will be coloured in to show the relevant rating that has been given.
A candidate's star rating will not only display on the candidates record - it will also display in the search results, candidate record preview and on the job workflow.
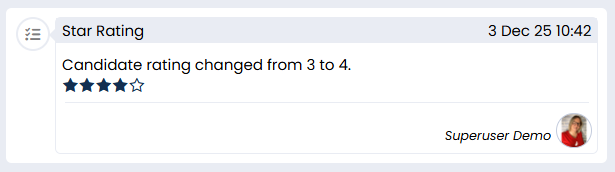
Amending the star rating on a candidate record will also record an action in the Recent Activity, so we can see if or when a candidates star rating has been changed.
By default, candidate star ratings are set to 3 stars. If you would like to change your default star rating, you can reach out to the Support team.
You can learn about searching for a candidate based on their star rating here.
Hotness
The hot flame allows you to mark a candidate as particularly stand out. This is a a temporary way to highlight that a candidate is one to be watched. Typically, you'd be wanting to work closely with these candidates to get them placed quickly. Hot candidates are those who are ready for placement or are highly engaged so should be on your team's radar.
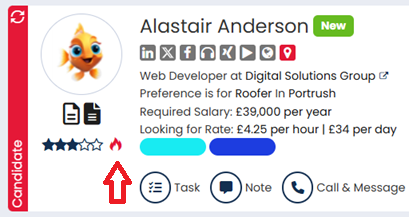
To add hot status to a candidate, you can click the flame in the banner of the candidate's record, underneath their profile picture.
The grey flame will now turn red, indicating a hot status.
A candidate's hot status will not only display on the candidates record - it will also display in search results, candidate record preview and on the job workflow.
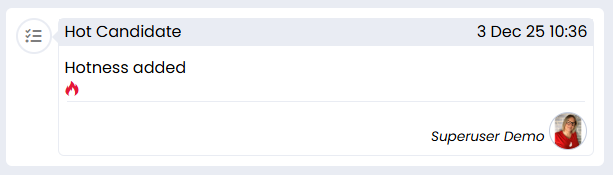
Adding hot status to a candidate record will also record an action in their Recent Activity, so we can see if candidates have previously been considered hot, who added/removed the status and when.
Superusers can configure the length of time a candidate stays hot for:
- Go to settings
- Select People Configuration
- In the Hot Candidate field you can configure the hotness length based on the desired amount of days, weeks, months or years.

You can learn about searching for a candidate's marked as hot here.
Profile Completeness Score
A candidate's Profile Completeness Score provides an overview of how complete the candidate's record is, based on the number of fields set as required vs the number of fields that are completed. This shows as a percentage score in the right-hand corner of the Candidate Header, and any fields missing will be highlighted in Orange.
Required fields can be configured in areas such as:
- Settings > People Configuration > Profile Settings
- Settings > People Configuration > Candidate Settings
- Settings > People Configuration > Compliance Details
- Settings > System Configuration > Preferences
- Settings > System Configuration > Properties
To set a field as required:
- Go to the relevant settings area.
- Find the field or section you want to include.
- Tick Required.
- Save your changes.
If you mark a full section as required, fields within that section may also be treated as required for completeness.
You can learn more about the Profile Completeness Score here.
The Profile Tab
The Profile tab holds each candidate's contact details, social media links and availability. You can also keep a log of their top skills, any languages they speak, their education and certifications, and their employment history. You can also log both a recruiter summary and a candidate summary.
Our AI CV Parsing Tool will update all of this for you when you upload a new CV to the candidate's record, and you're able to amend and add more information as needed.
Recruiter Summary
The Recruiter Summary sits at the top of the Profile tab. It is designed to give users a quick, high-level overview of a candidate’s profile. It’s particularly useful for summarising the candidate's experience, skills, and suitability without needing to review the full CV.
The Recruiter Summary is not visible to candidates on the portal.
If you press Suggest, an AI summary based on the candidate's CV will be generated.

Top Skills
Top Skills in Firefish are skills parsed from a candidate’s CV, based on job titles and demonstrable experience in their employment history. The system uses CV parsing logic to evaluate what skills are relevant to the candidate’s roles, finds examples in their work history, and matches these against the master skills list in system properties.
- Grey skills in the record indicate those that have been both demonstrated and matched against the configured Top Skills list.
- White skills are inferred based solely on job titles. Even if a skill appears multiple times (e.g., from duplicate CV uploads), each instance is linked to a unique justification. You can hover over each skill to view this reasoning.

You can learn more about how to manage the skills list that the parser uses here.
Personal Details
In the Personal Details section you can log standard details such as name, address, email address, contact phone numbers, most recent job title, etc. You can log the candidate's availability, their original source and if they have their own transport. You will also be able to see their marketing preferences here.

Languages
In the Languages section you can log any languages that the candidate can speak, and you can also rank their proficiency.

Adding Languages
If you need to add a new language, select the blue edit pencil on the right hand side and start typing the language title. If it already exists, you'll be able to select it from the drop down, and if it doesn't exist on your system already, you can click the green plus button when you're finished typing.

Employment History
In the Employment History section, you can keep a log of the candidate's previous work experience. If you upload a CV to the candidate's record then our parsing tool will do most of the heavy listing for you.

Linked and Unlinked Companies
You may notice that some companies are in a grey box, and others are not in a box and have a link icon. Here is what this means:
- Grey box - The company exists on your system. If you click here you will be able to open the company record.
- Link icon - The company does not exist on your system, but if you click the link icon, you will be able to create a record for them without leaving the page.
Adding a New Employment Record
If you want to add any additional employment history then:
- Press the Add button next to the Employment header.
- Enter the name of the company
- If the company already exists on your system then you will be able to select the company from the drop down as you type the name out.
- If the company doesn't already exist then you can select Add to create a record, or you can click away from the box and move on if you do not wish to create a new company.
- Add the job title.
- Add in the start and end dates for the job, or click Present for the end date if the candidate still works there.
- If you wish, you can also add a brief summary of the role and also log any skills that the candidate acquired whilst in that position.
- Click Save when you've added all the information you need to.

Education
In the Education section you can track where and when a candidate went to school/university, and which qualifications they earned there.

Adding a New Record of Education
If you wish to add a new education record then you can:
- Select the Add button next to the Education header.
- Search for the Establishment.
- If the establishment does not already exist, you can add it by pressing the + button at the bottom.
- Add the Qualification and Course.
- Add the start and end dates. If the candidate is still studying, select Present instead of entering an end date.
- If you wish, you can also add additional information into the comment box, with a note of any relevant activities, clubs or societies that the candidate was part of whilst they were studying.
Candidate Summary
The Candidate Summary allows you to create a summary of the candidate that is visible to them via the Candidate Portal. They are also able to update this themselves, allowing the candidate to provide a brief cover letter.

Professional Memberships
A Professional Membership is a formal affiliation with a recognised industry body, association, or regulatory organisation relevant to a person’s career or profession. It often signifies that the individual meets certain standards of qualification, ethics, or ongoing development required by that body.
In Firefish, Professional Memberships can be recorded on candidate records to highlight industry accreditations or affiliations such as nursing councils, chartered institutes, or trade-specific organisations, helping recruiters assess credibility and compliance for specific roles.

To add a new Professional Membership, simply press the Add button next to the header and add the Professional Body and the candidate's Membership Number.
Certifications
A Certification is an official credential that confirms an individual has completed specific training or met defined standards in a particular skill or area of expertise. Certifications are often issued by educational bodies, professional organisations, or regulatory agencies and may be required for legal compliance or to demonstrate competency.
In Firefish, certifications can be logged on candidate records to track qualifications relevant to job role such as health and safety training, IT system proficiency, or other industry-specific credentials.

Adding a New Certification
To add a new Certification, you will first of all need to ensure that the Certification you're looking to add has already been added to the system. Learn how to manage Certifications in Properties here.
Once you're ready to add the Certification:
- Select the Add button next to the Certification header.
- Start searching for the Certification. As you start typing, any matching Certifications will show in a drop down list for you to select from.

- You can then select the date that the Certification was awarded, and when it will expire.
- Add any additional notes, if you wish.
- Upload a copy of the Certification.
- Save.